TL;DR – it is really self-hosted LiveSync, it is working but its setup is not super obvious (while not super hard as well)
Problem statement
Ok, let’s start with the problem statement. There is a super brilliant Obsidian app which is super flexible and convenient for note management but is a bit tricky when it comes to the sync. The thing is that Obsidian works perfectly with iCloud in Apple perimeter, and things are much worse when you set it up on Windows.
So the problem statement – there is (were) no way to have free sync for Obsidian vaults between iOS devices and Windows.
In Windows there is iCloud client, but it works so bad and slowly that the overall performance and responsiveness of the Obsidian is super bad.
Yes, there is paid option of Obsidian Sync which I believe works absolutely perfect in each and every platform however I am greedy as hell and just dont want to pay for it.
So right when I’ve heard about the Self-Hosted LiveSync plugin, I’ve decided to give it a shot.
Here is the link to the Self-hosted LiveSync Github page.
Prerequisites
- DDNS is set up and NAS is available from outside network
- NAS supports Docker
DB set up on Synology
This part would be specific for Synology and is based on this manual and this thread. I’ve set up my own NAS on DSM 7.1.1-42962 Update 4, but don’t think that it really matters a lot until your DSM lets you to run Docker containers and set up reversed proxy.
Create a user for CouchDB
Go to your web interface of your NAS and open Control Panel and Users and Groups tab.
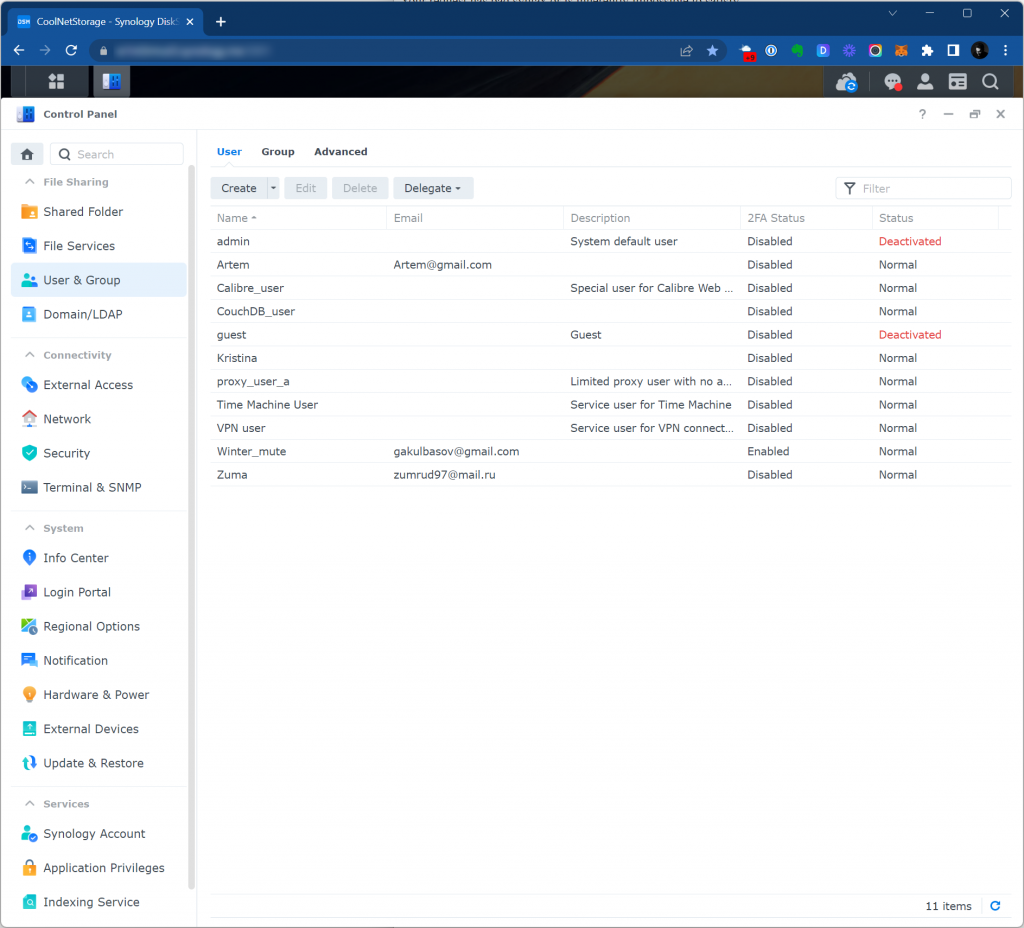
Just create a new user which you would use to access DB – I’ve created a user called CouchDB_user.
Add him to users group.
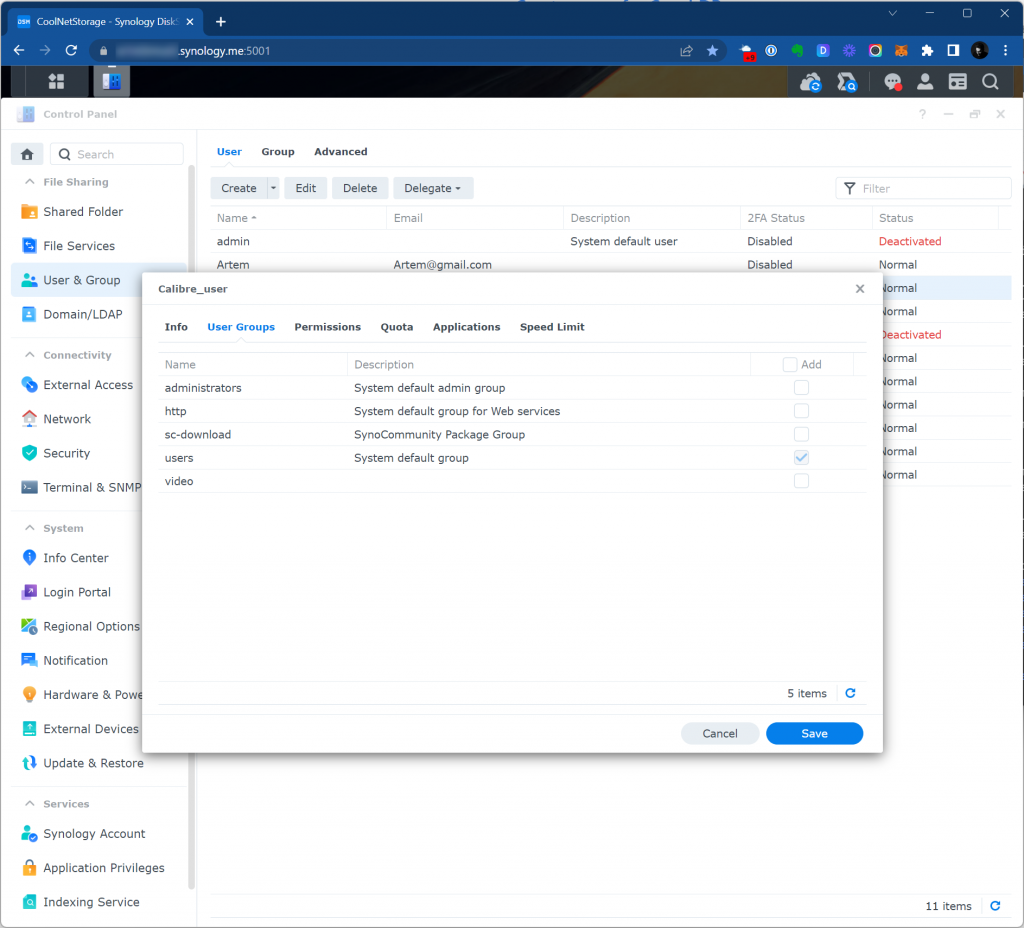
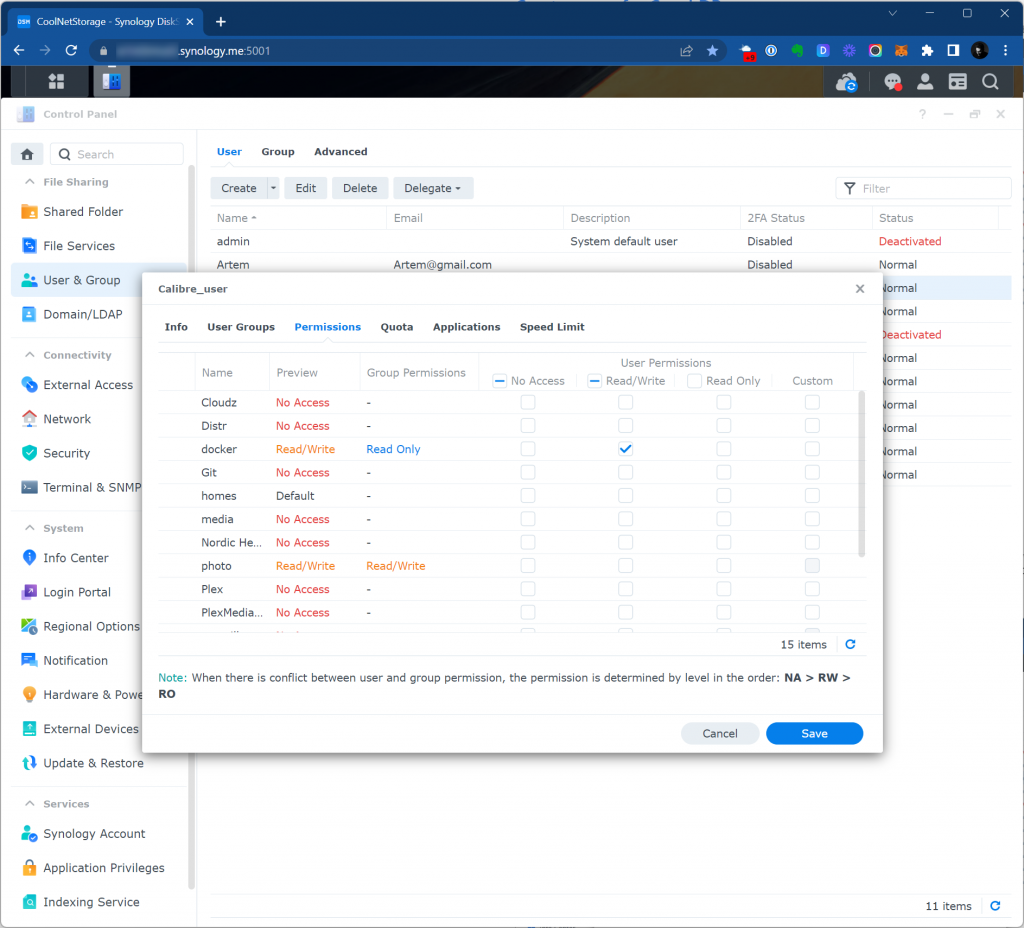
It doesn’t need a lot of privileges, so I’ve only let him to access Docker folder.
Place the local.ini configuration
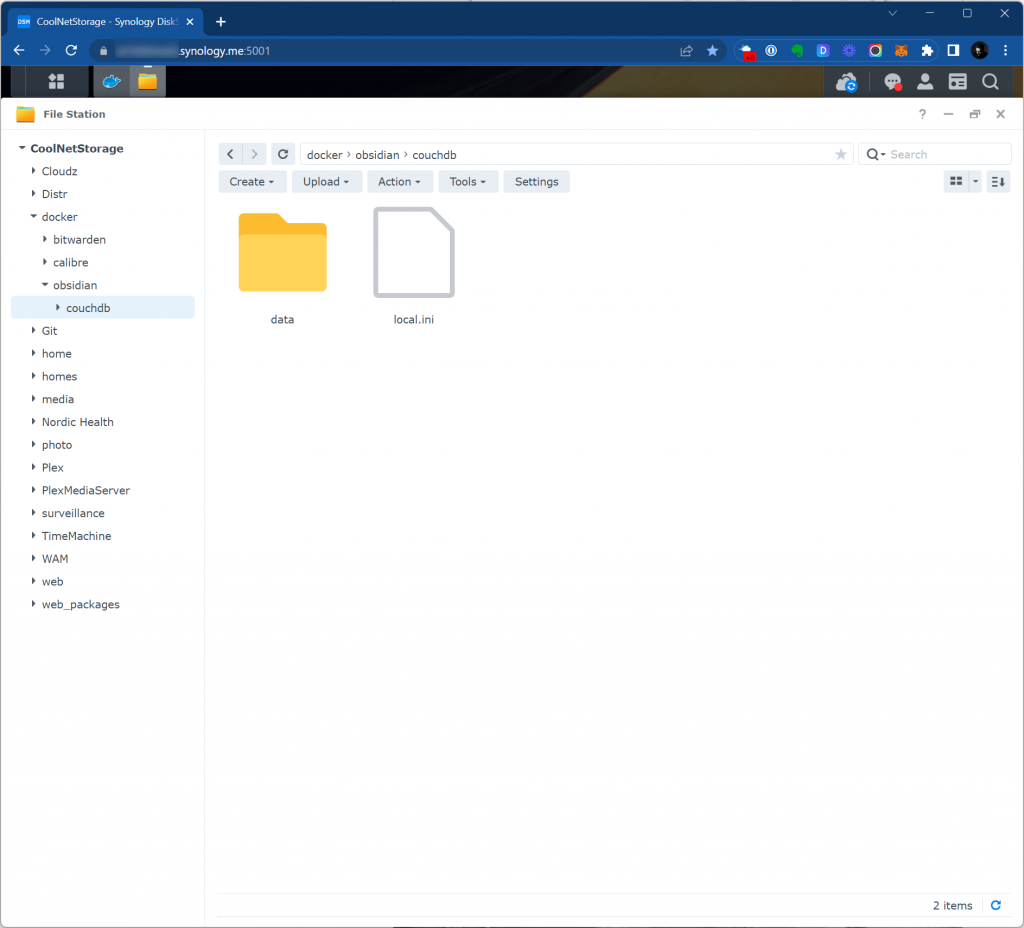
We would need to have a proper configuration of our DB and the easiest way to handle it is to place local.ini file in NAS filesystem and then use it in container.
The ini file itself is available here – you just need to copy the content and create a file in text editor on your computer and upload it to NAS.
Launch File Station app and place it somethere in your filesystem. In QuickStart Guide it was proposed to put it in /docker/obsidian/couchdb – I just followed this suggestion.
Download a docker image of CouchDB
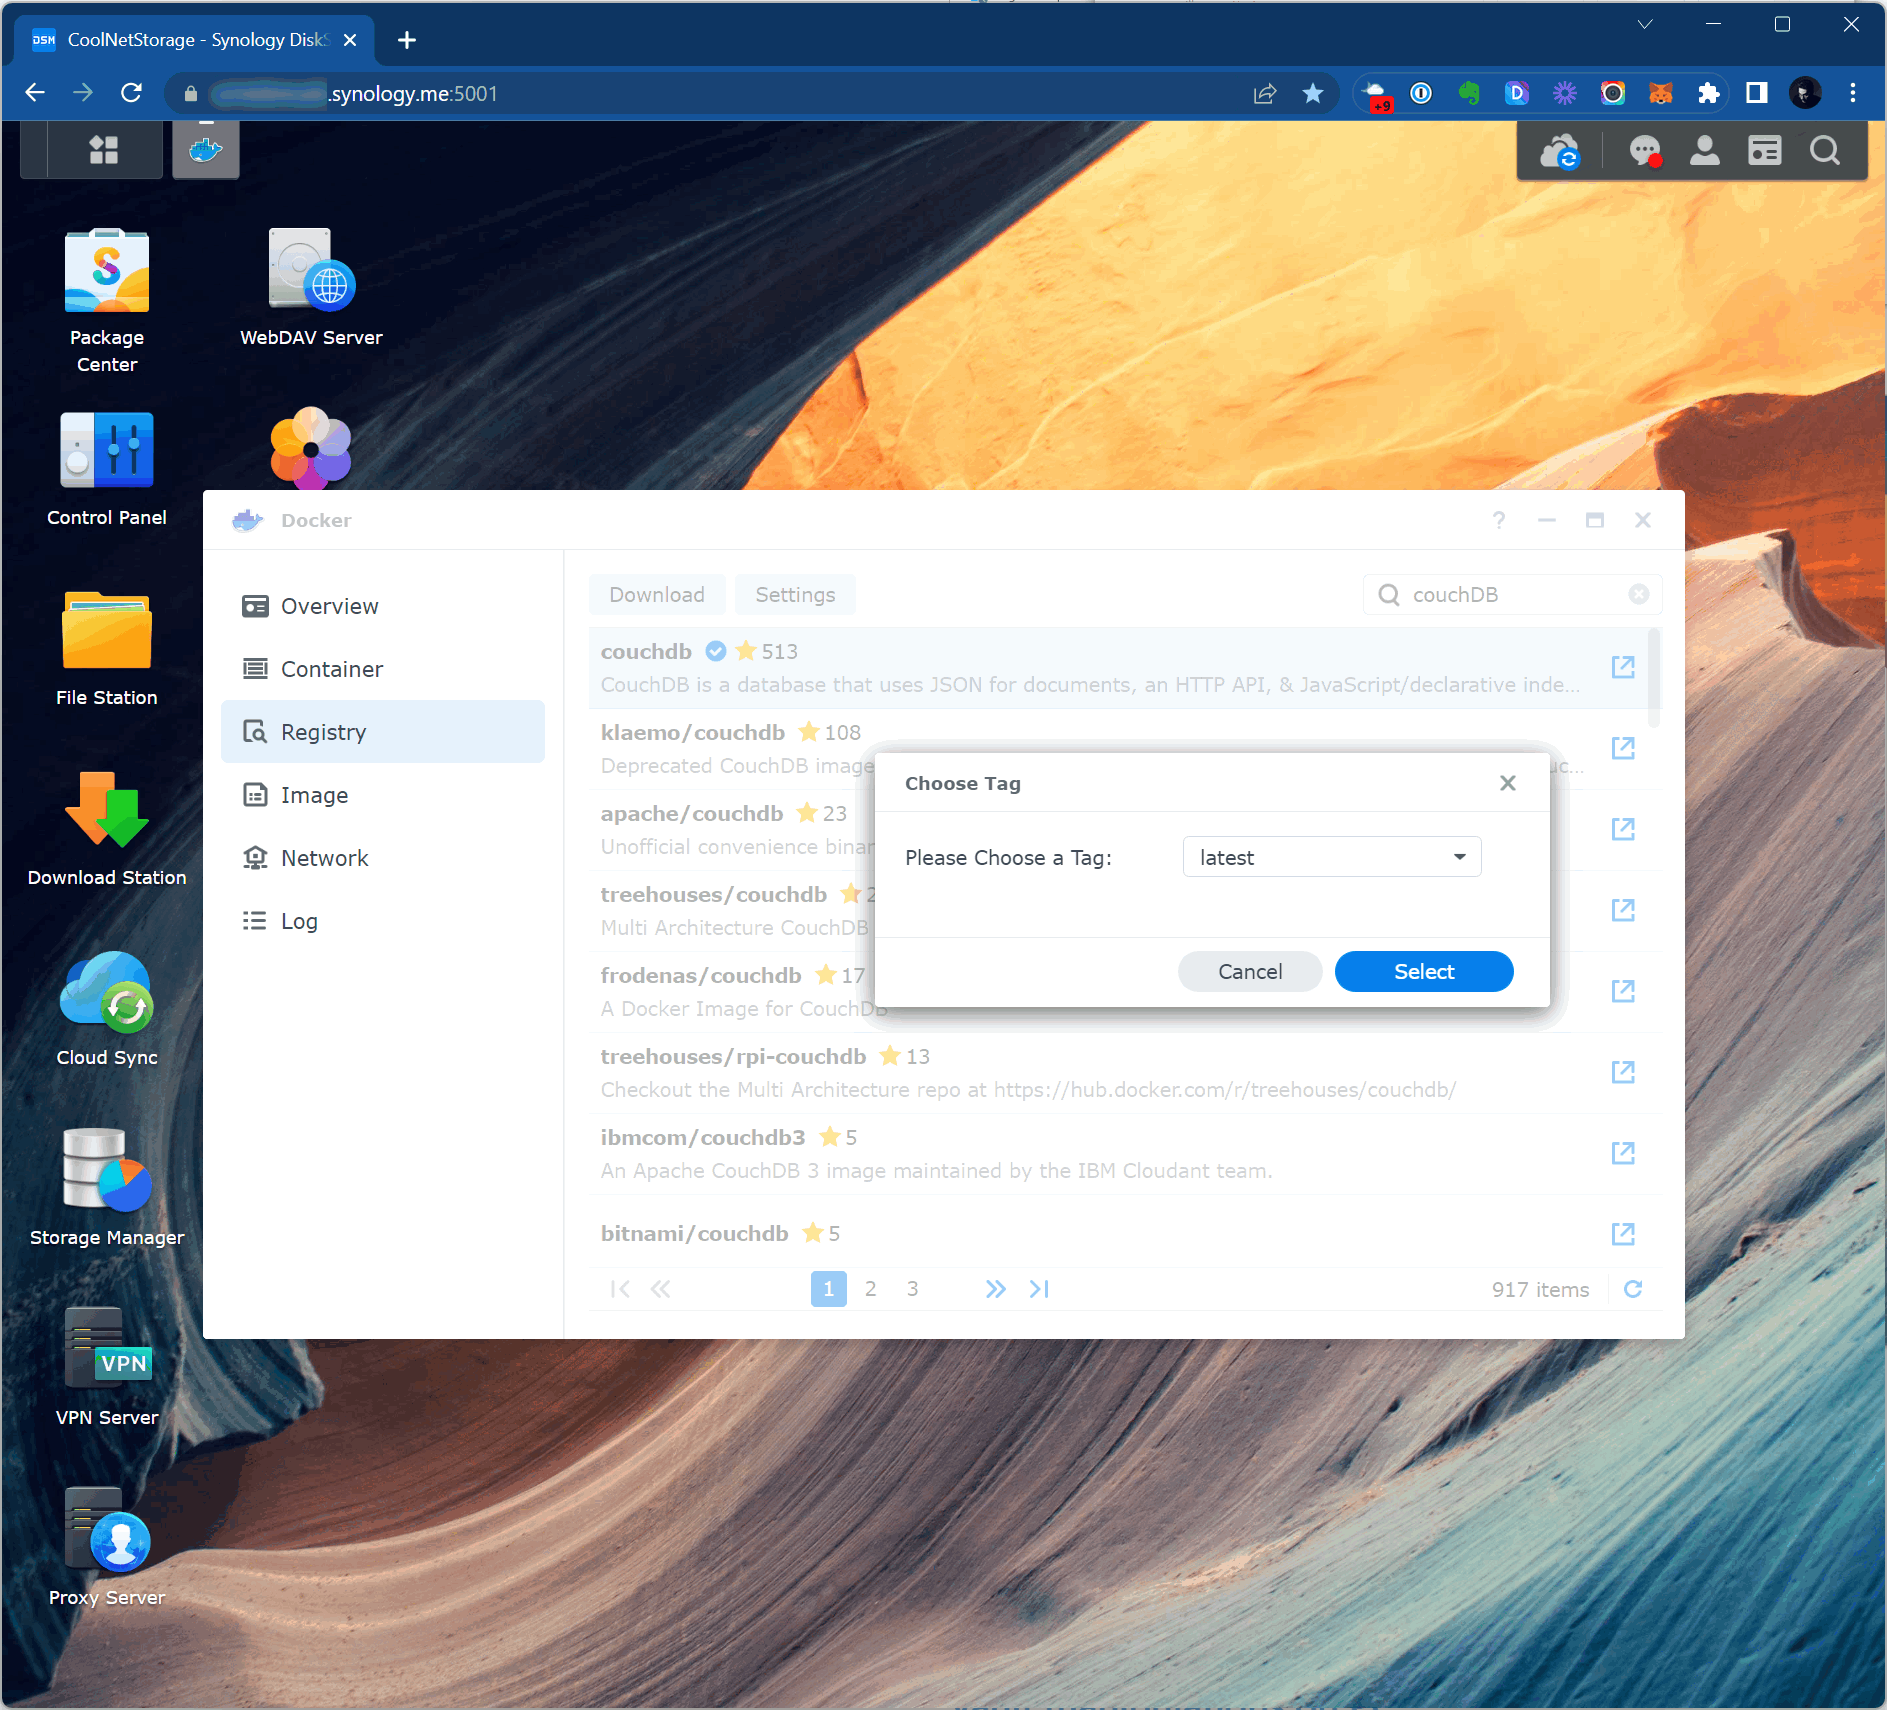
Launch Docker app and go to Registry tab.
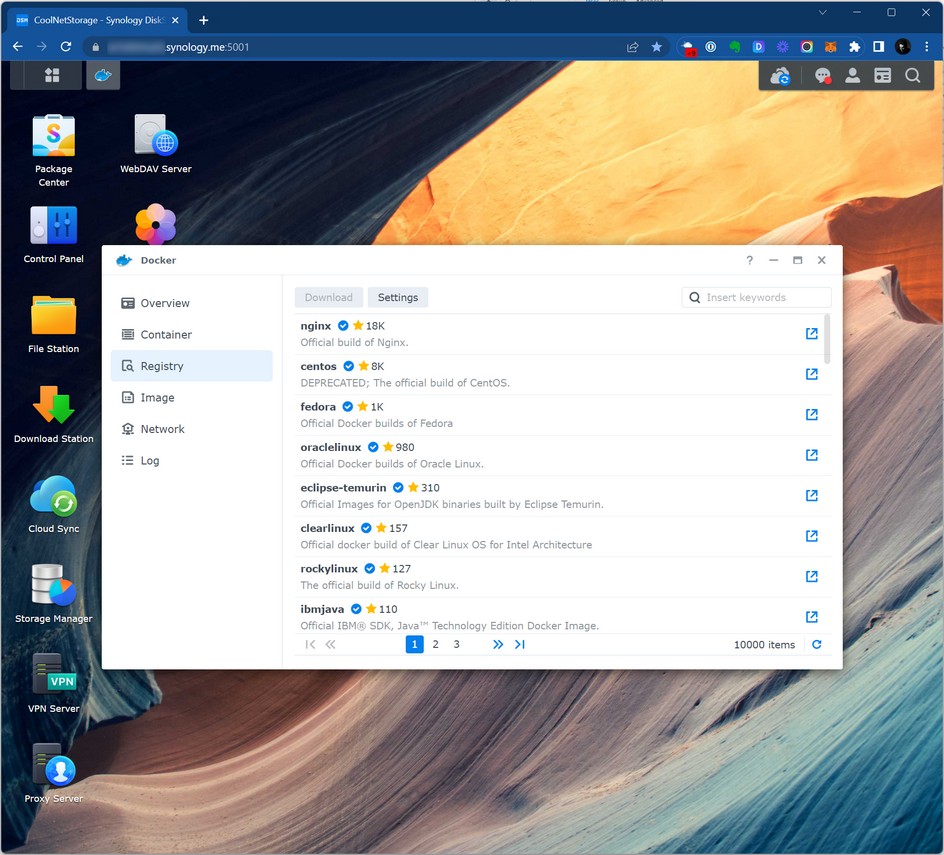
Search for CouchDB and download latest tag image. If you are as stupid as me – download means you should click on the image name in the list and then click Download button. No, I am not joking, and yes, Synology probably should consider to polish the UI.
Create and run docker container
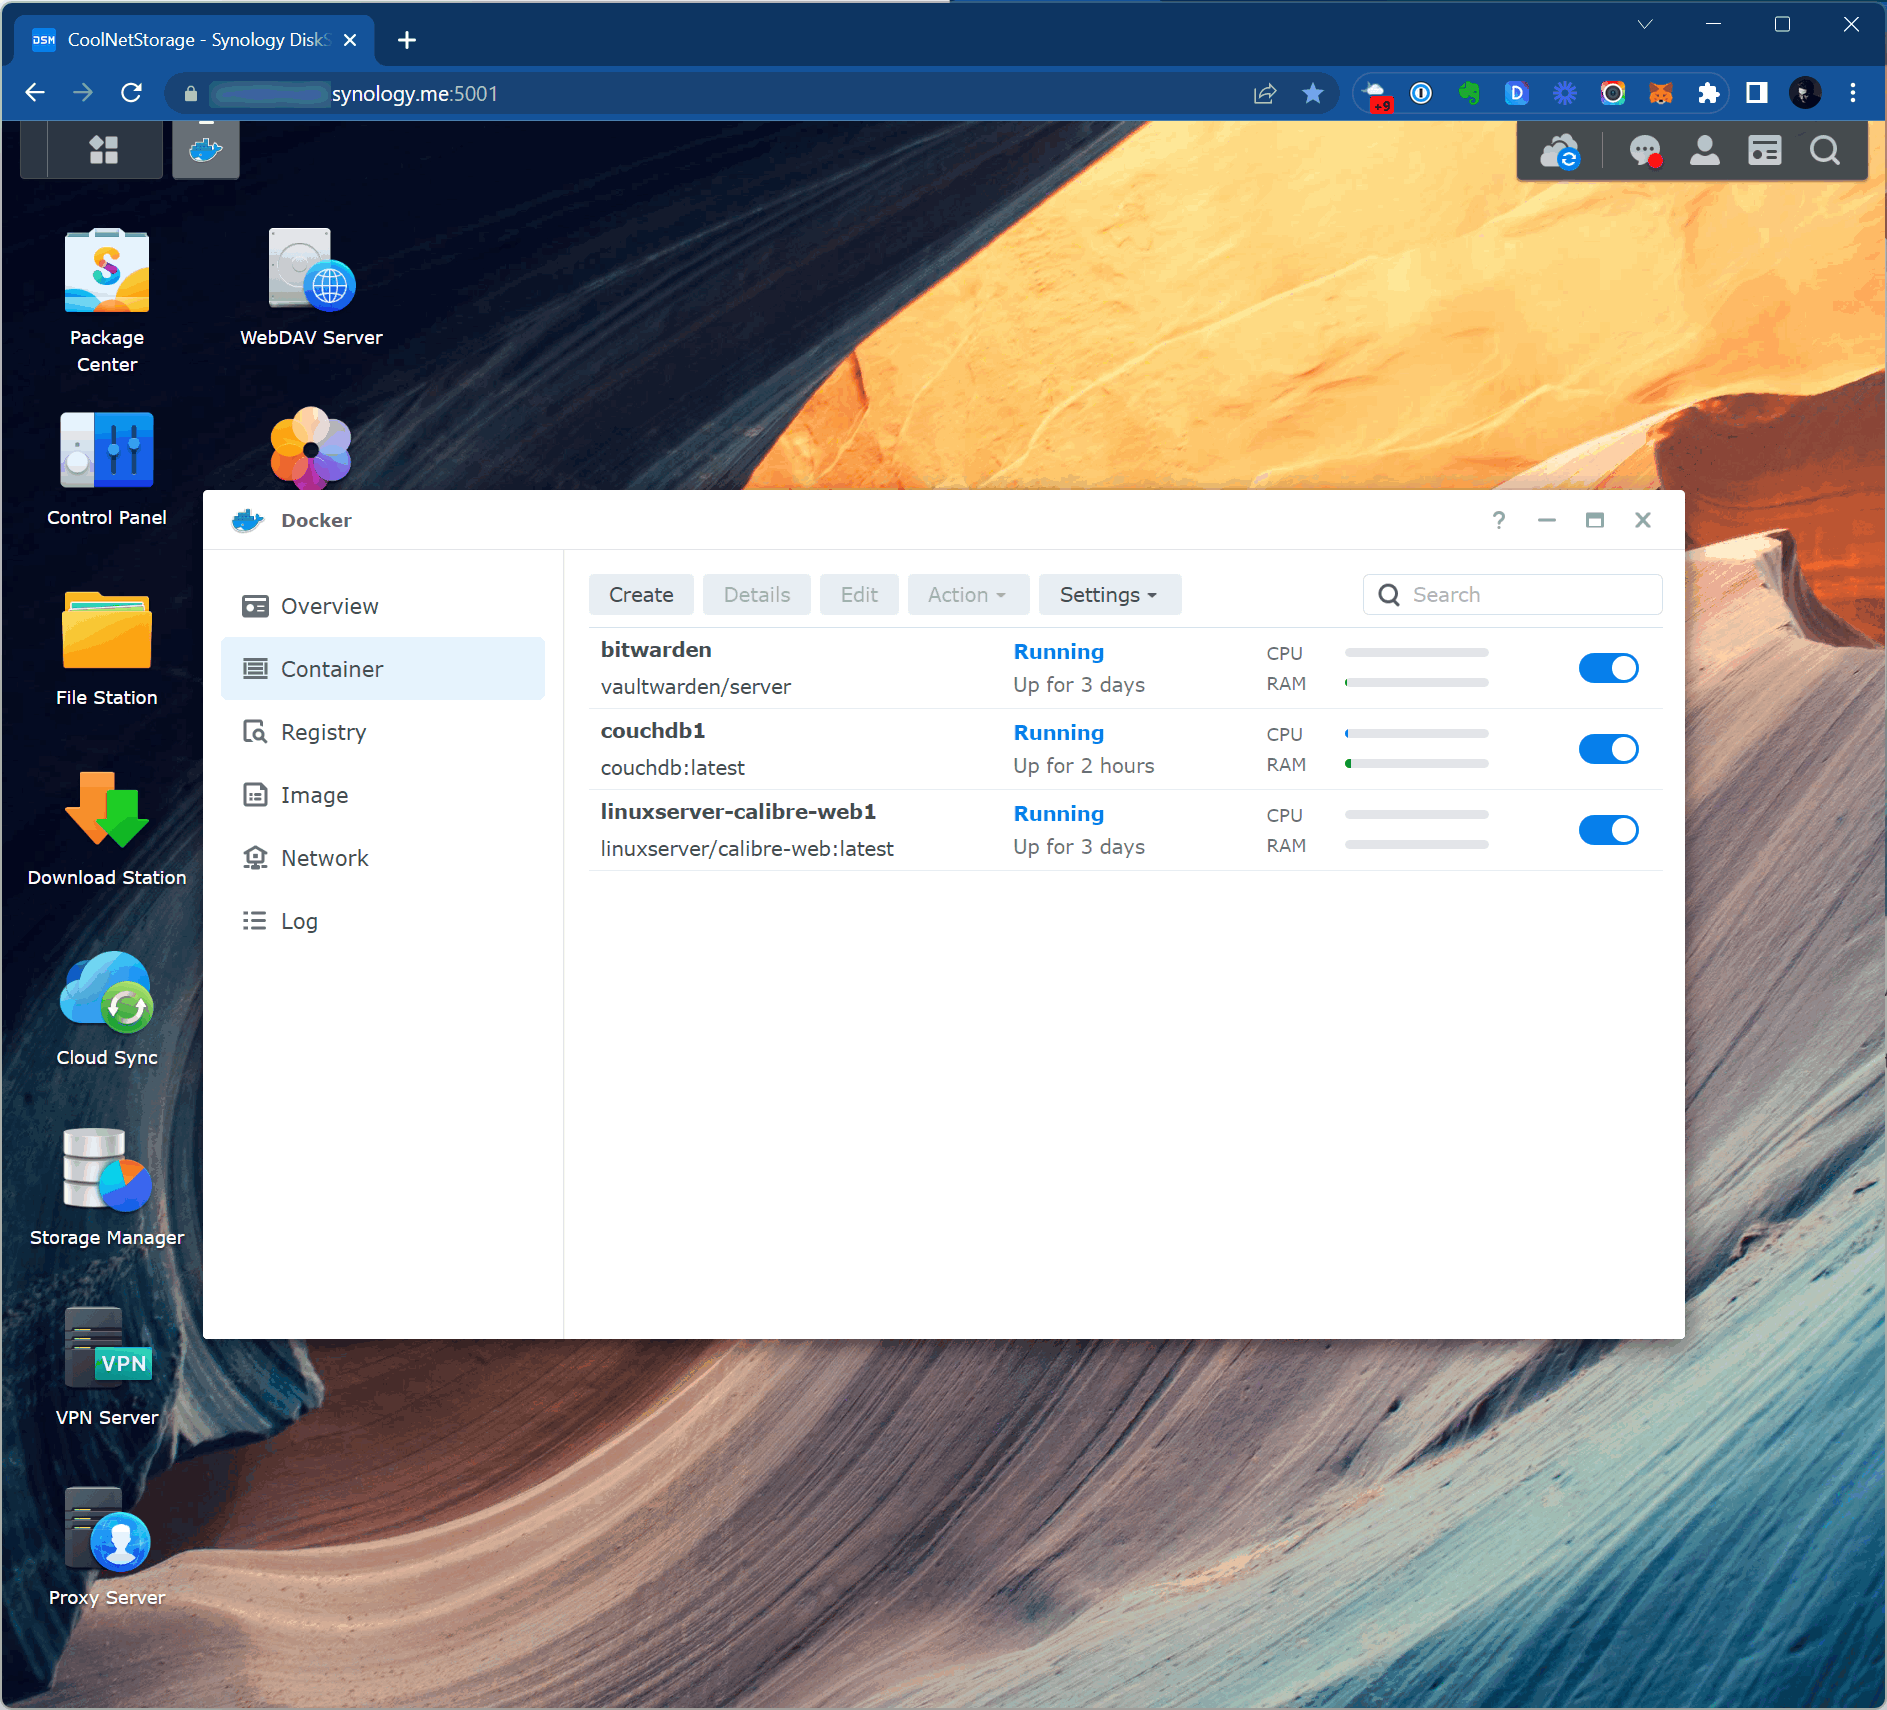
Ok, we have the image and now can set up a container. Still in Docker app we need to switch to Container tab and click the Create button
At the screenshot below I’ve already have one container running, and I would set up another one in parallel.
We already have the image downloaded at the step before, so just choose it and hit next.
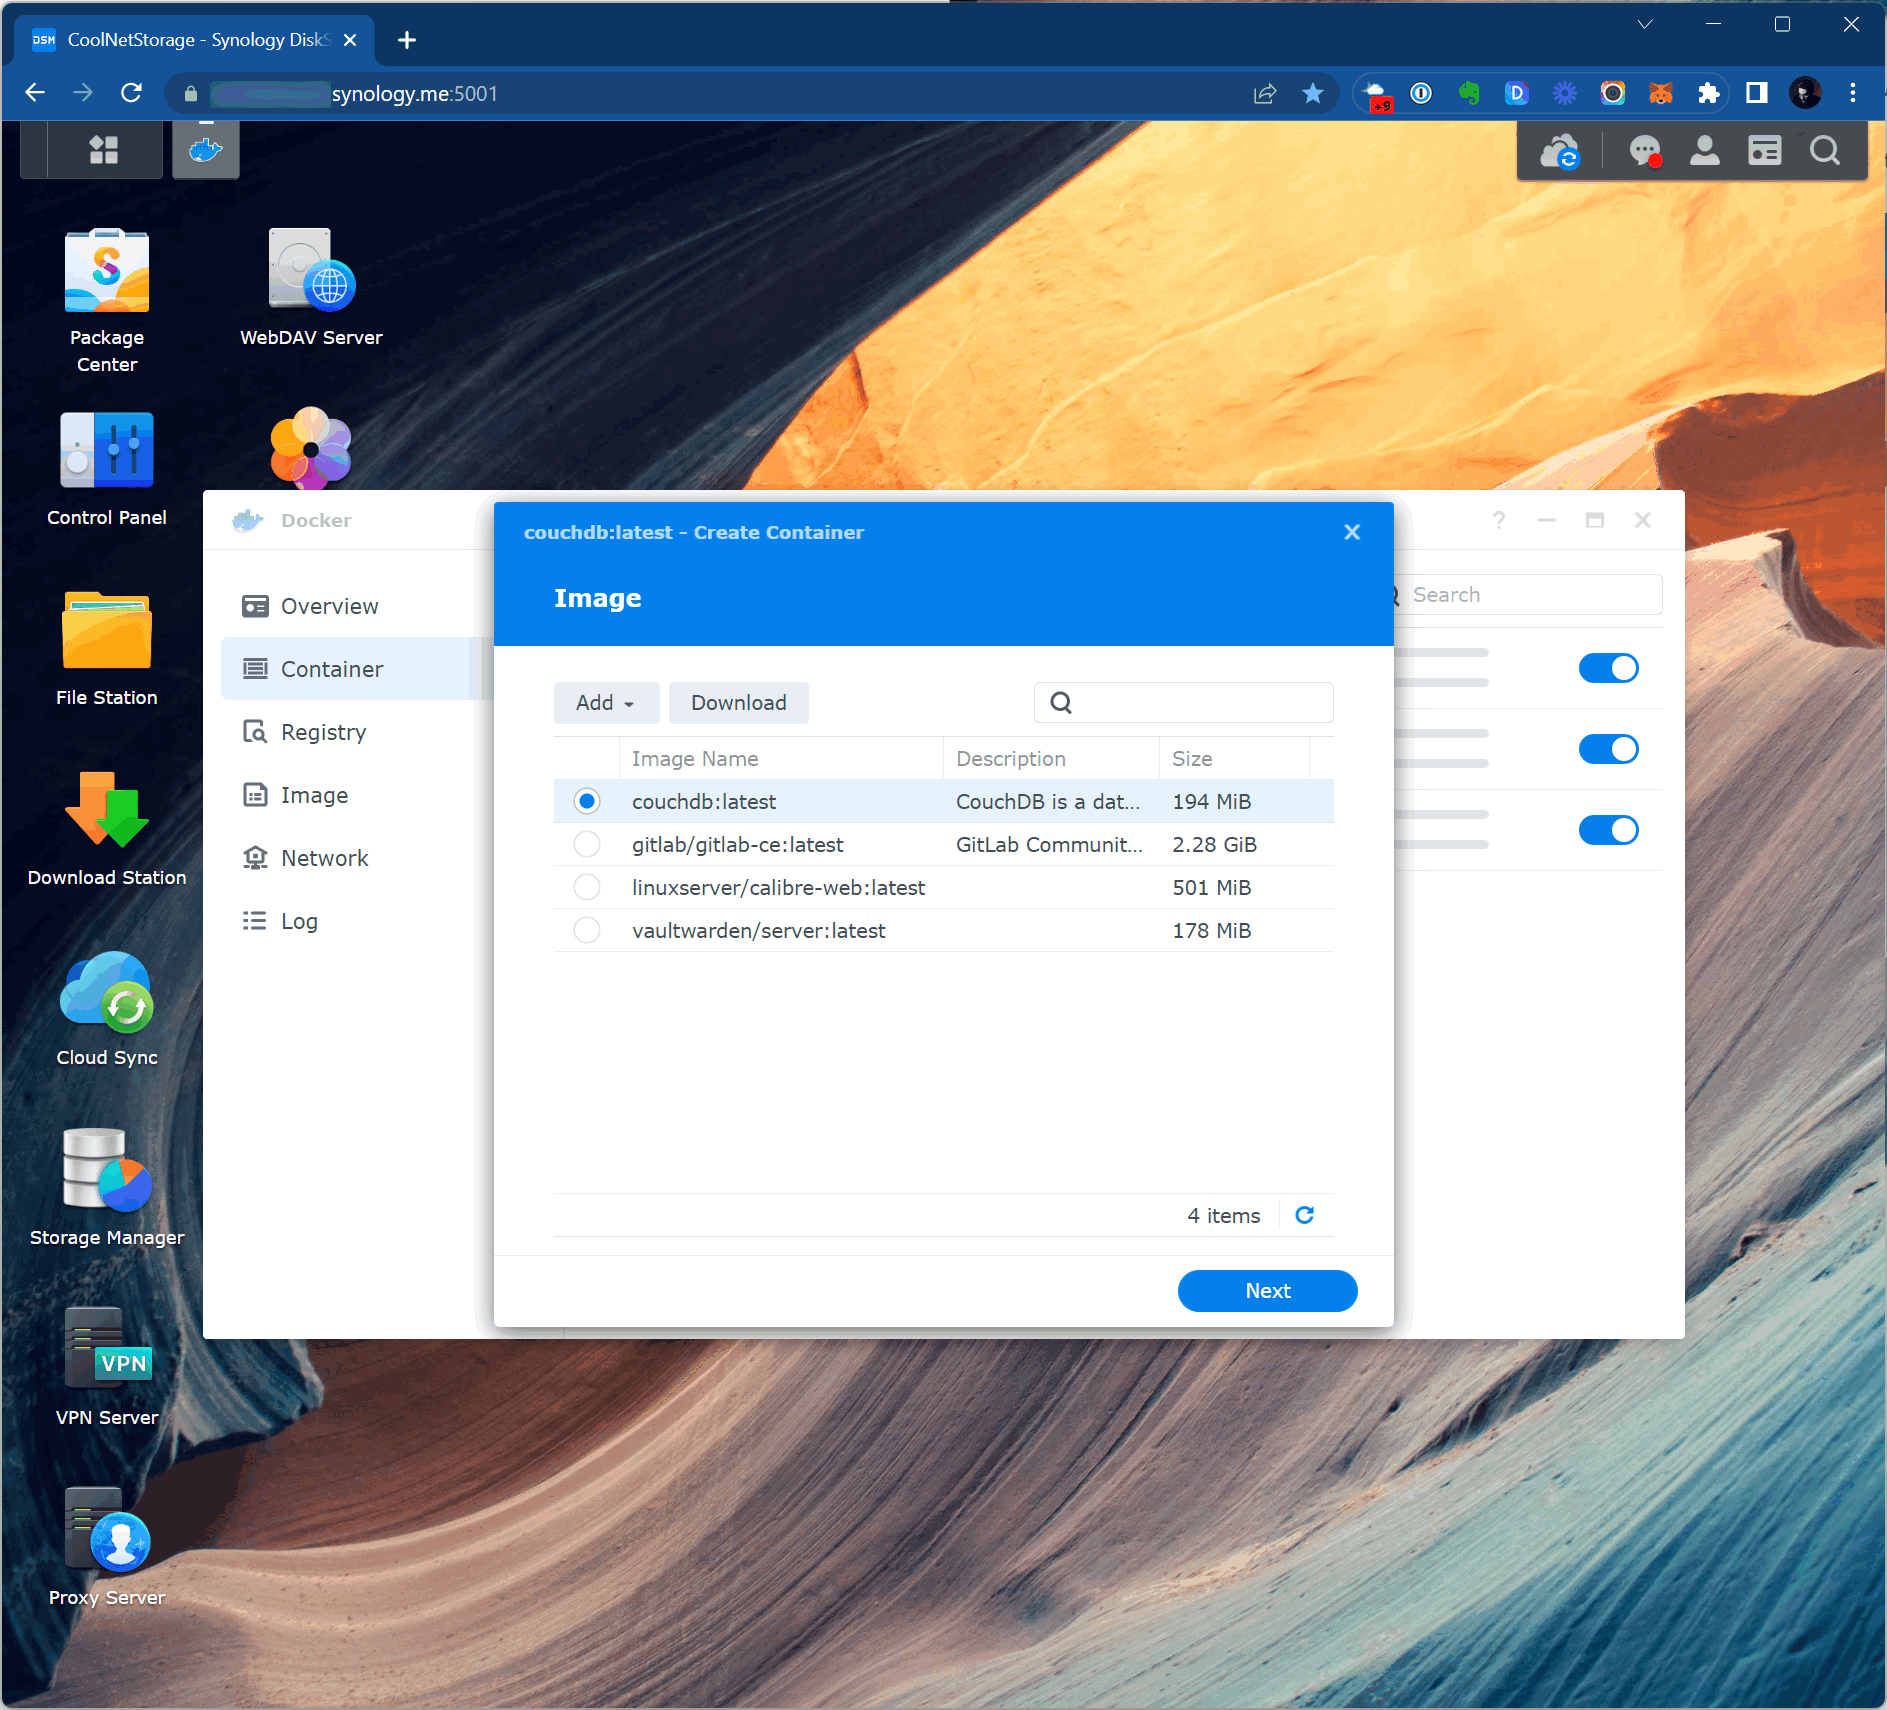
Bridge is ok.

Name it whatever you like, but don’t forget to tick Enable auto-restart option. Probably it would work if you would tick Enable web portal via Web Station, but I didn’t try it so let’s keep it for the those who is brave enough (or just have time) to check it up.

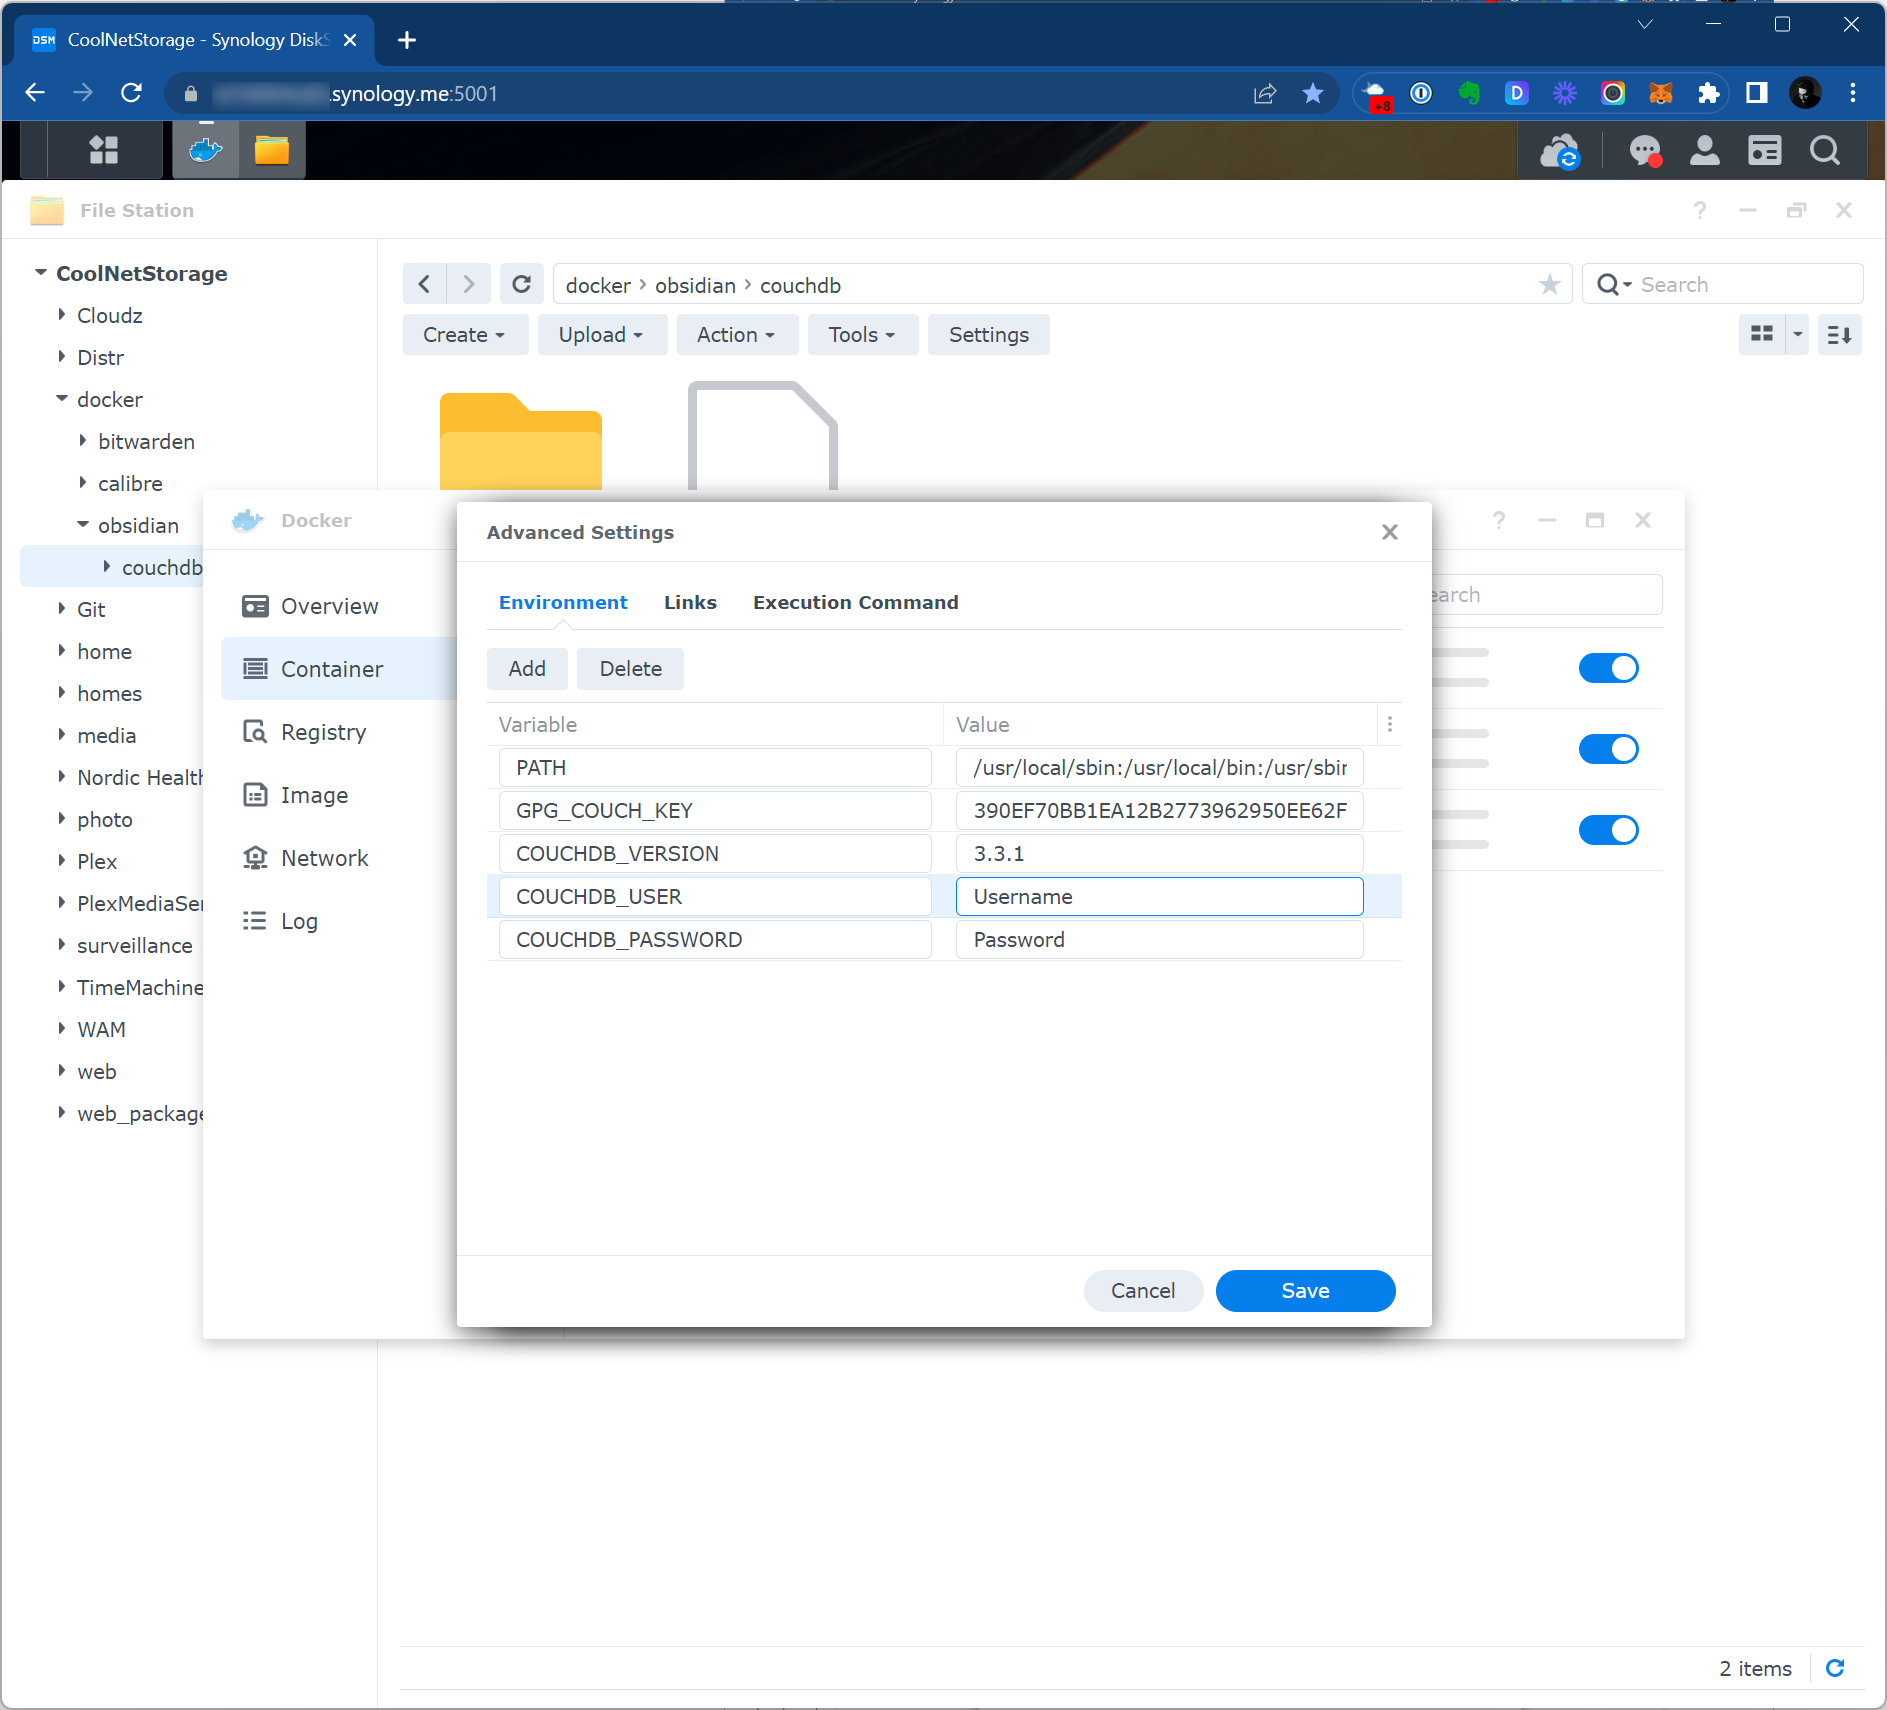
What we really need is to go to Advanced Settings and add a few necessary settings. We need to add 2 variables in Environment tab:
- COUCHDB_USER – put here the username which we created a few steps before
- COUCHDB_PASSWORD – and here you should put the relevant password
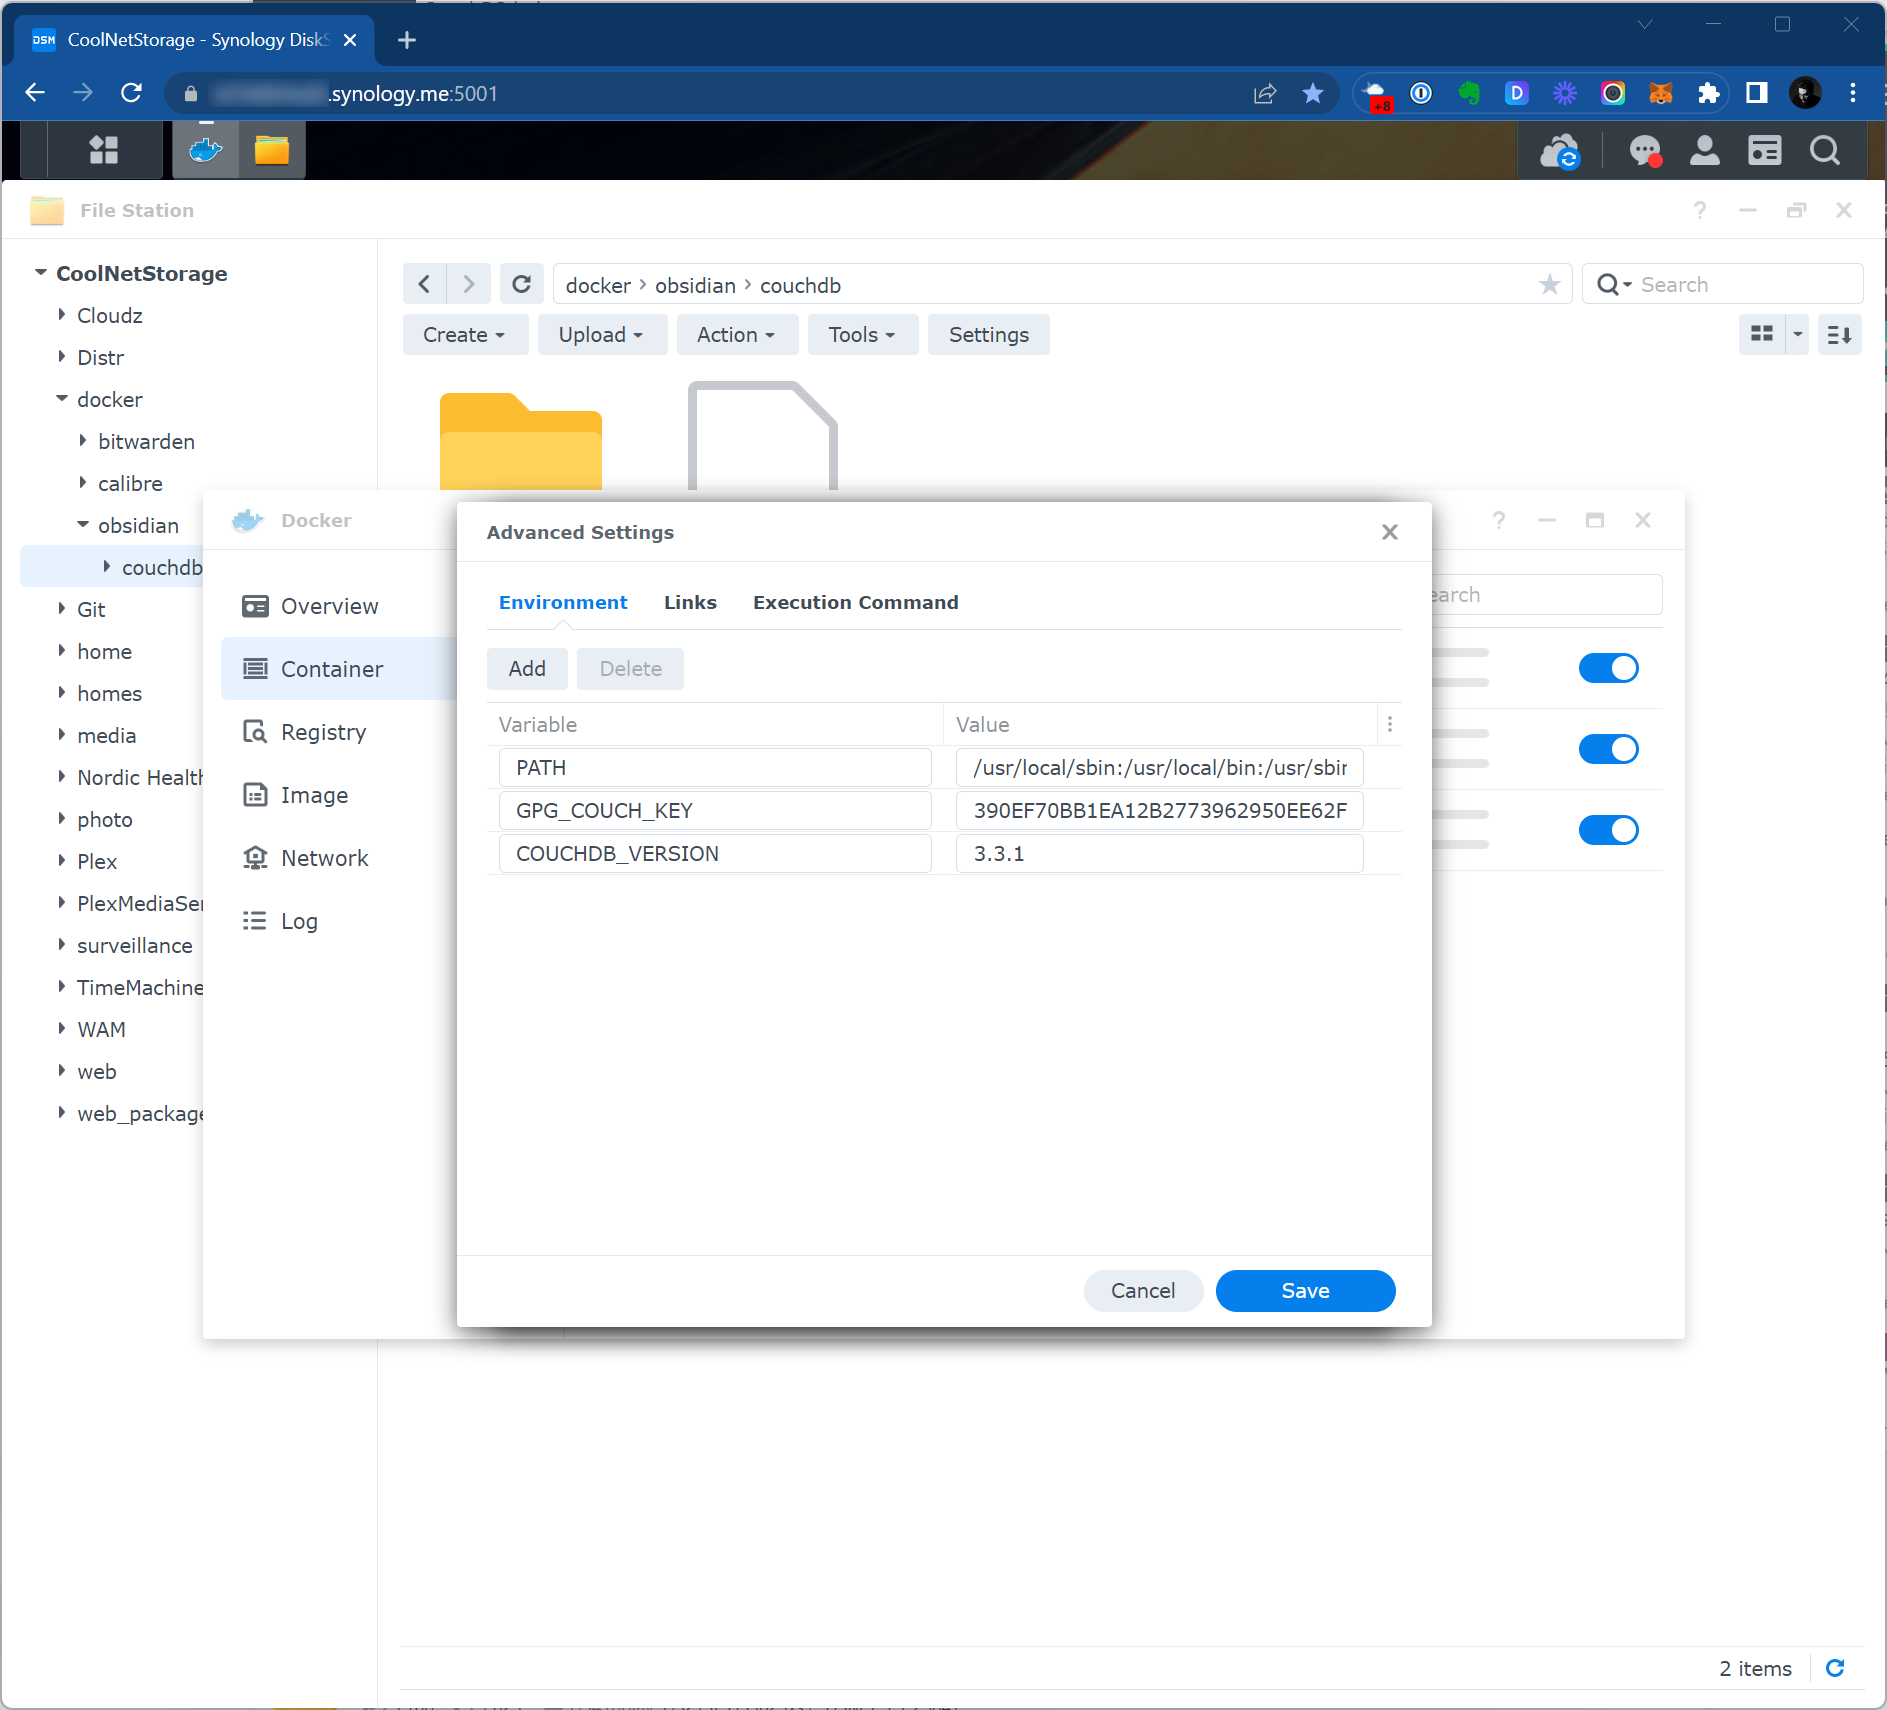
It should look like this and you can click Save.
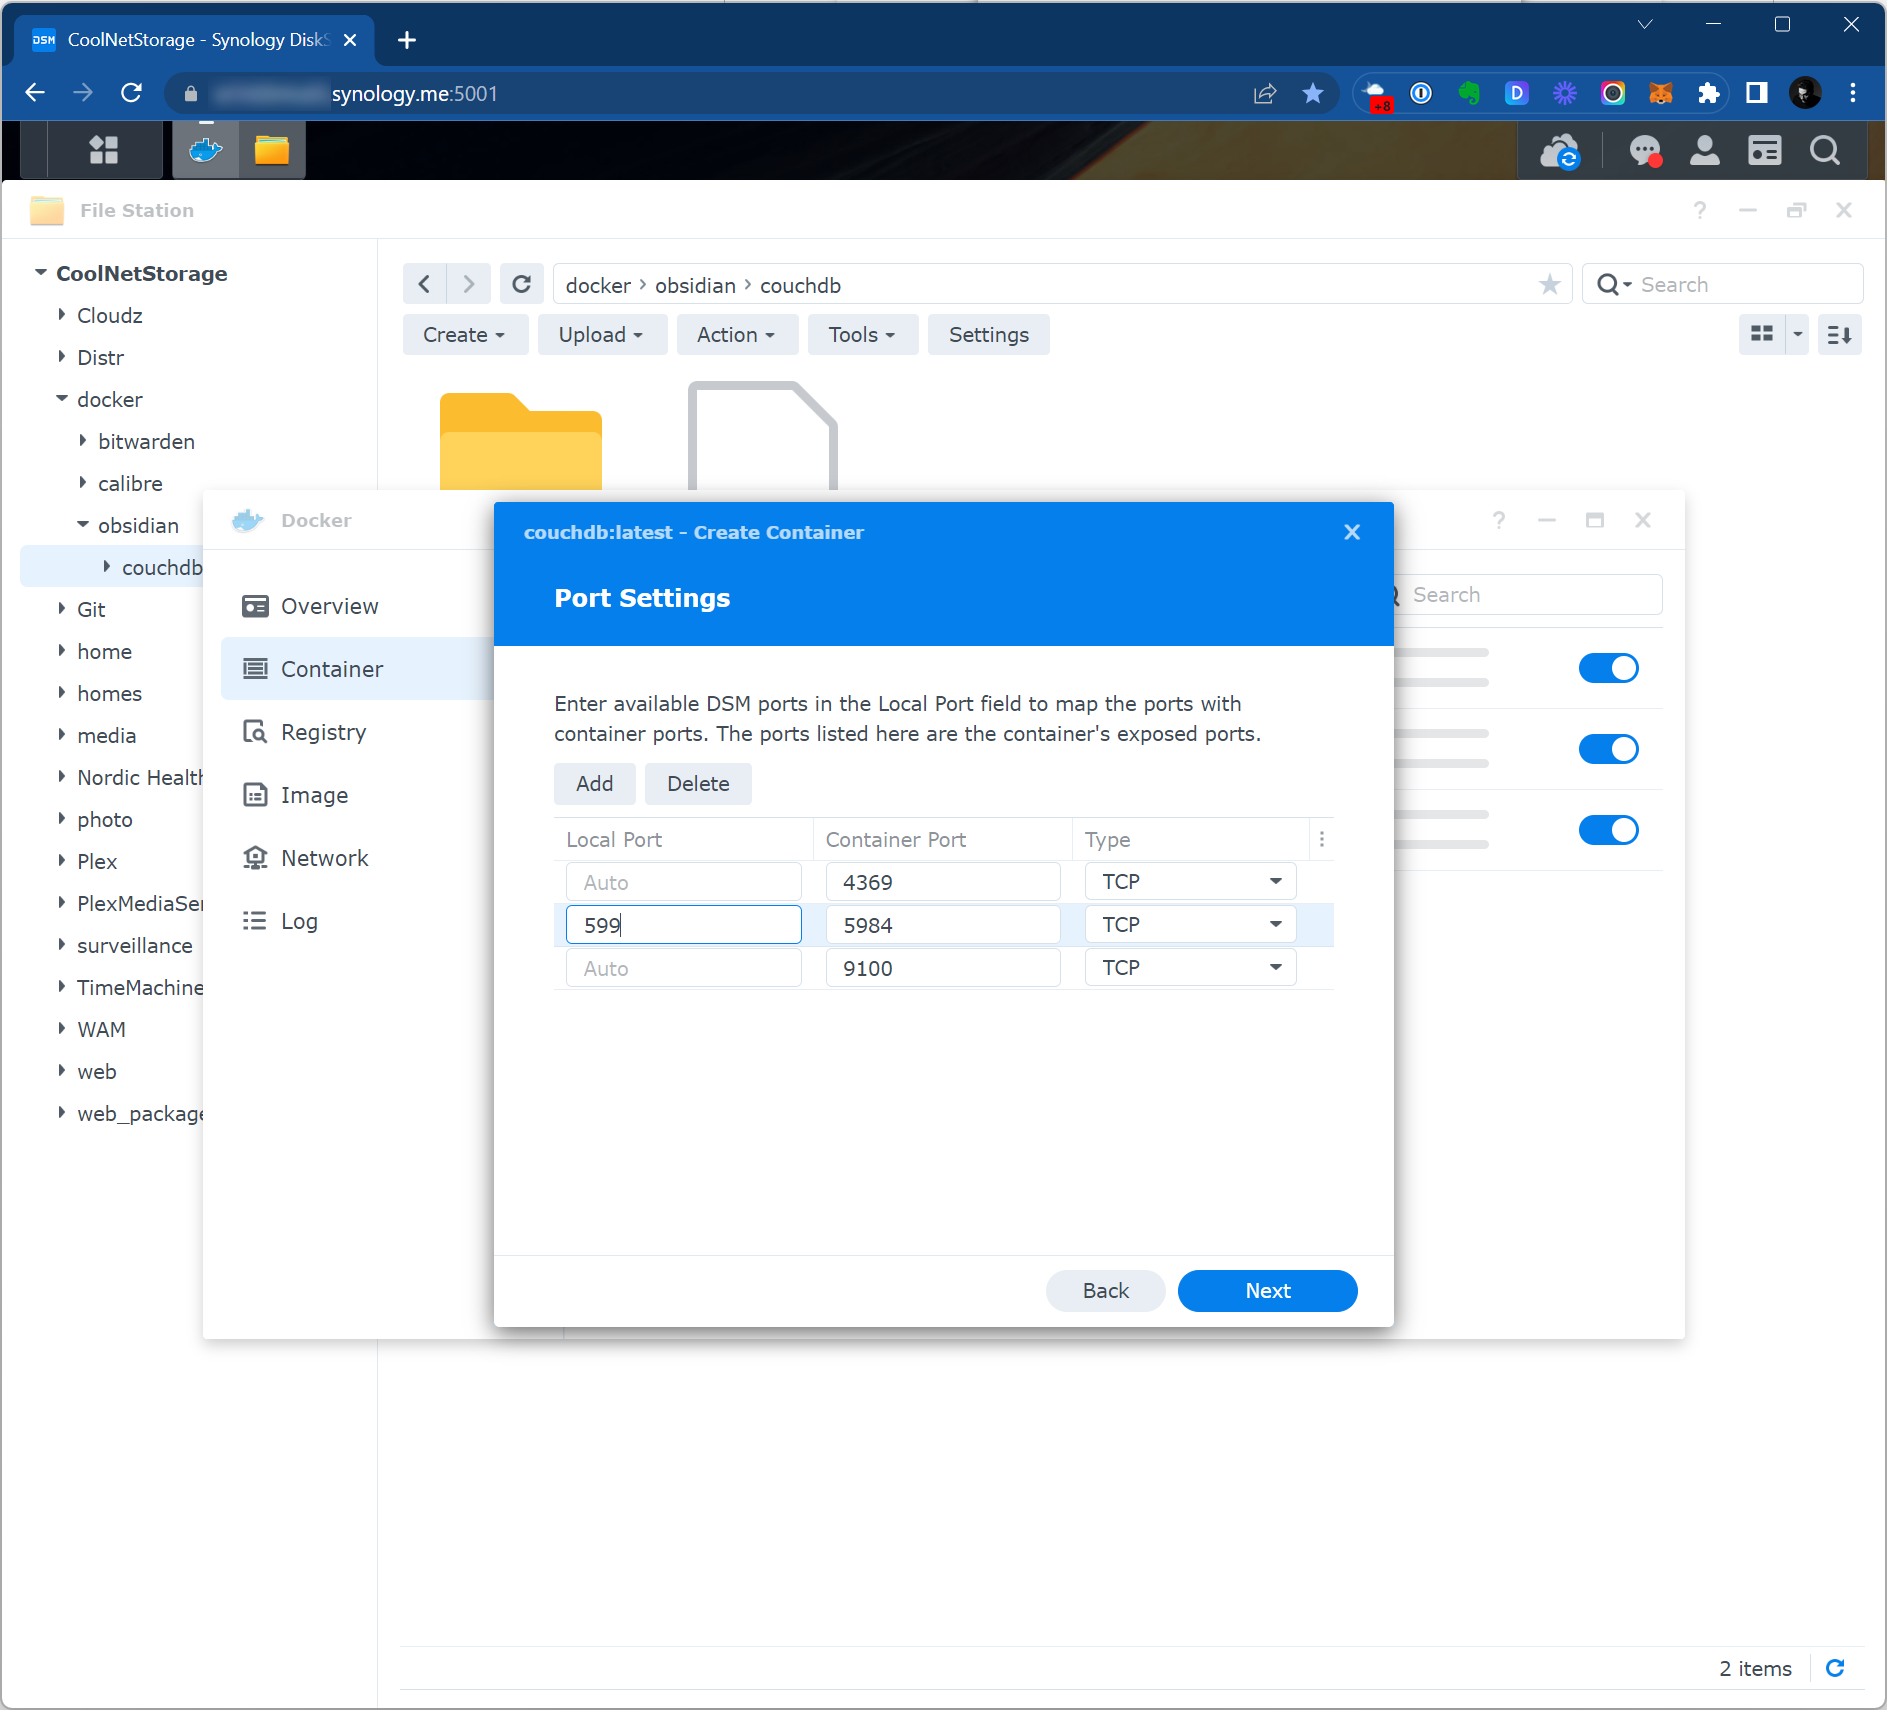
You would get back to the container creation flow and should click Next to sort out the ports. We need to access port 5984 of our contatiner and we can map it to any free ports of our NAS. As I’ve already used 598 for my first container, I am putting 599.
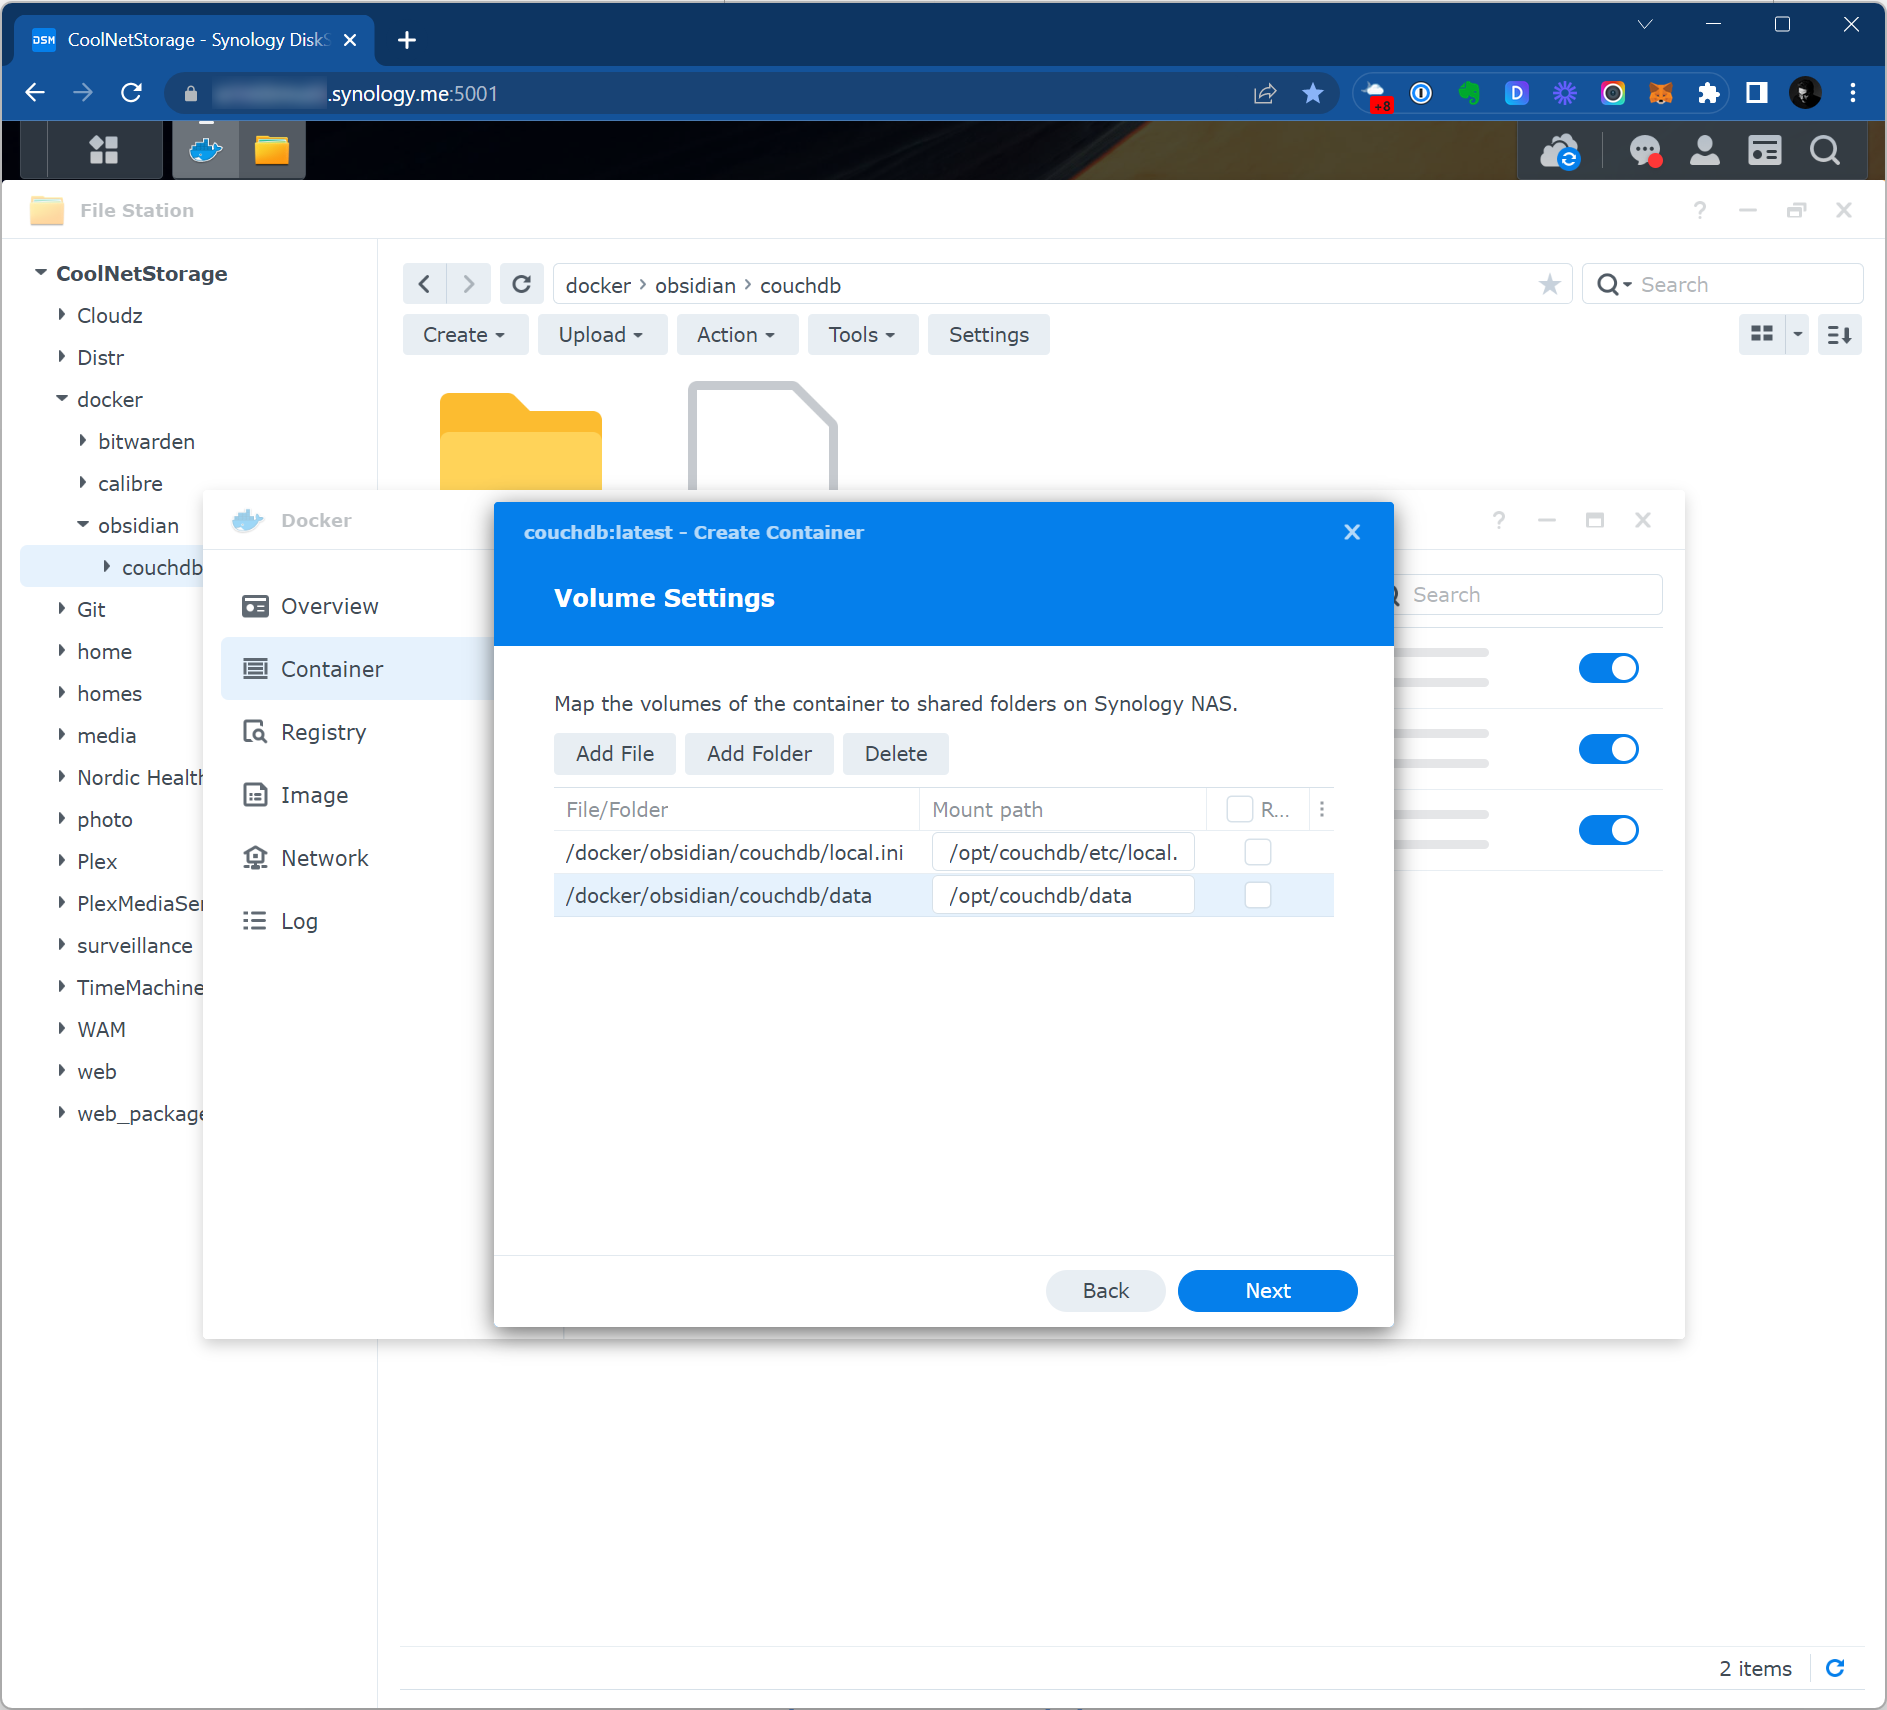
Here we should link the local.ini file which is stored in NAS filesystem with container. Just click Add File and find your local.ini.
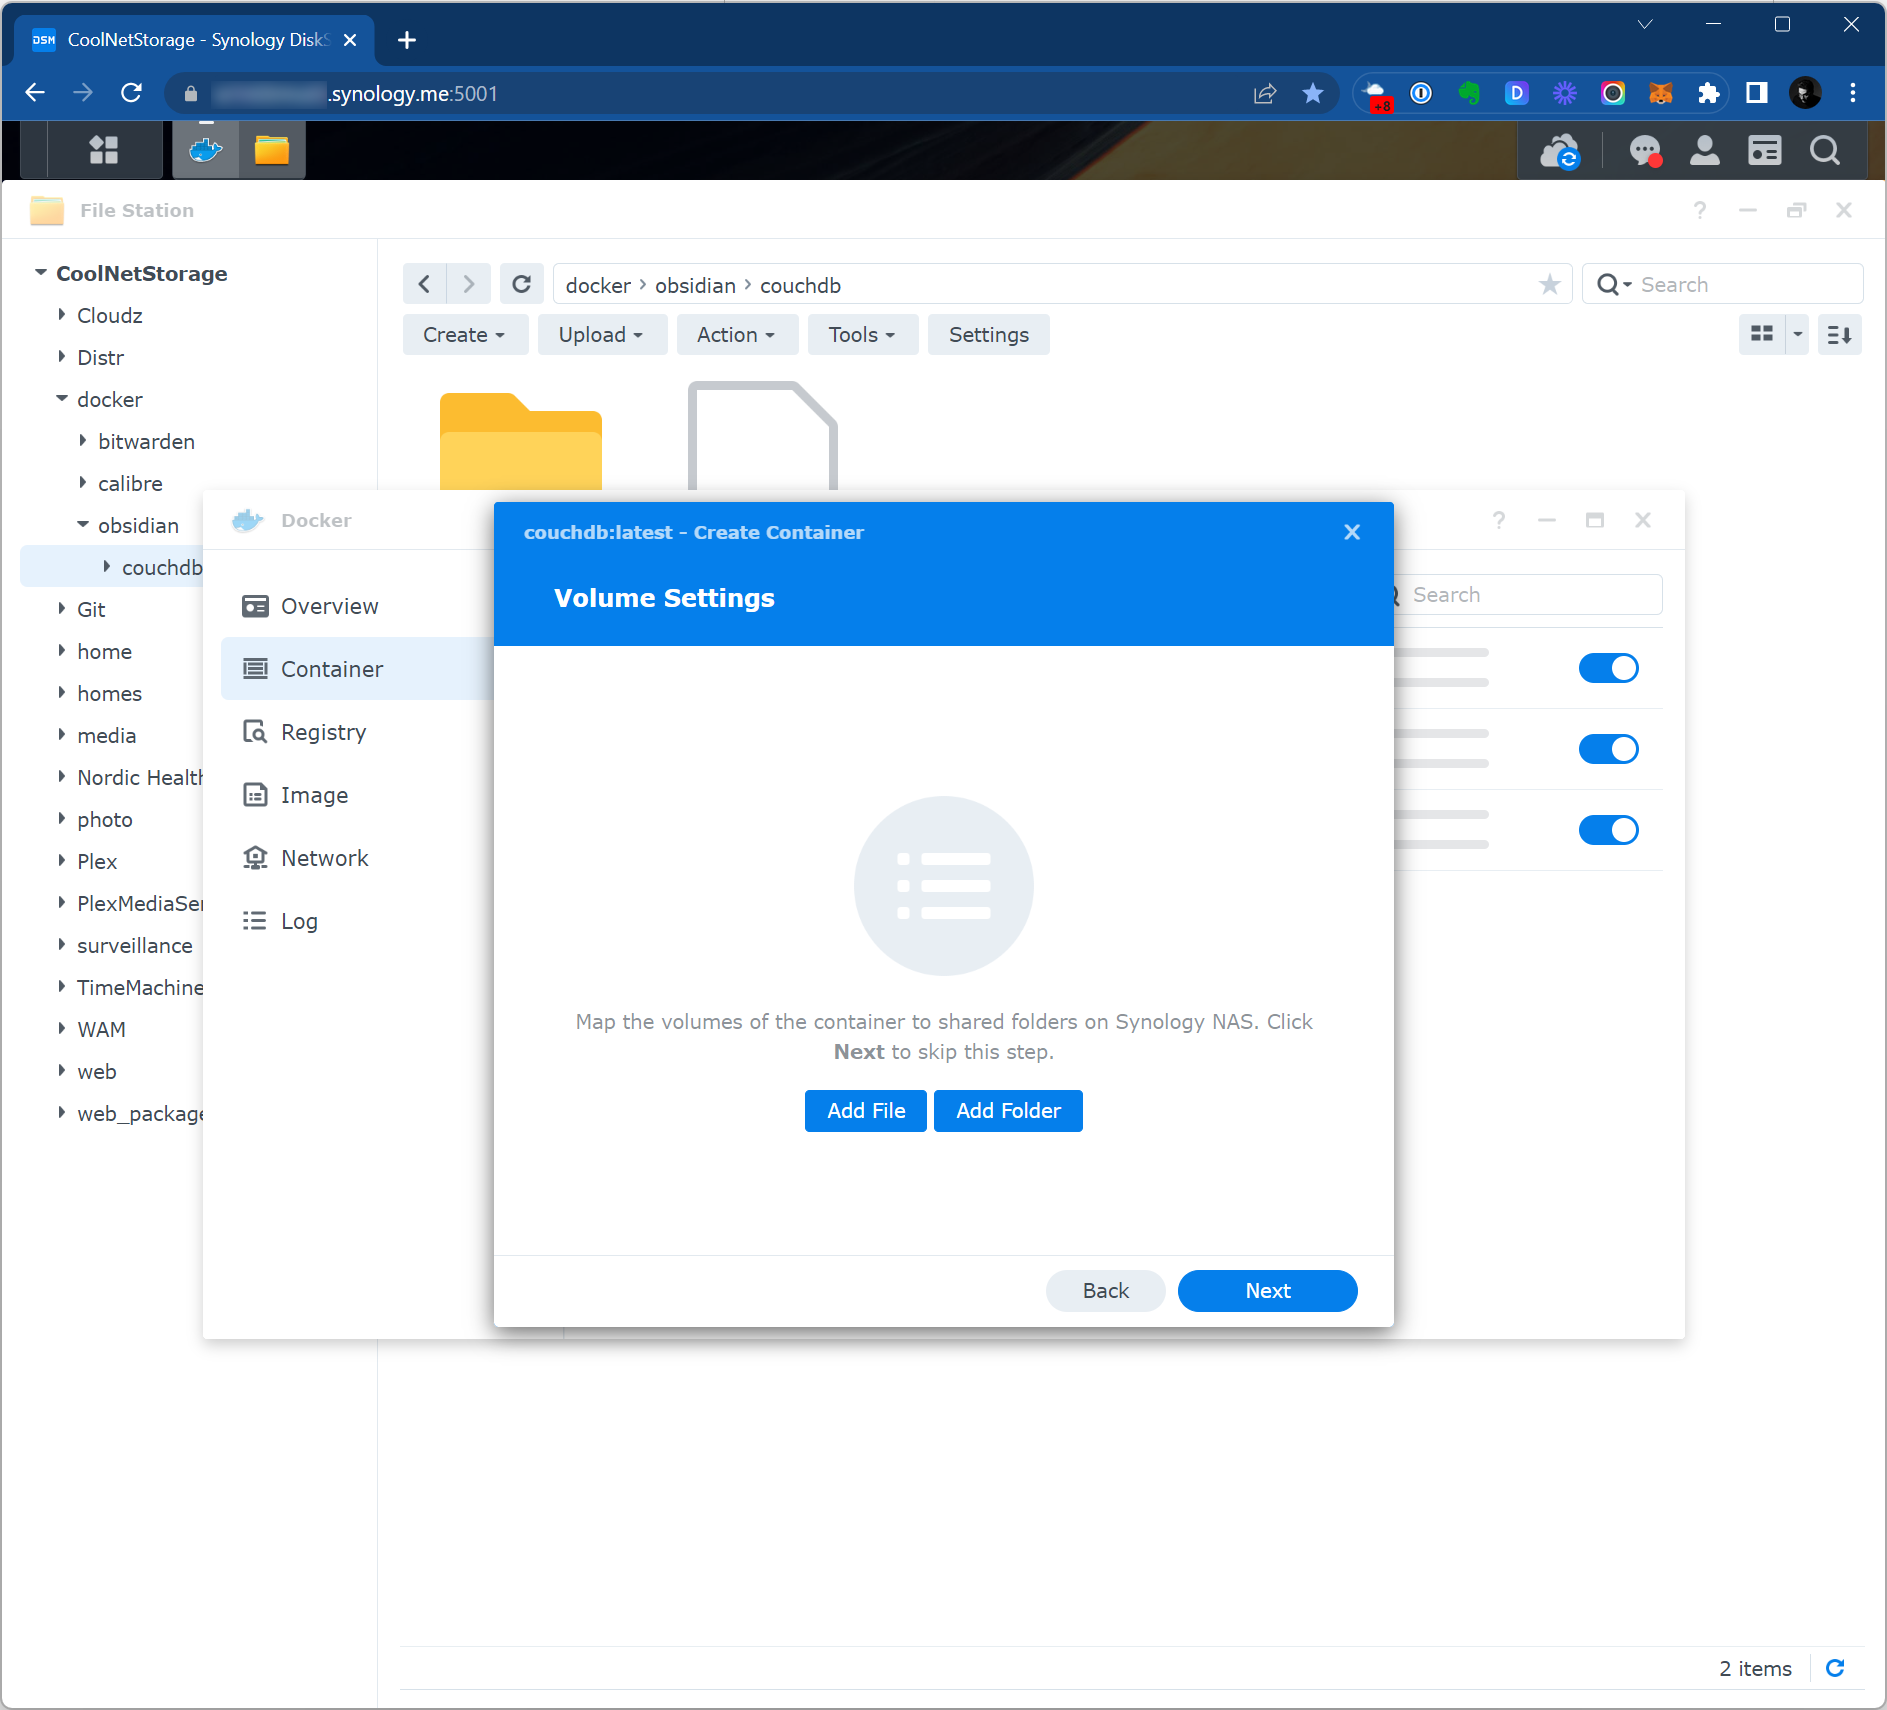
For me it looks this way.
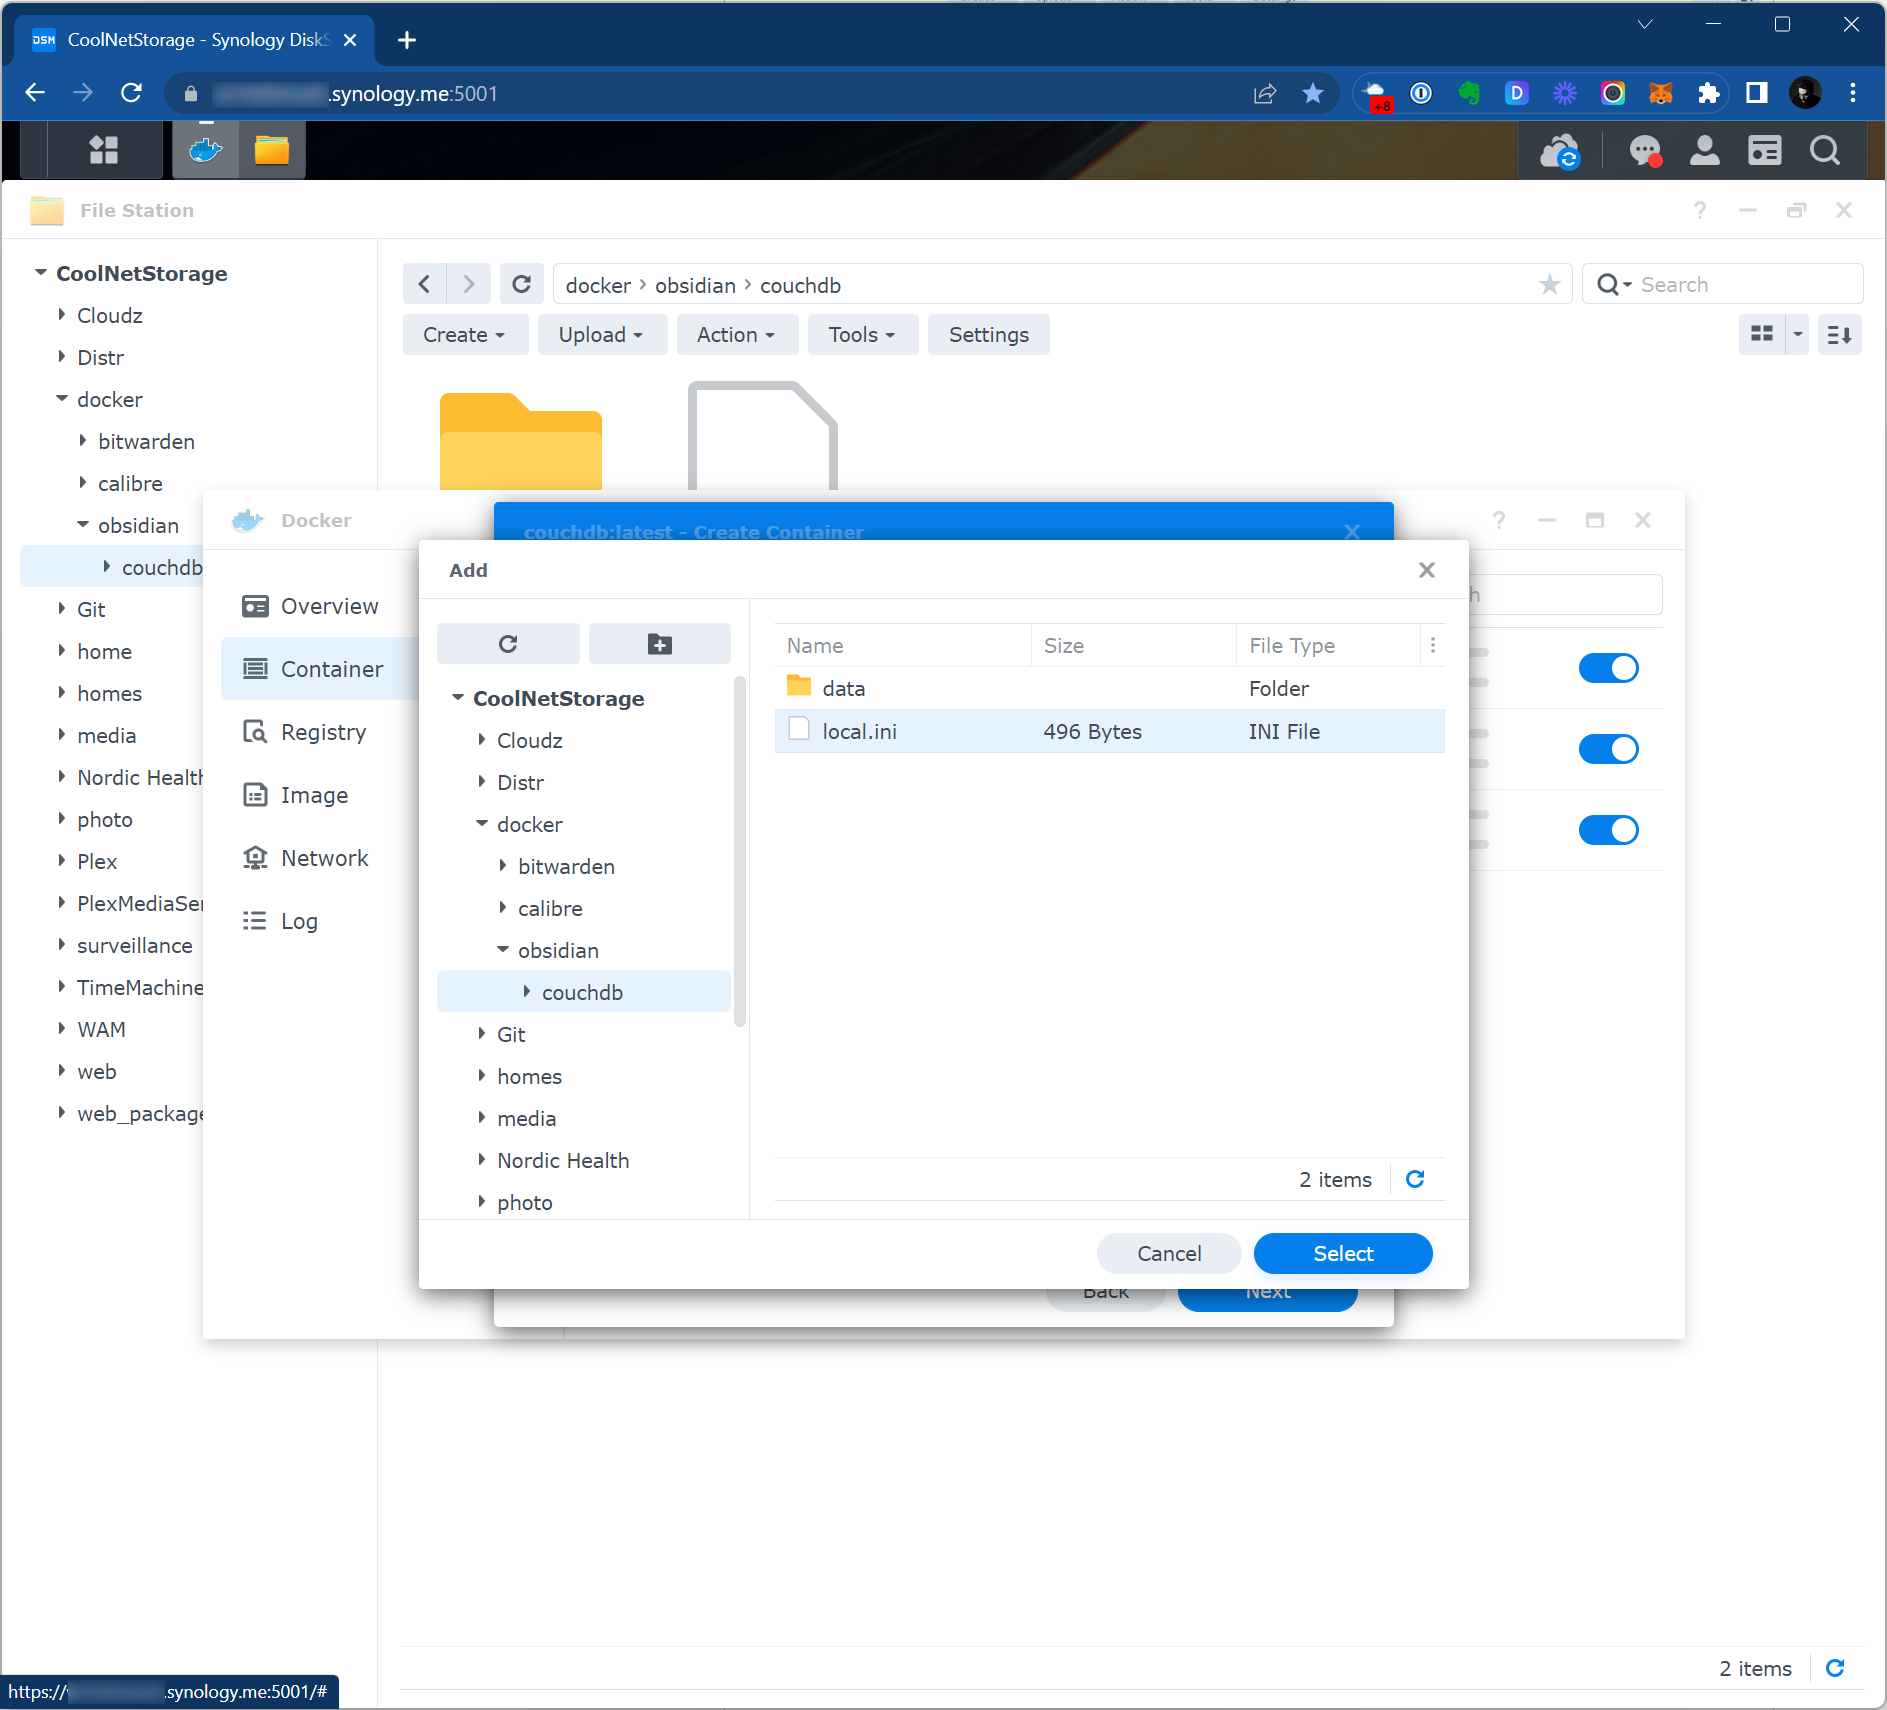
Mount path should be /opt/couchdb/etc/local.ini.

There also could be sense to mount couchdb data, it can be done by mapping of /opt/couchdb/data to NAS filesystem, like this.
Let’s check the settings and we are ready to go.
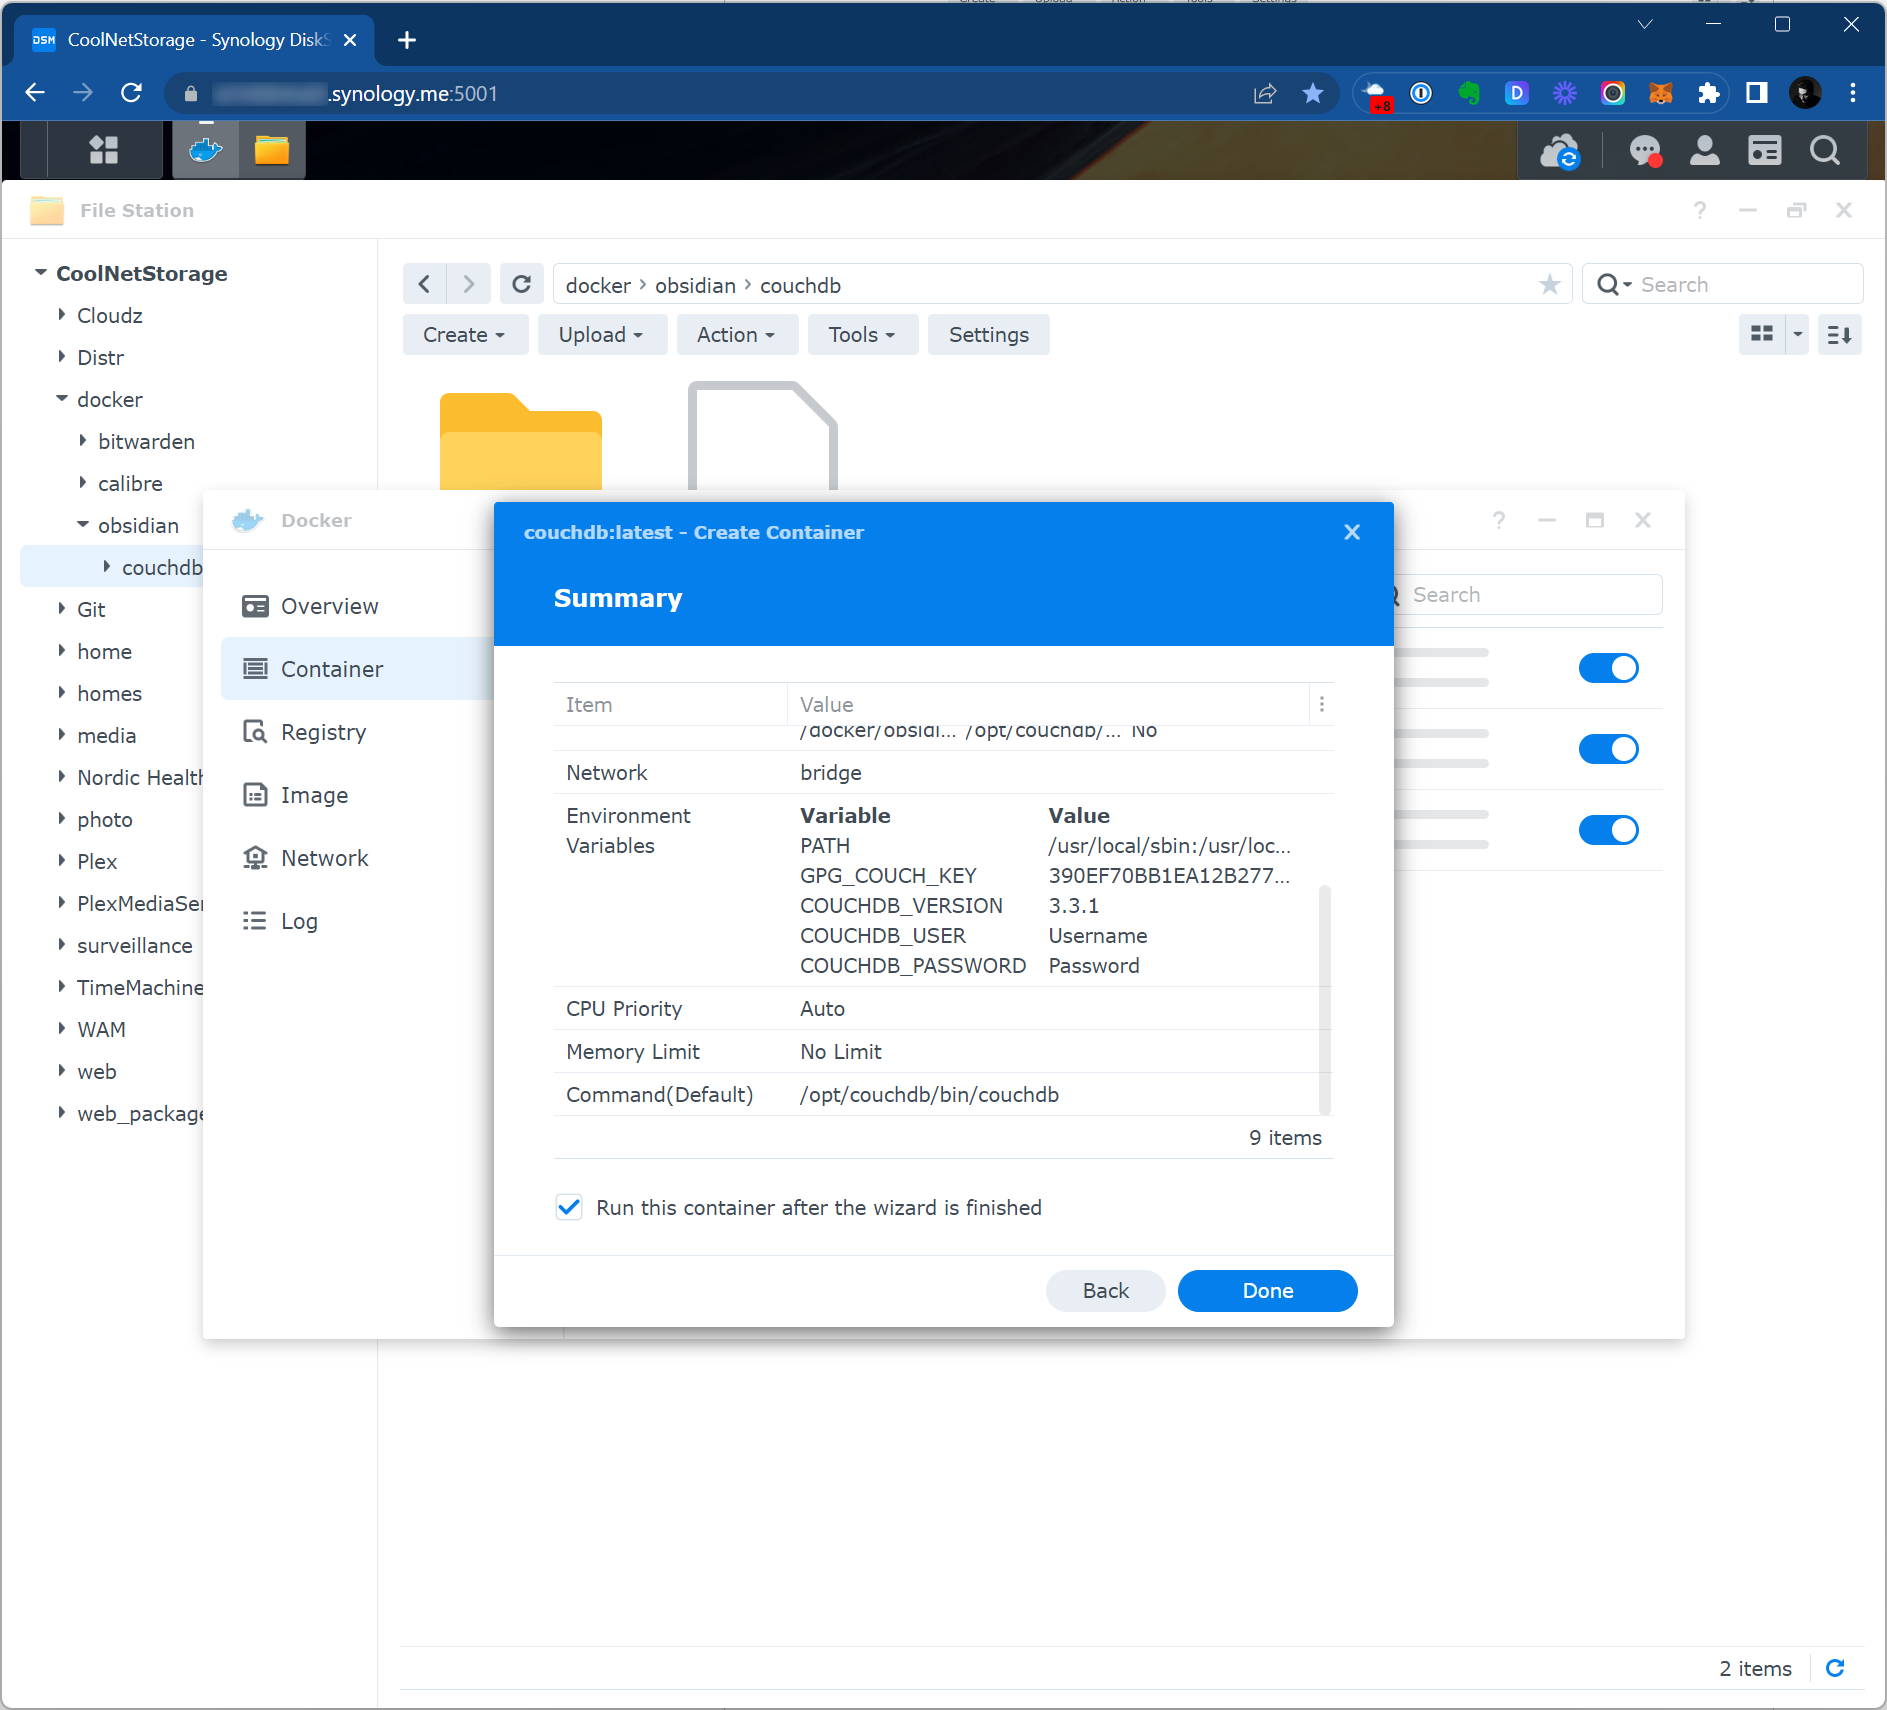
It would take a bit of time to start up the container, but once it done you would see it running.

Make sure it works
Ok, the container is running, but does the DB work? Let’s find out.
First of all, let’s try to access it locally. We need to try open the local IP of our NAS with the port we’ve specified above. In case you don’t remember the local IP of your NAS, you can look for it in web interface in top right corner and find it in System Health dashboard. As you can see, my NAS have 192.168.1.10 local IP.

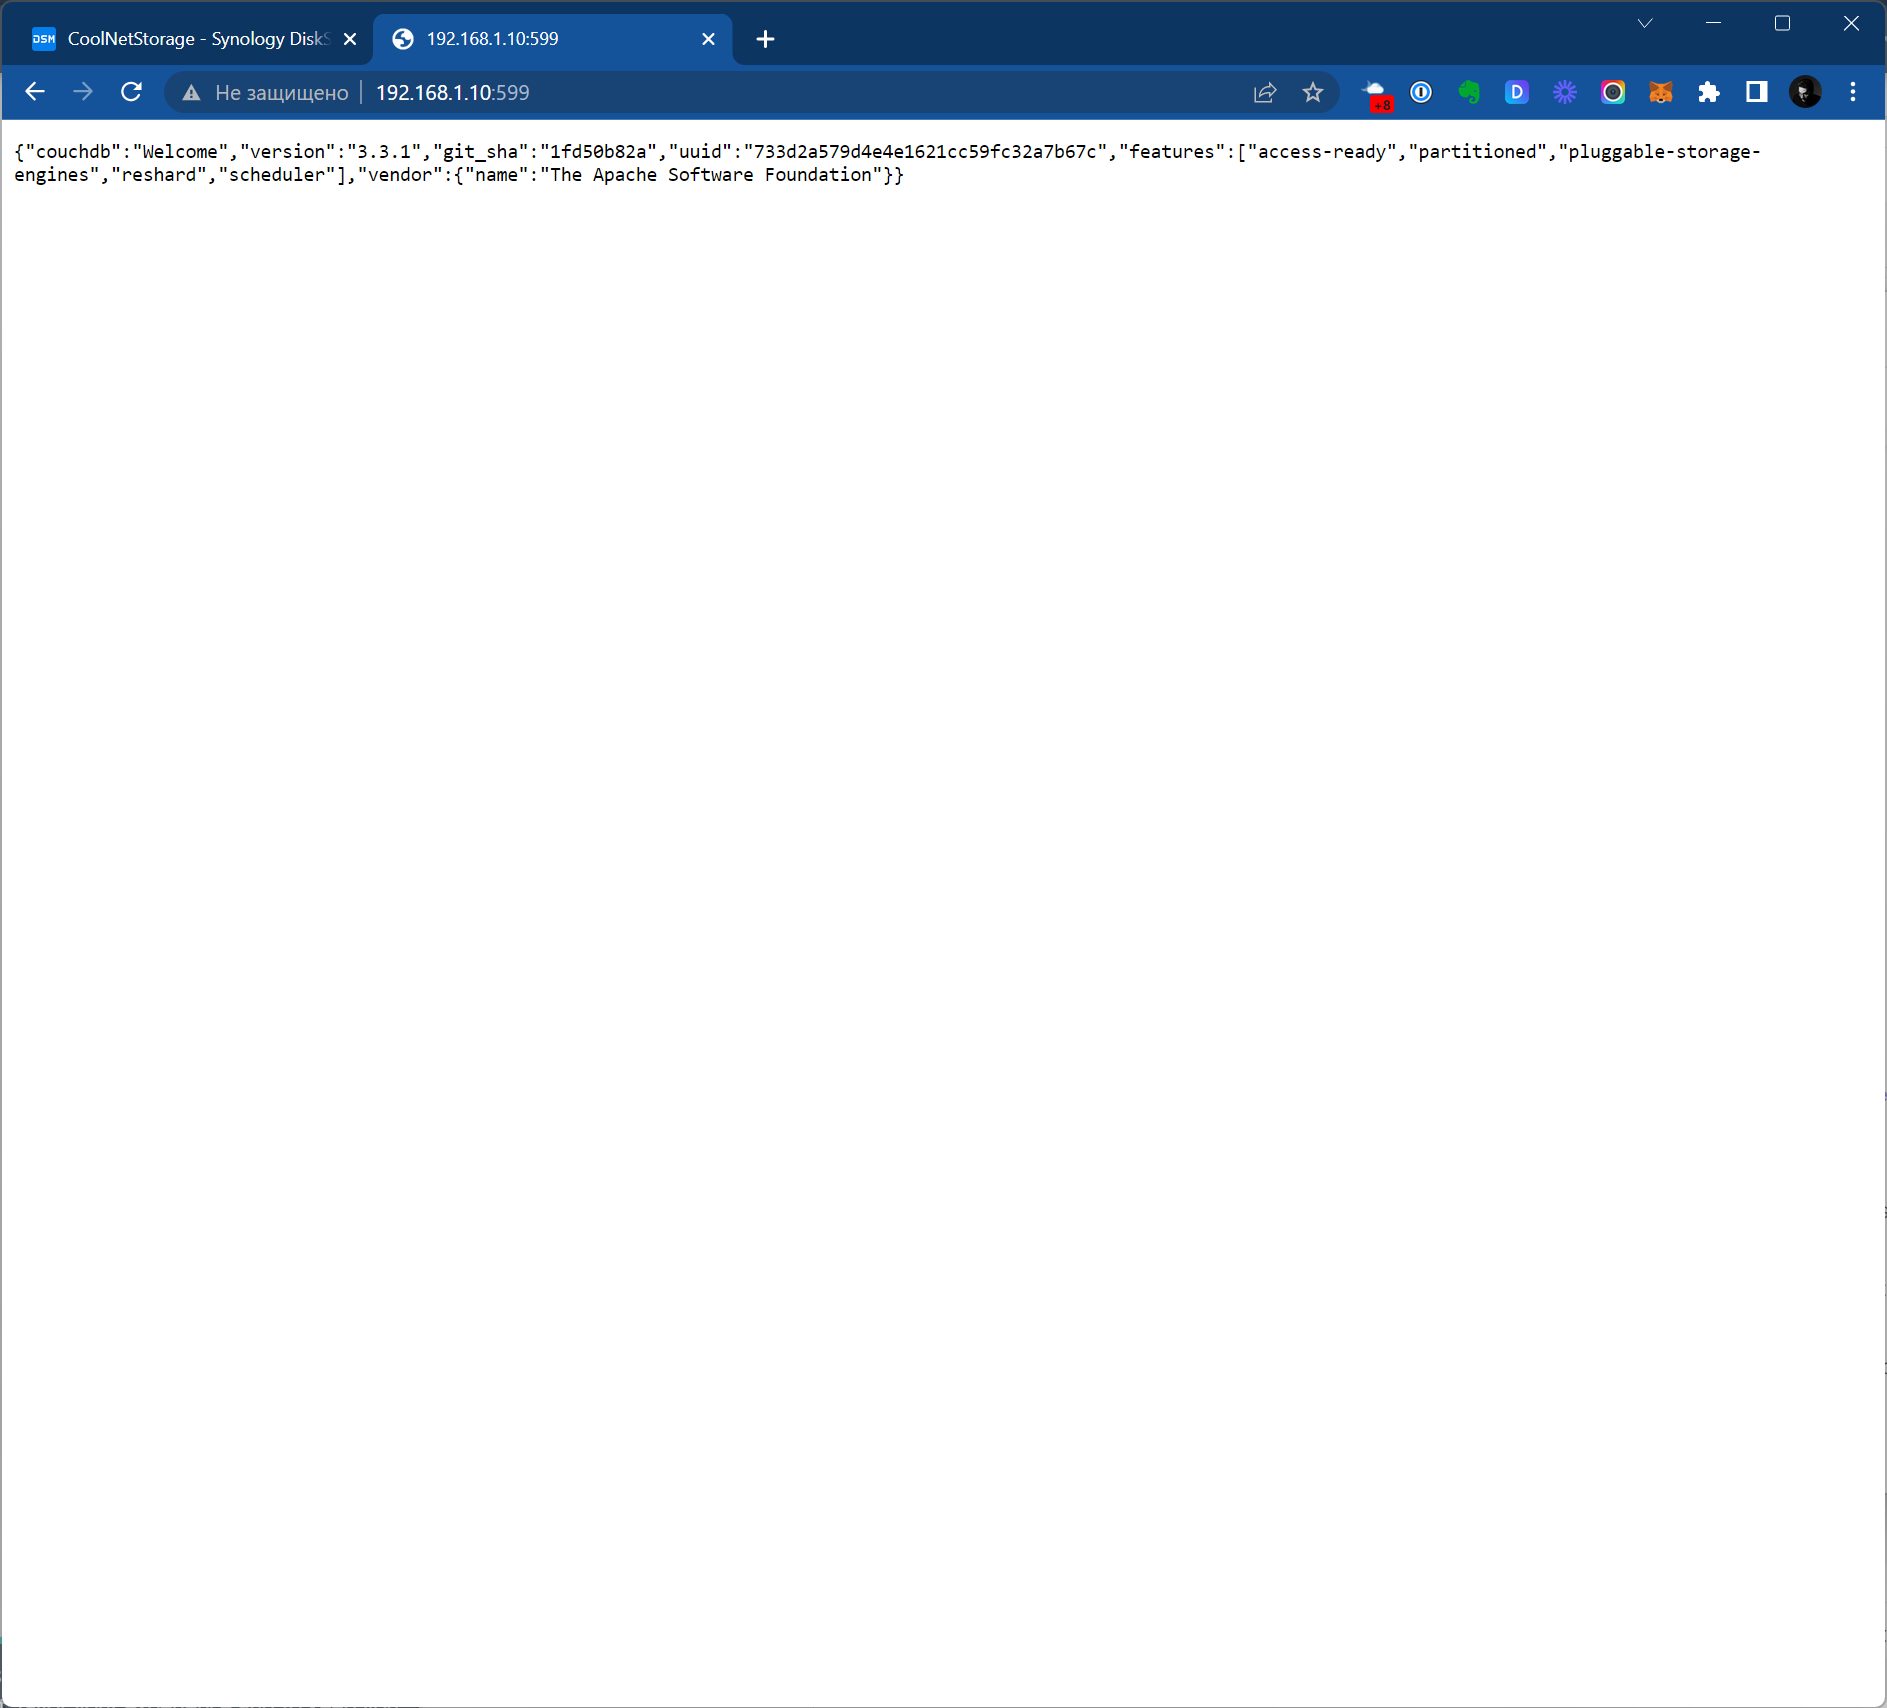
Let’s try to open http://192.168.1.10:599 and see what we’ll get.
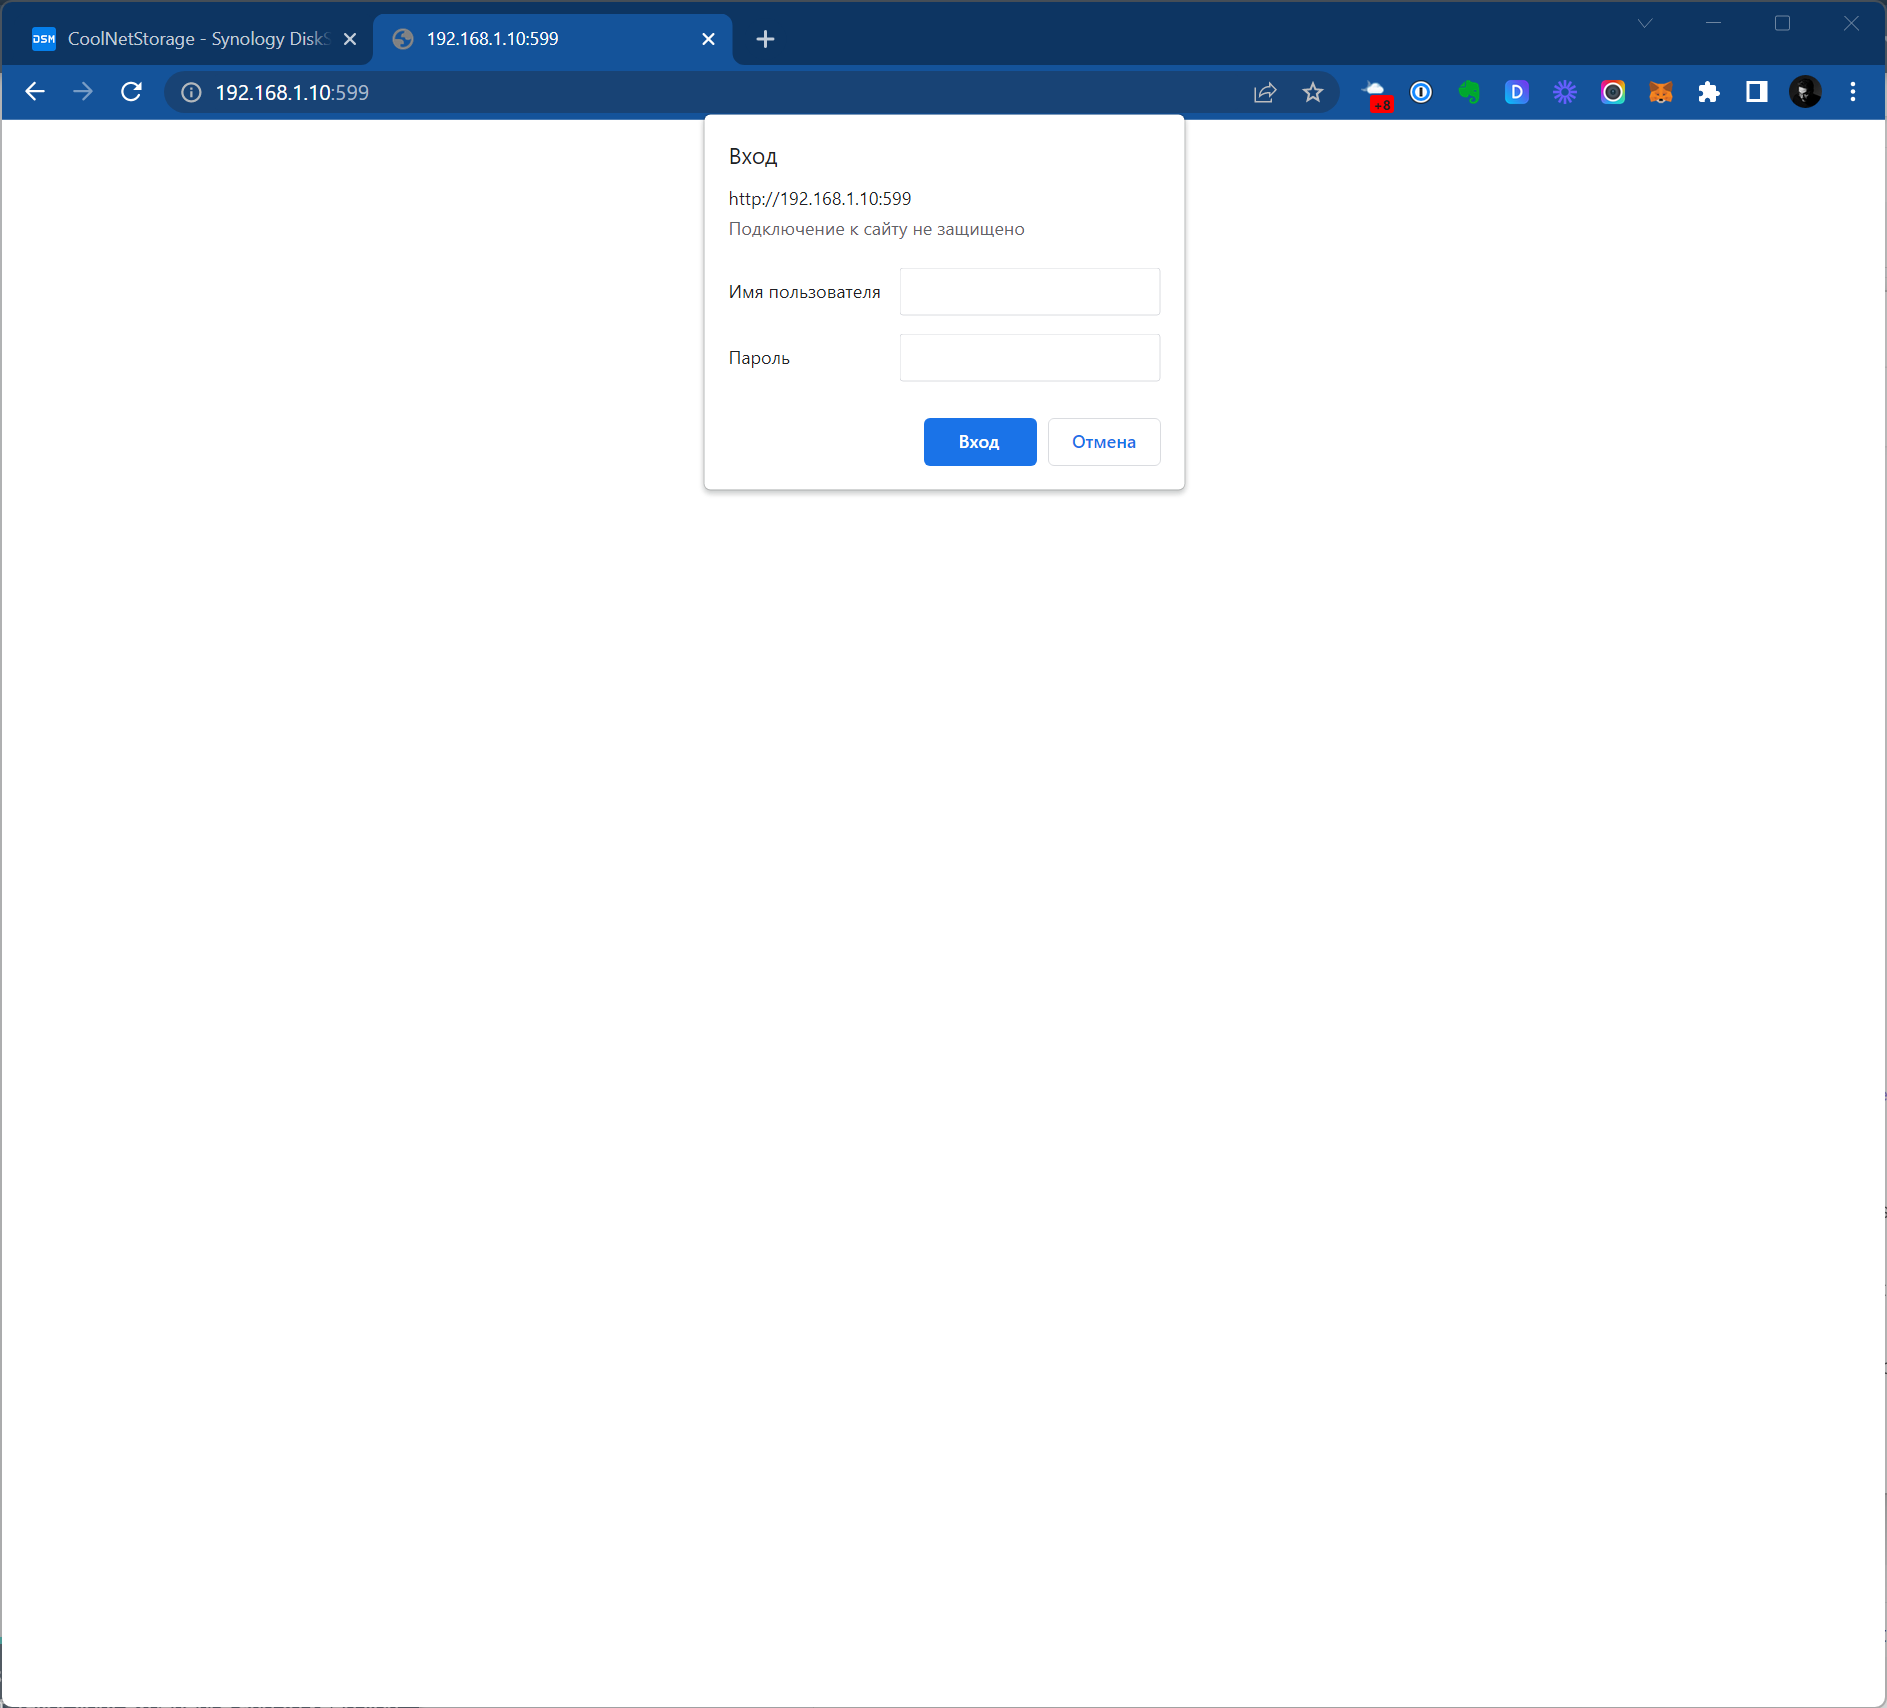
Put there the credentials of your new user and you’ll get something like this.
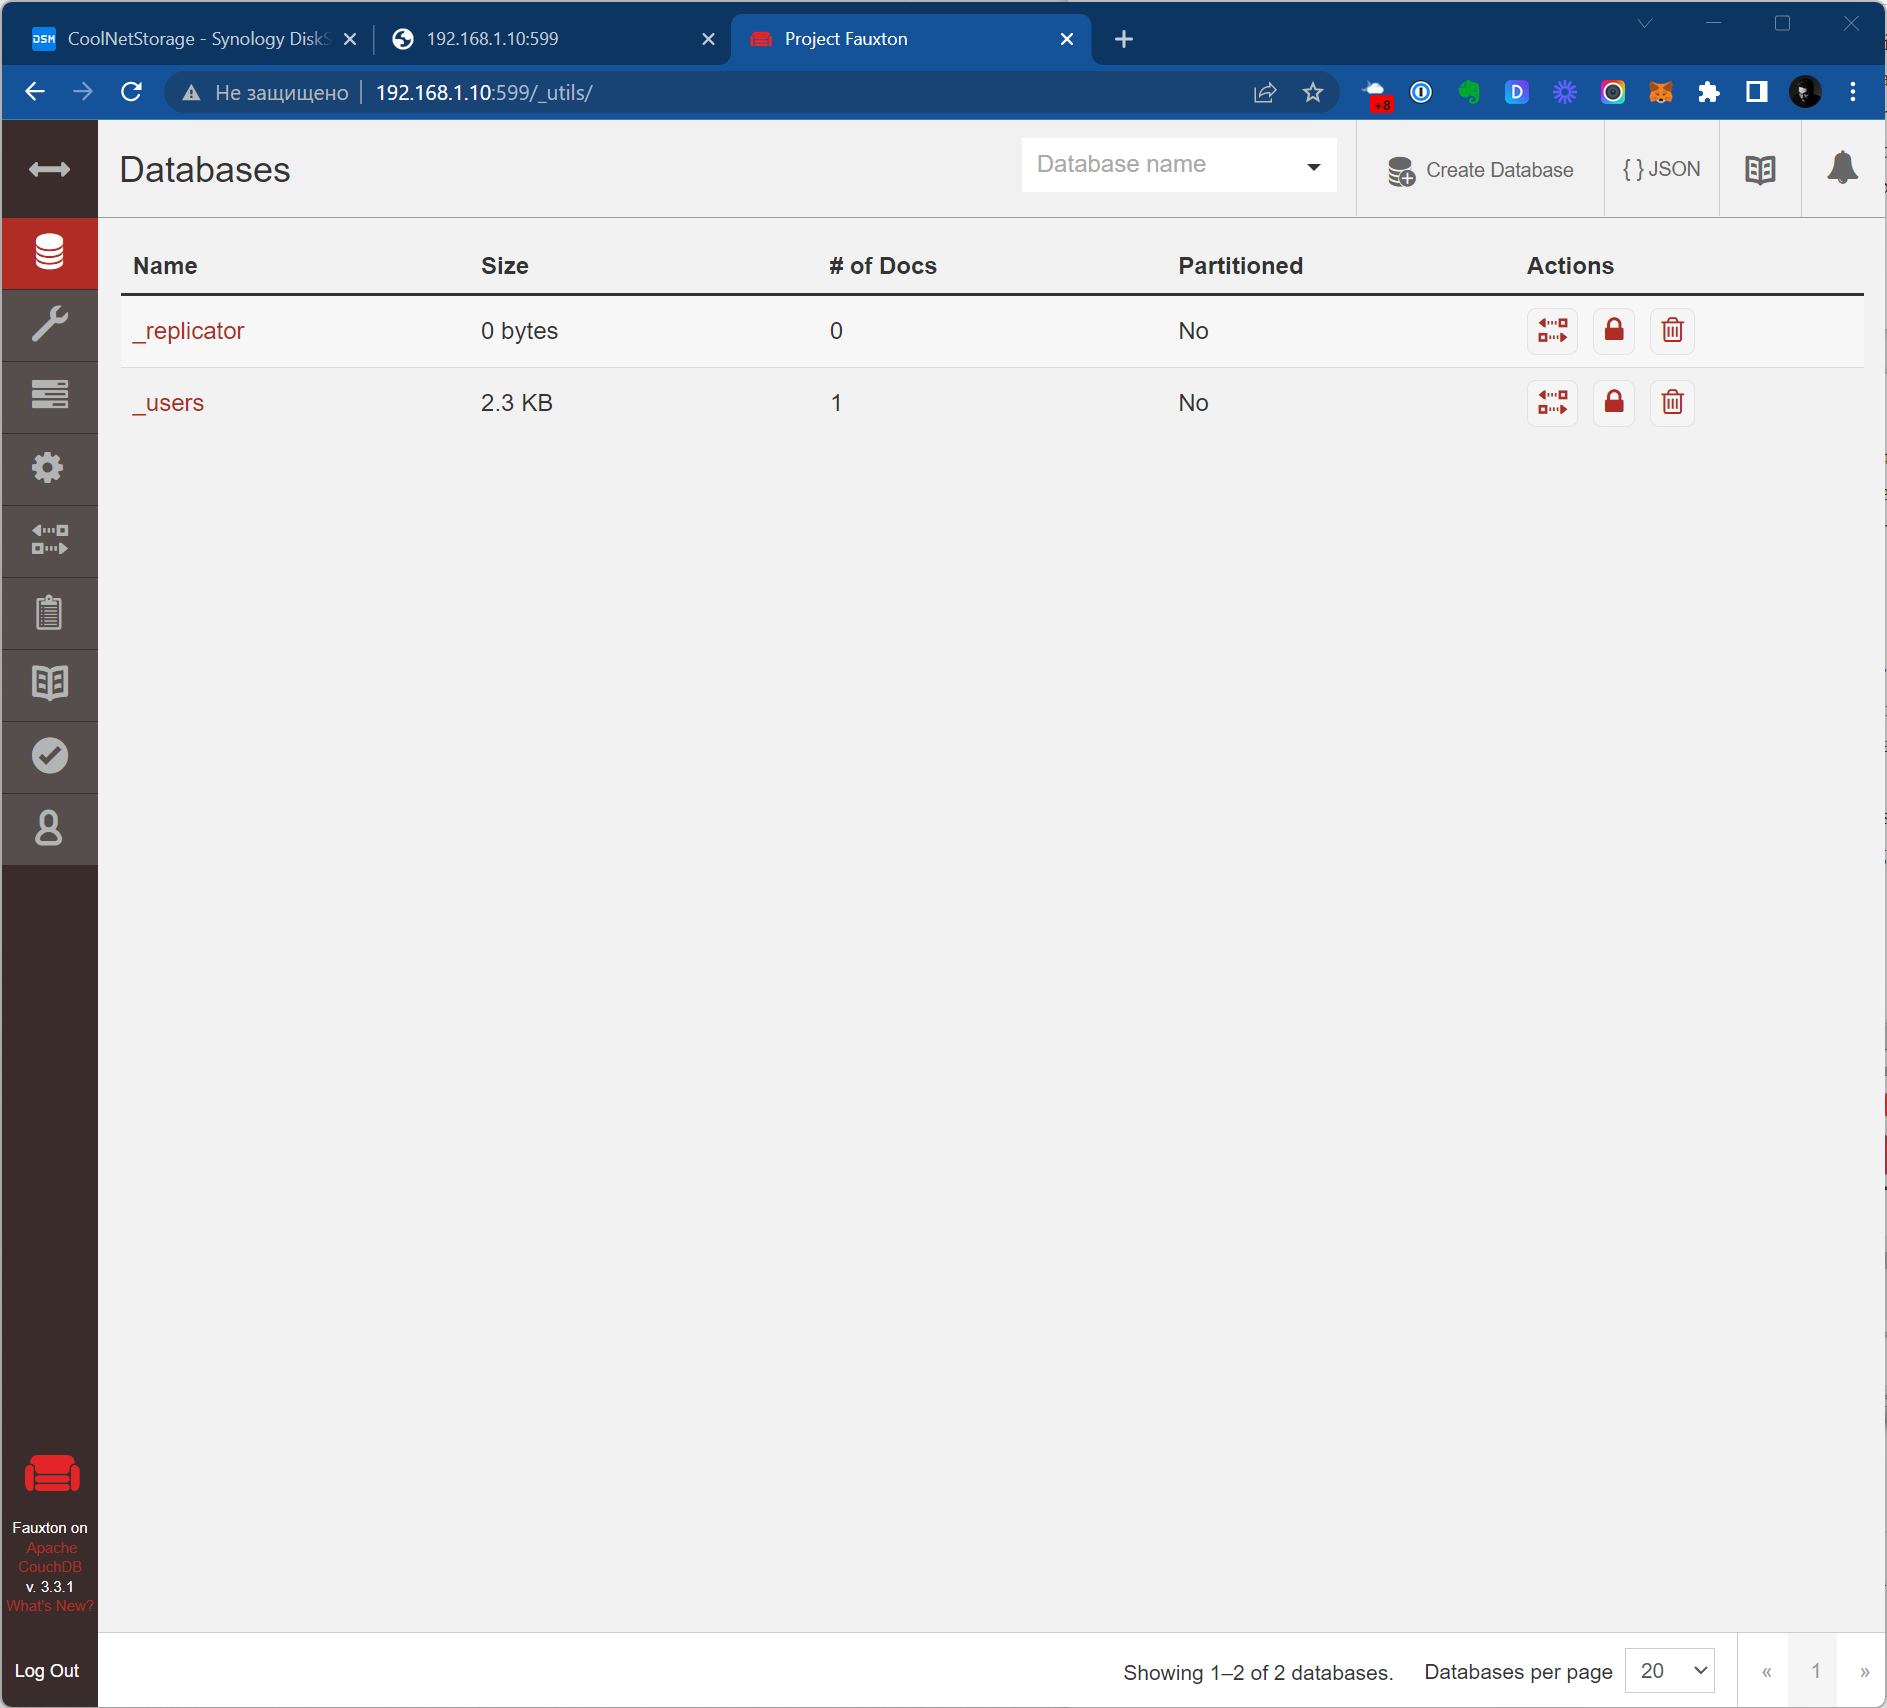
But what is the most esciting is that CouchDB do have built-in adminitstation interface called Futon. It is available at http://192.168.1.10:599/_utils/ and looks this way.
Make it accessible outside
Ok, if you were lucky and did everything right, for now you would have working instance of CouchDB which is available within your local network which is super cool, but we need to have it available outside, so let’s set up reversed proxy and assign a certificate to let it open by https – which is mandatory for mobile clients.
Set up reversed proxy
Reversed proxy is a thing which let’s you to access internal resources of your NAS by domain name. Let’s set it up.
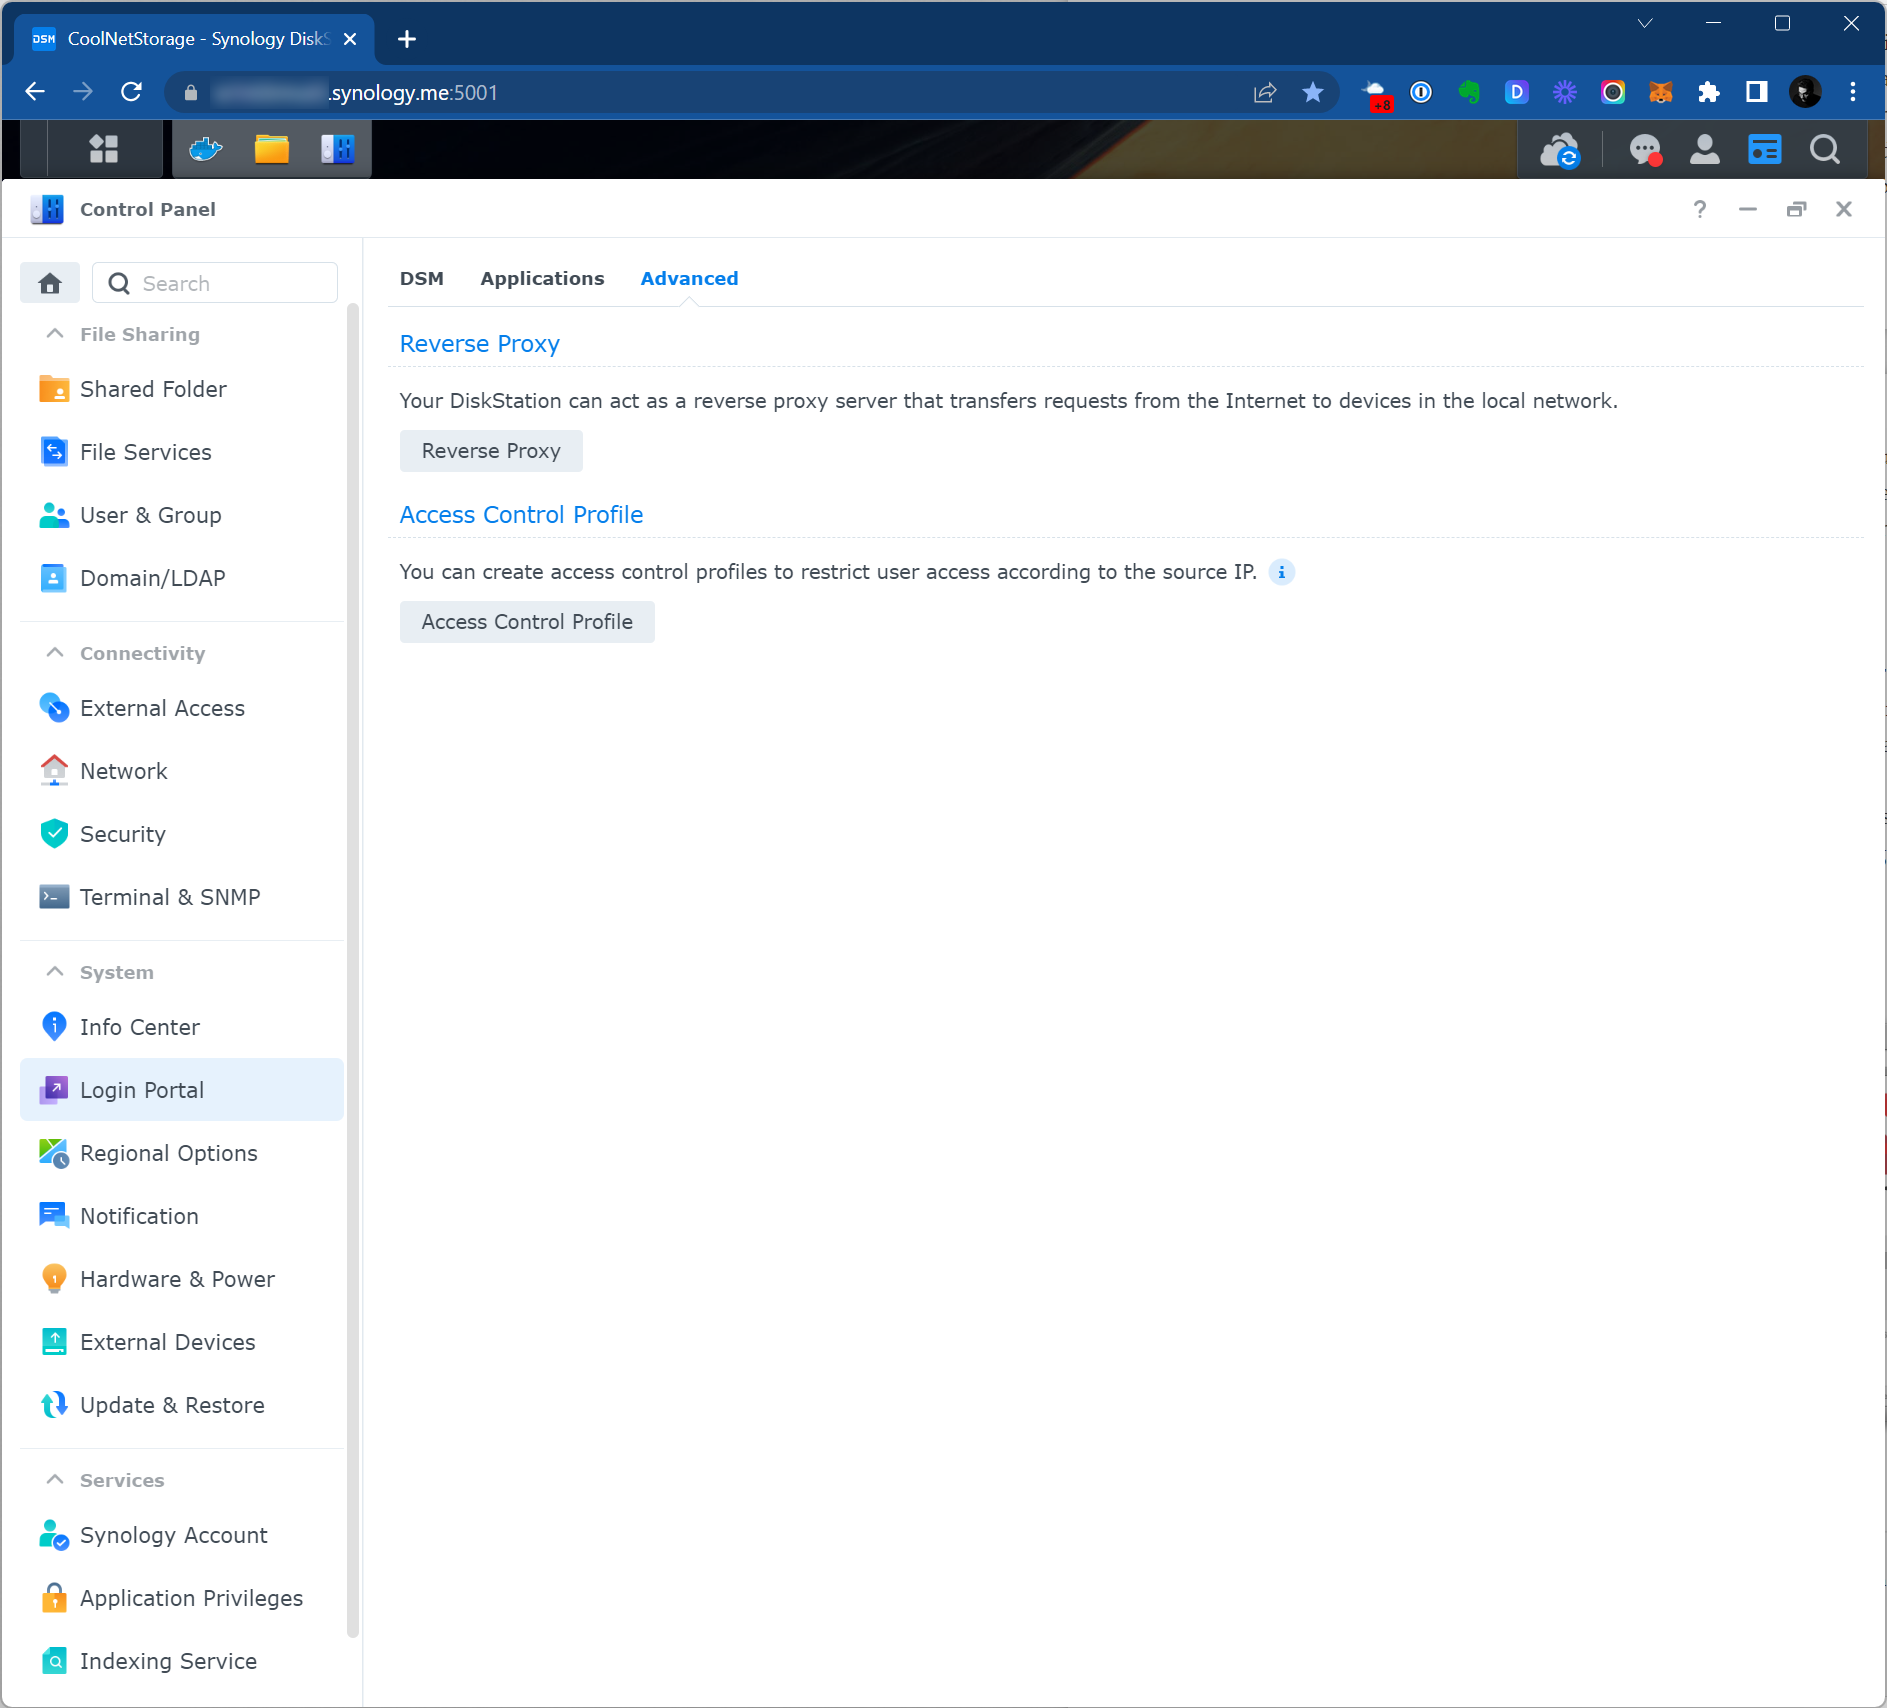
Go to Control Panel app and find the Login Portal part. Yep, reversed proxy settings live here. In Advanced tab. Nope, I am not insane. Is Synology sane? Well, considering this UX – it is a good question.
And I am not joking – just have a look.
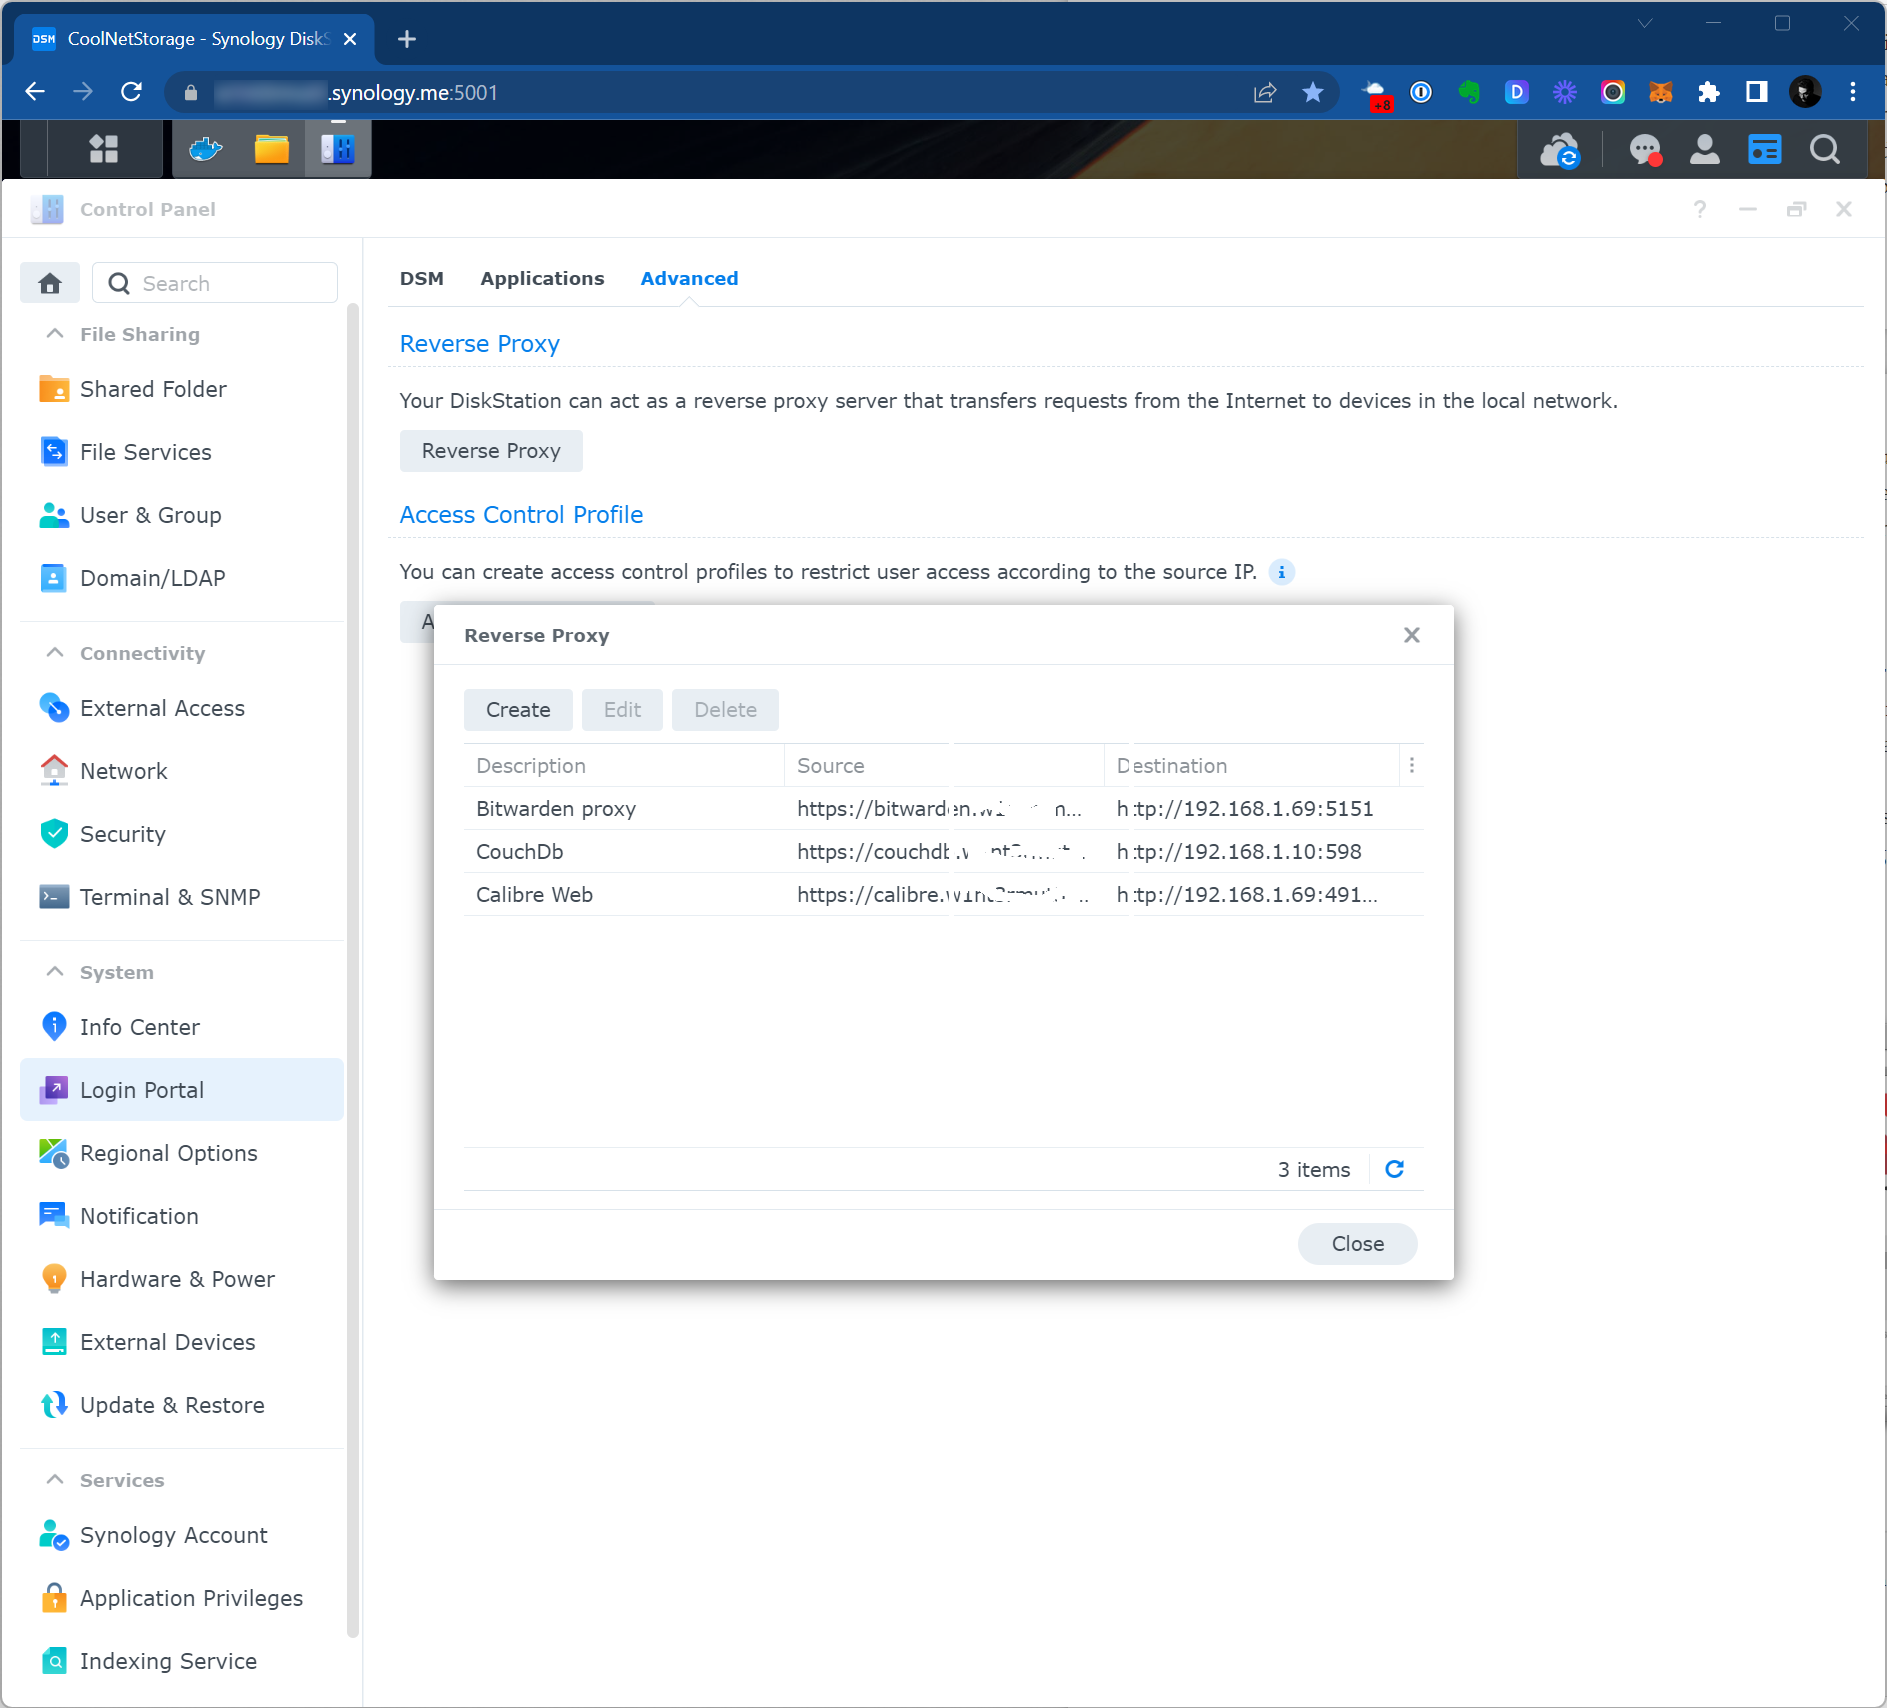
Click on Reverse Proxy and see the list of the already set up proxies. I’ve already set it up, so we would create a new one together parallel to the one I’ve already done.
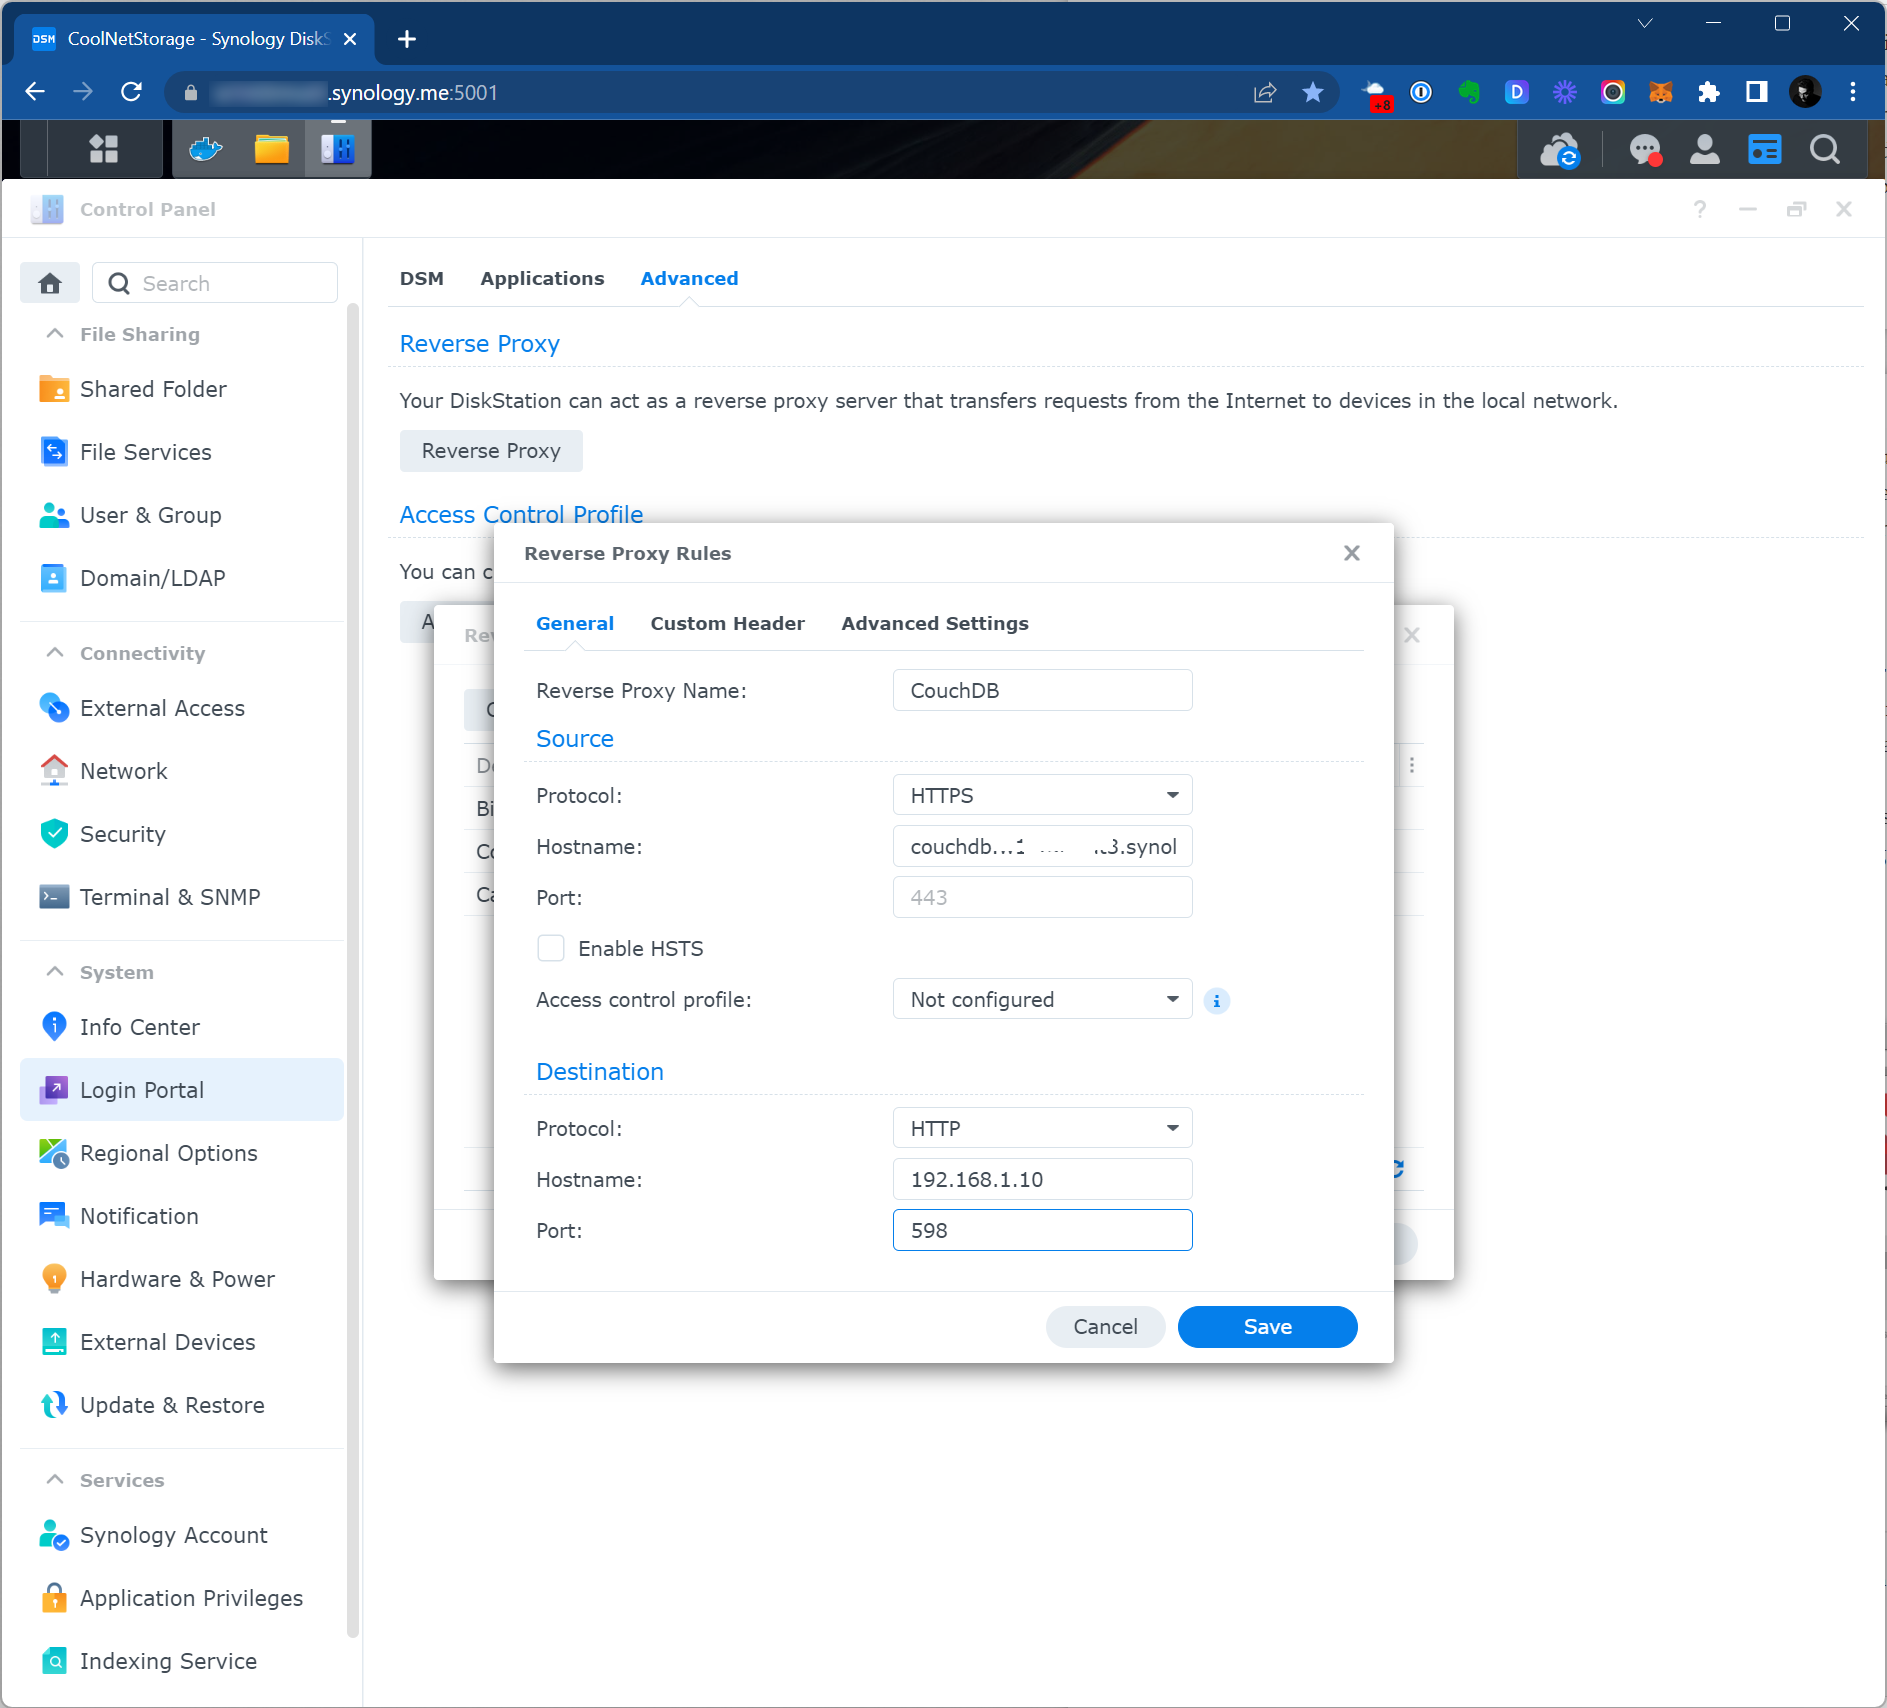
Let’s fill in the form.
- Source
Reverse Proxy Name- Very simple, just any meaningful name
Protocol- We need
HTTPS
- We need
Hostname- I assume that you have set up DDNS and your NAS is accessible from outside. I am using Synology DDNS, so my NAS have domain name – NAS.synology.me. So for the need of reversed proxy we can use a subdomain – e.g. couchdb.NAS.synology.me.
Port- 443 for HTTPS
- Destination
Protocol- HTTP
Hostname- Use the local IP of your NAS – for me it is 192.168.1.10
Port- Use the port which you set up – we used 599 above.
Create certificate for reversed proxy domain
Let’s go to Security tab in Control Panel and there go to Certificate tab.
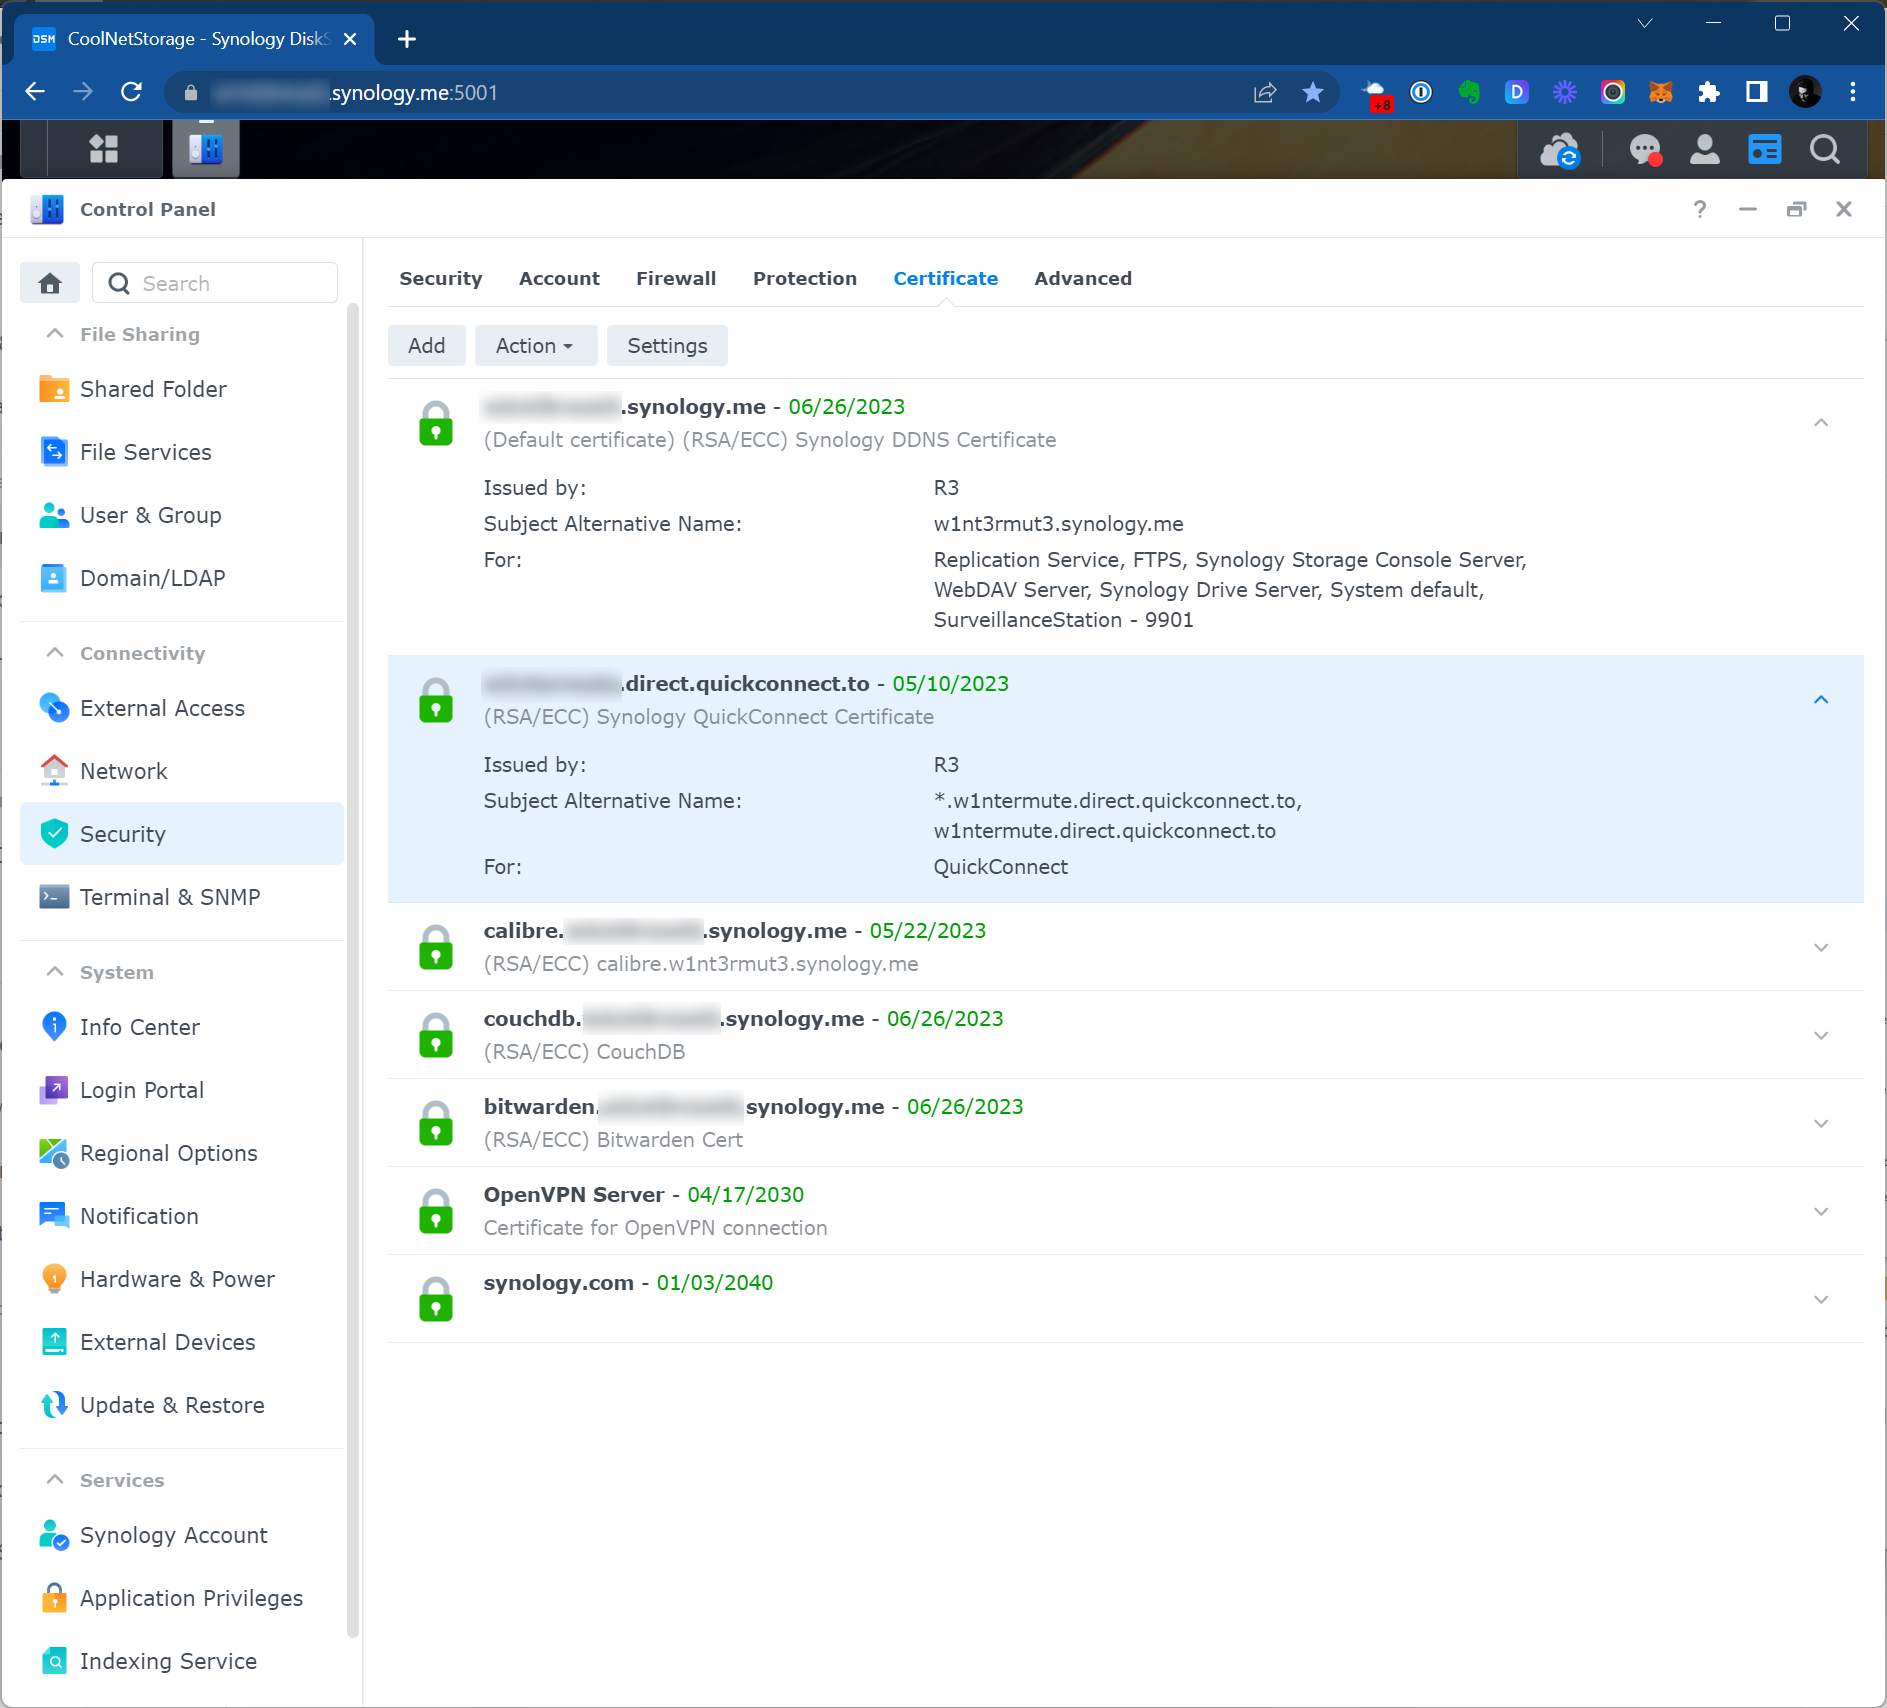
Here we need to create a new certificate. Click the Add button.
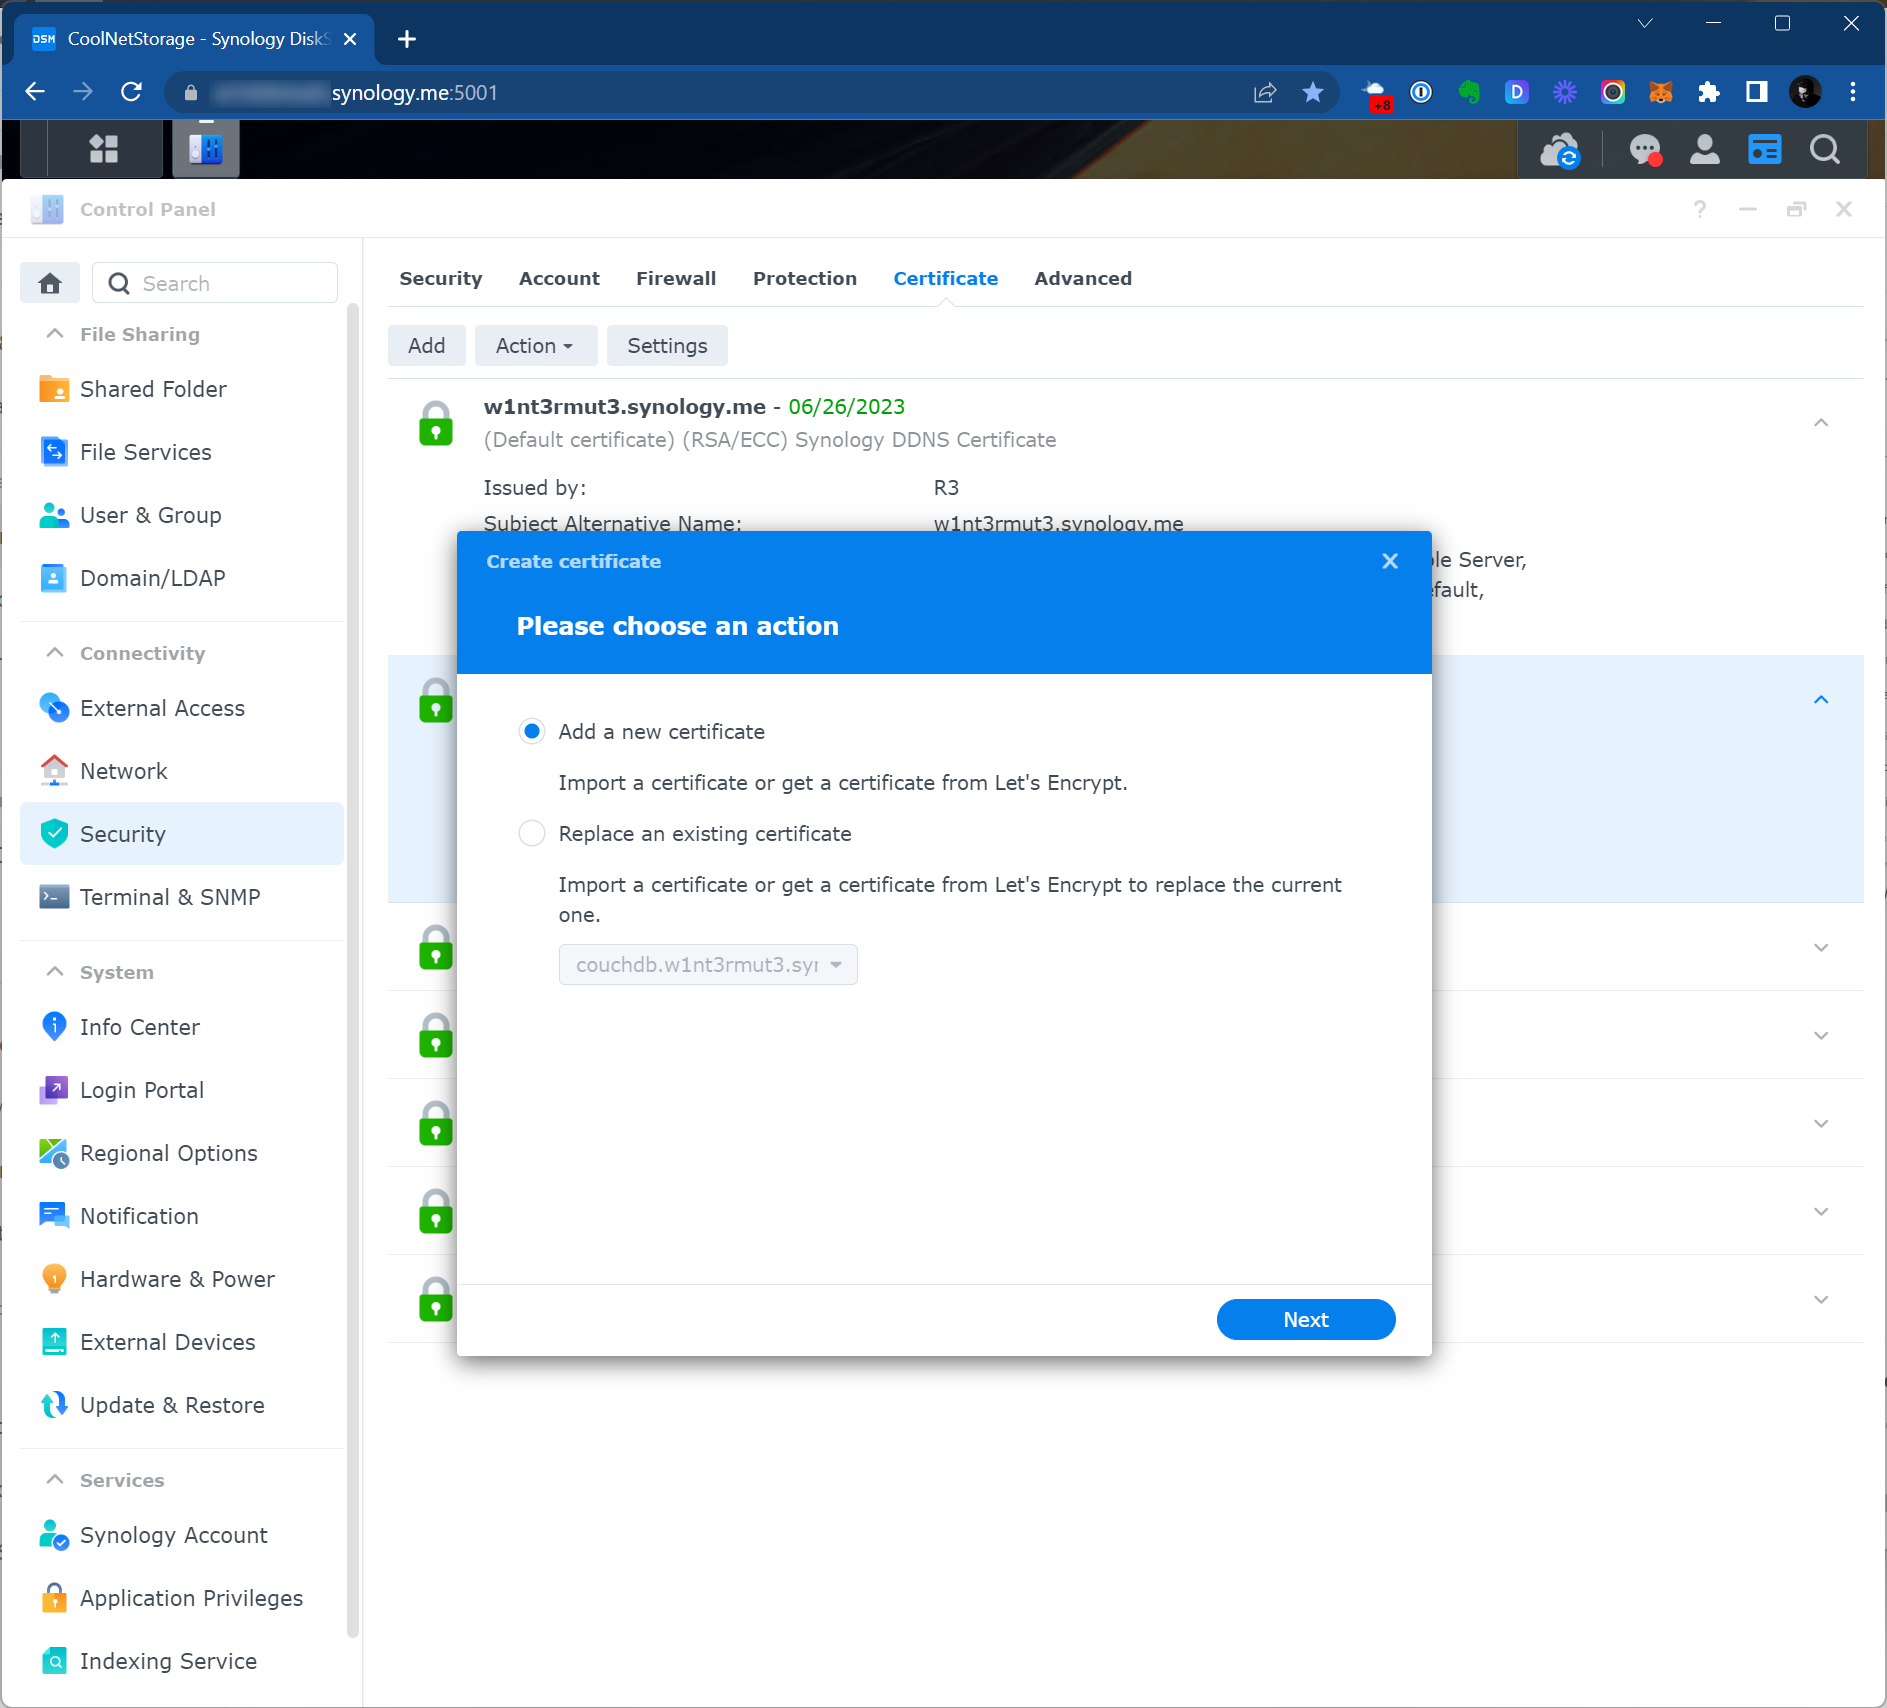
Choose Add a new certificate option.
- Description may be any, just put in a way to not mix up later
- Choose the option
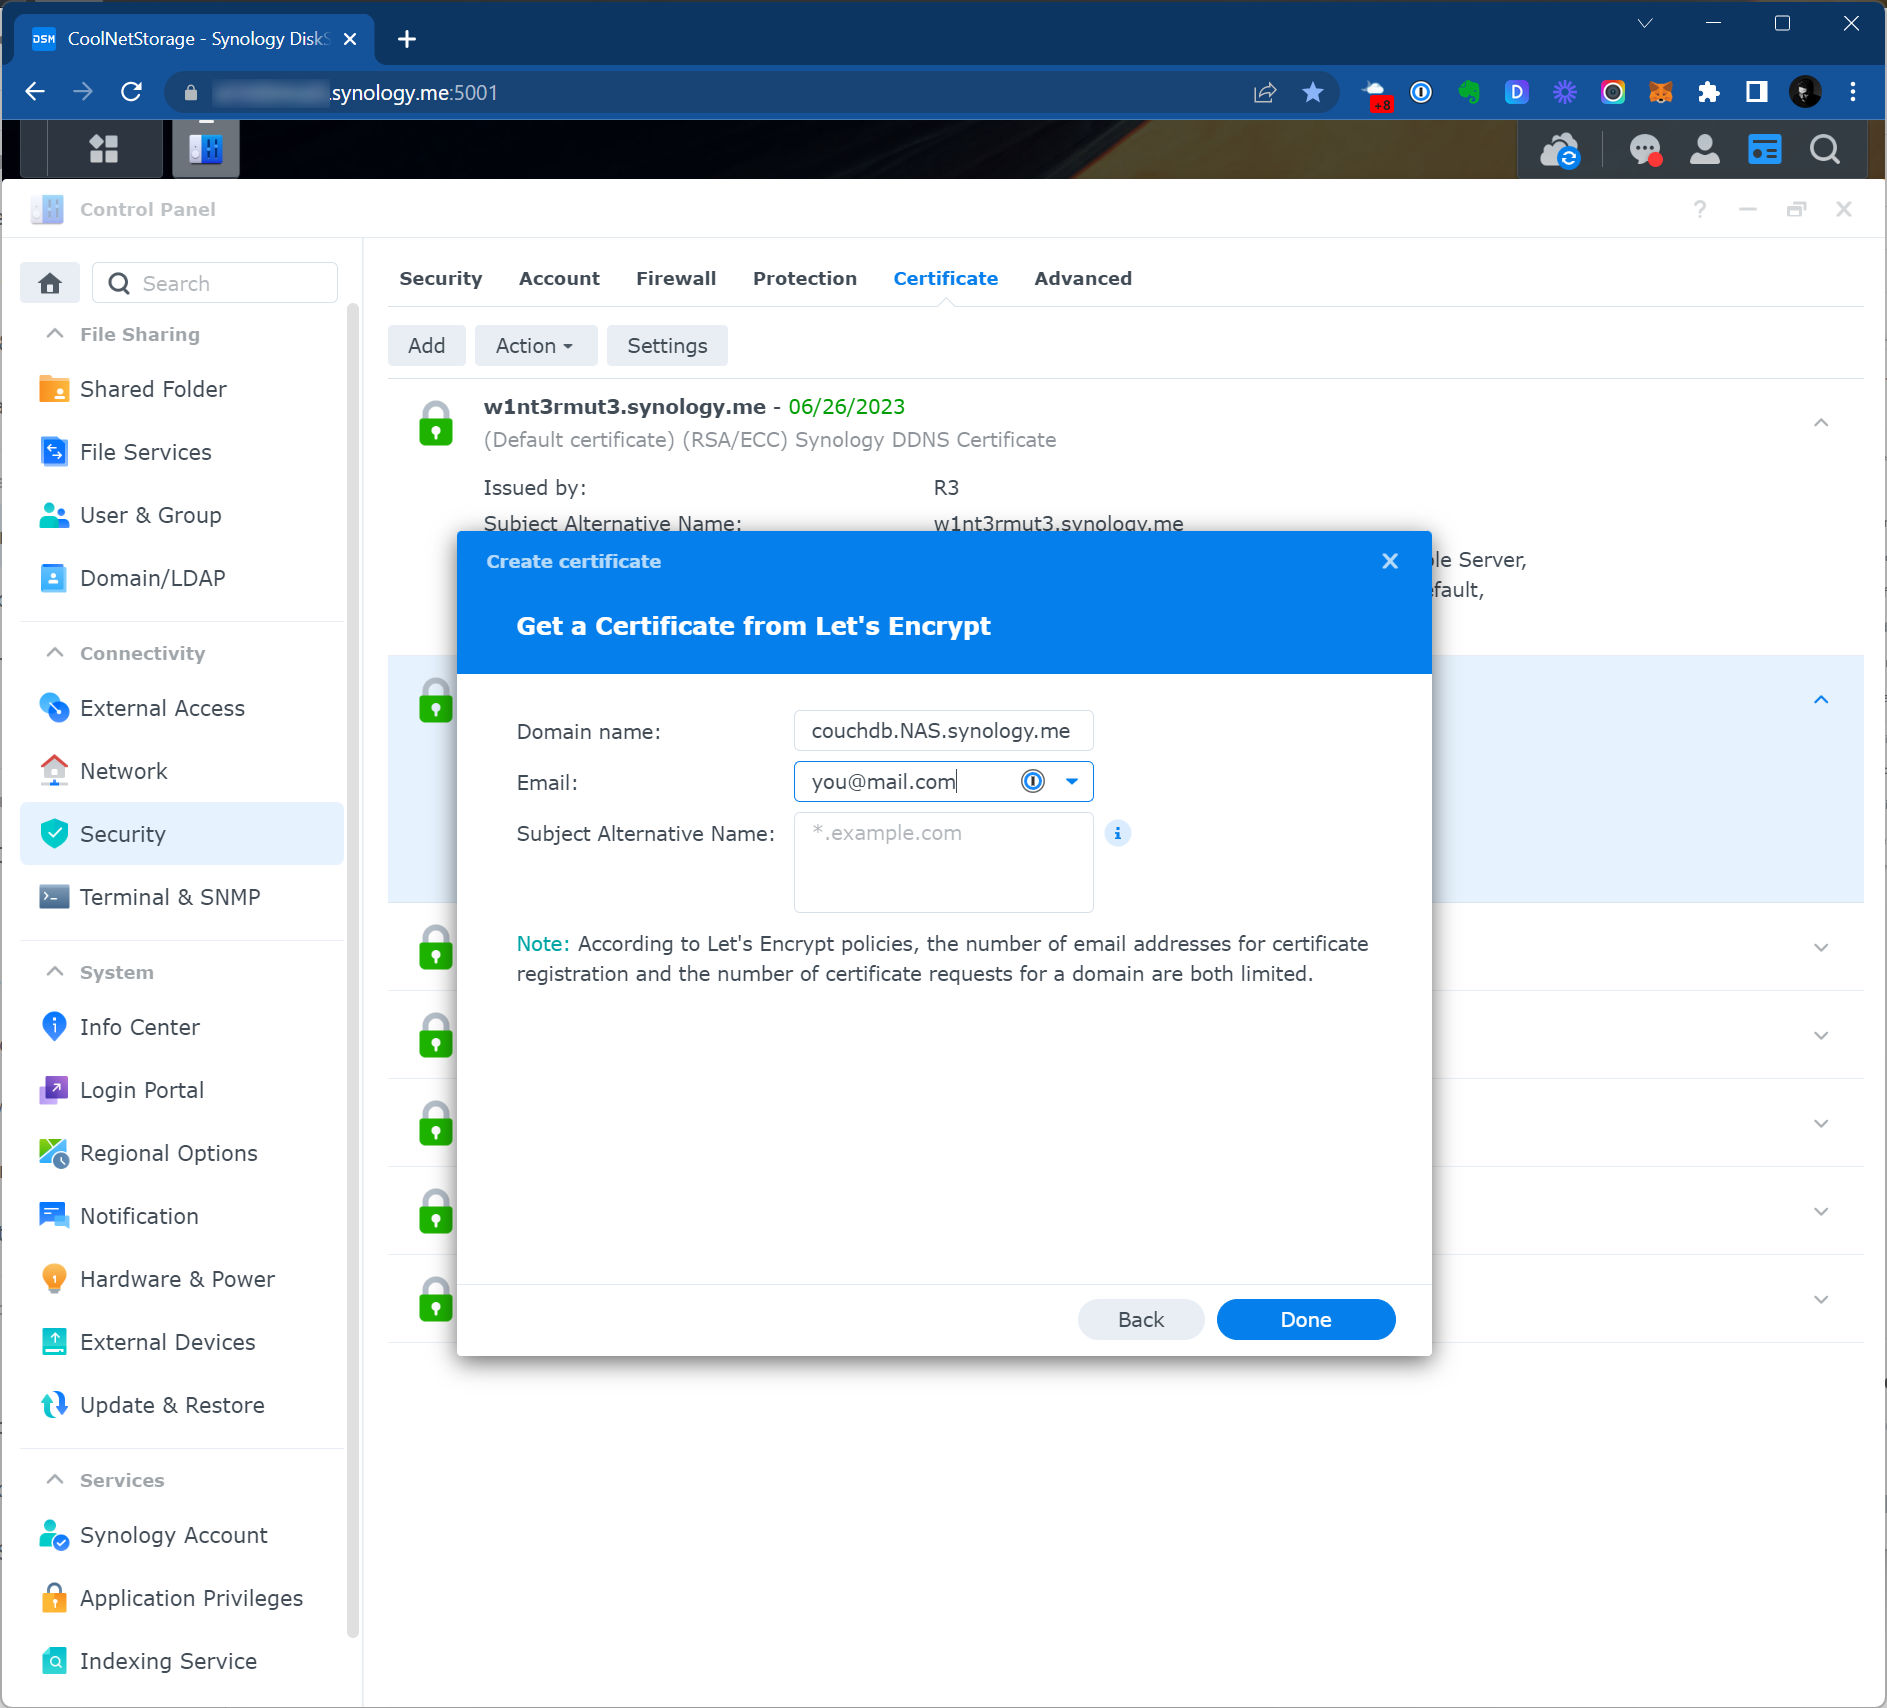
Get a certificate from Let's Encrypt
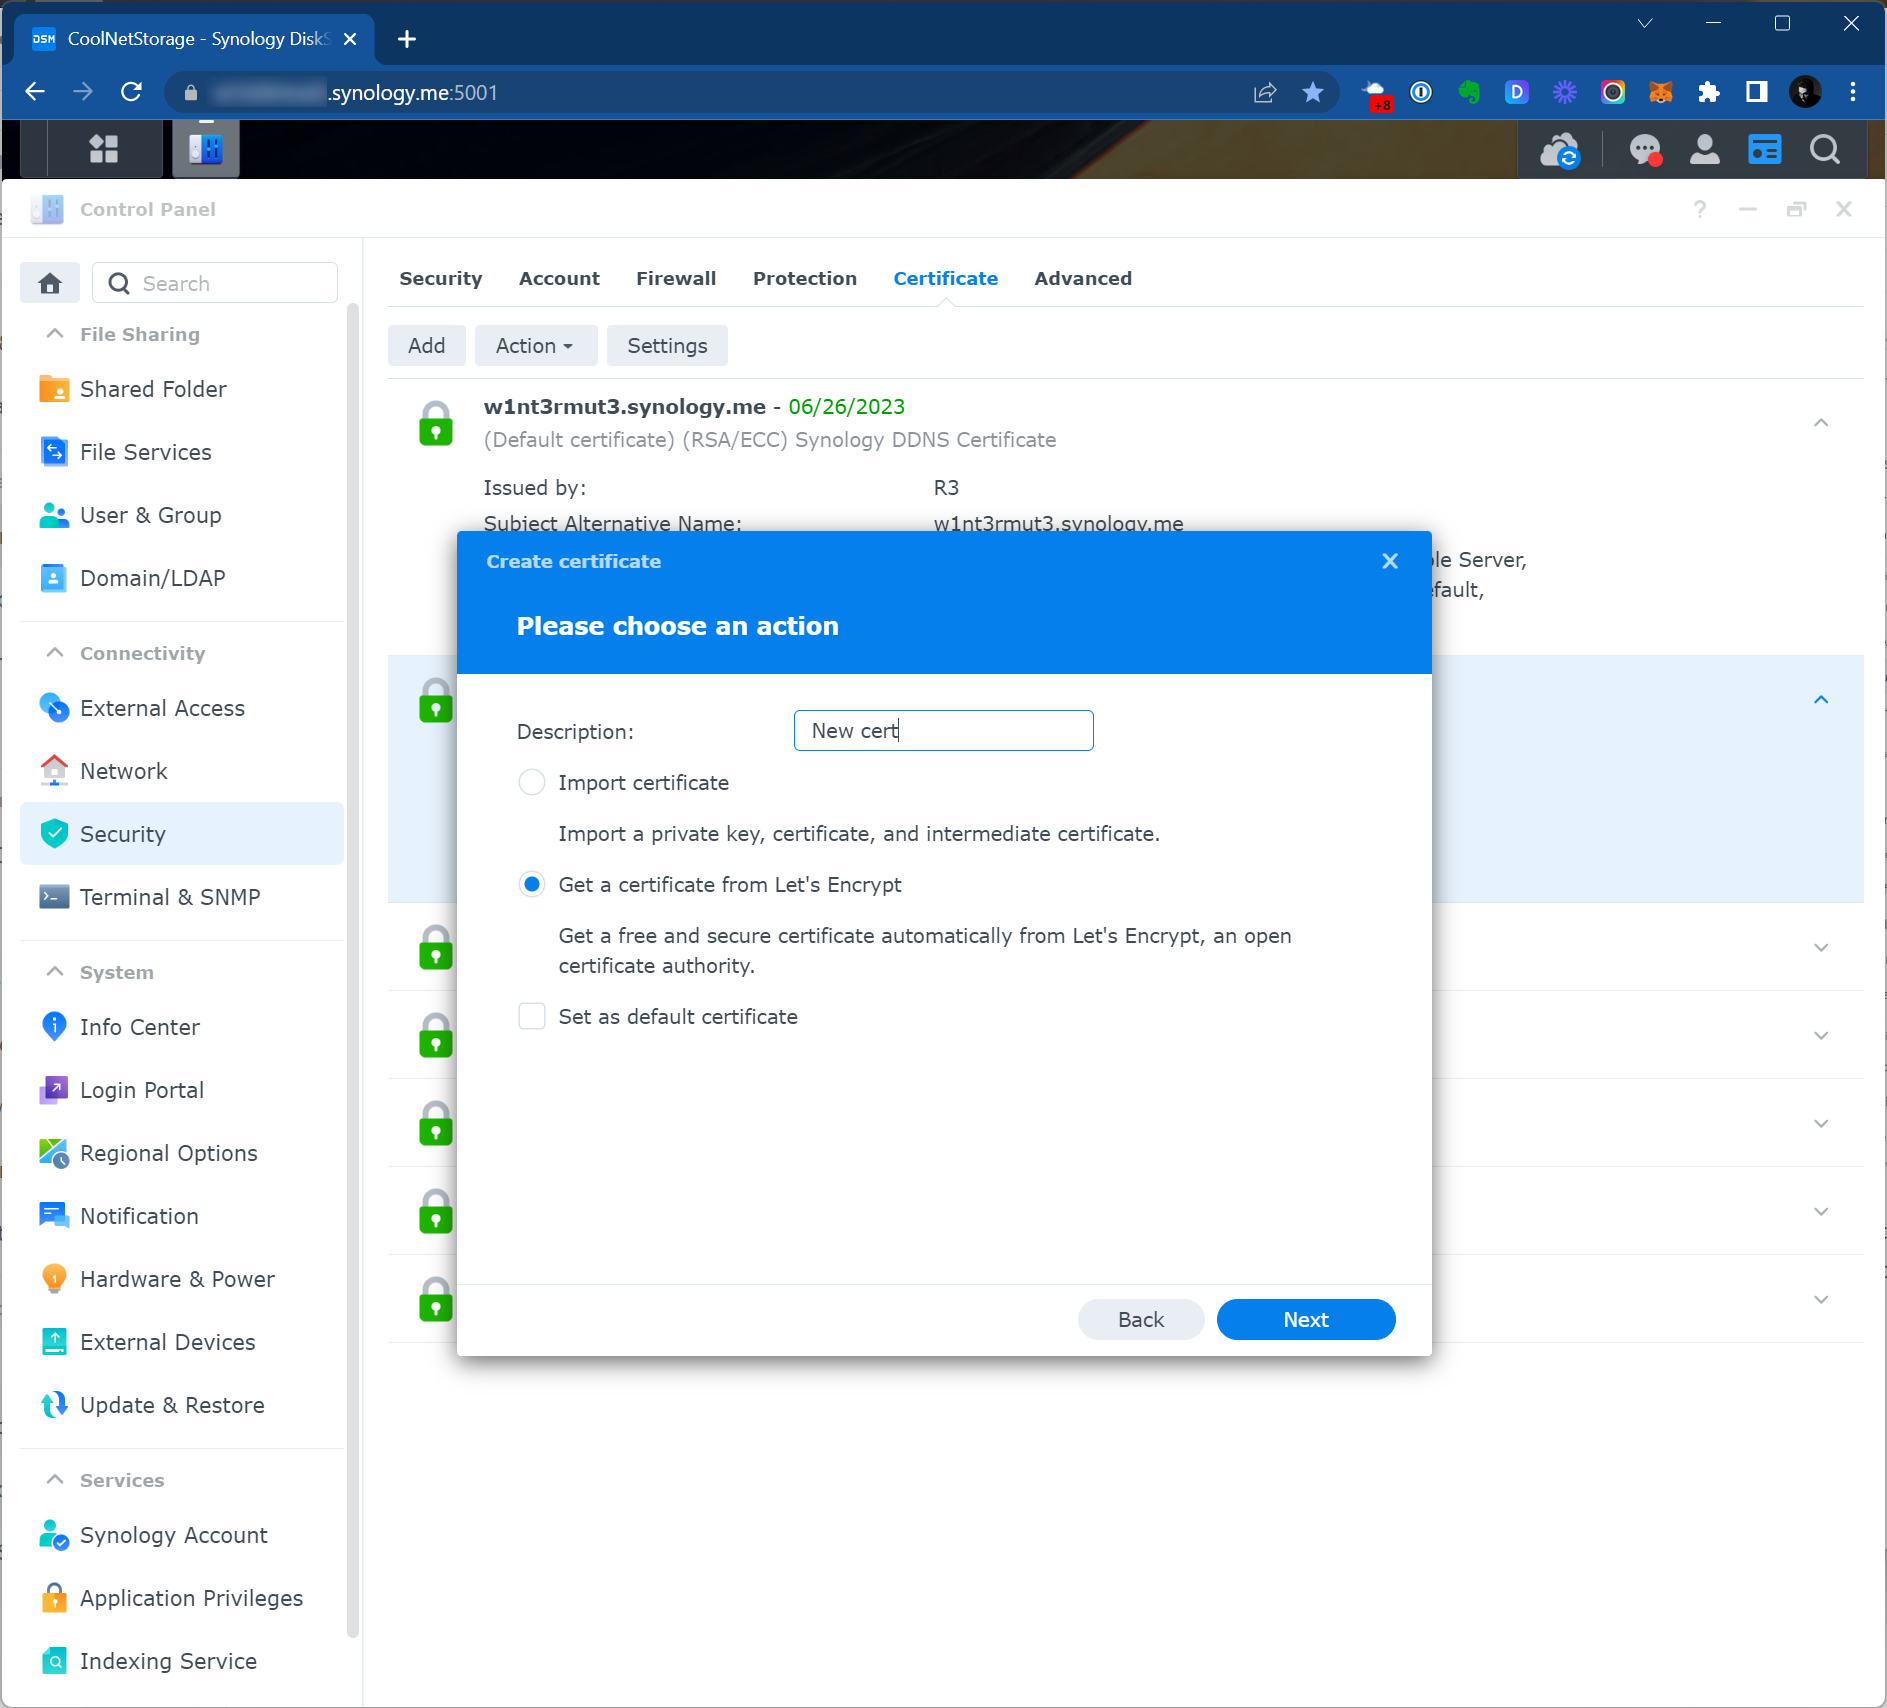
Put the domain name which we used when set up reversed proxy, and use your real email.
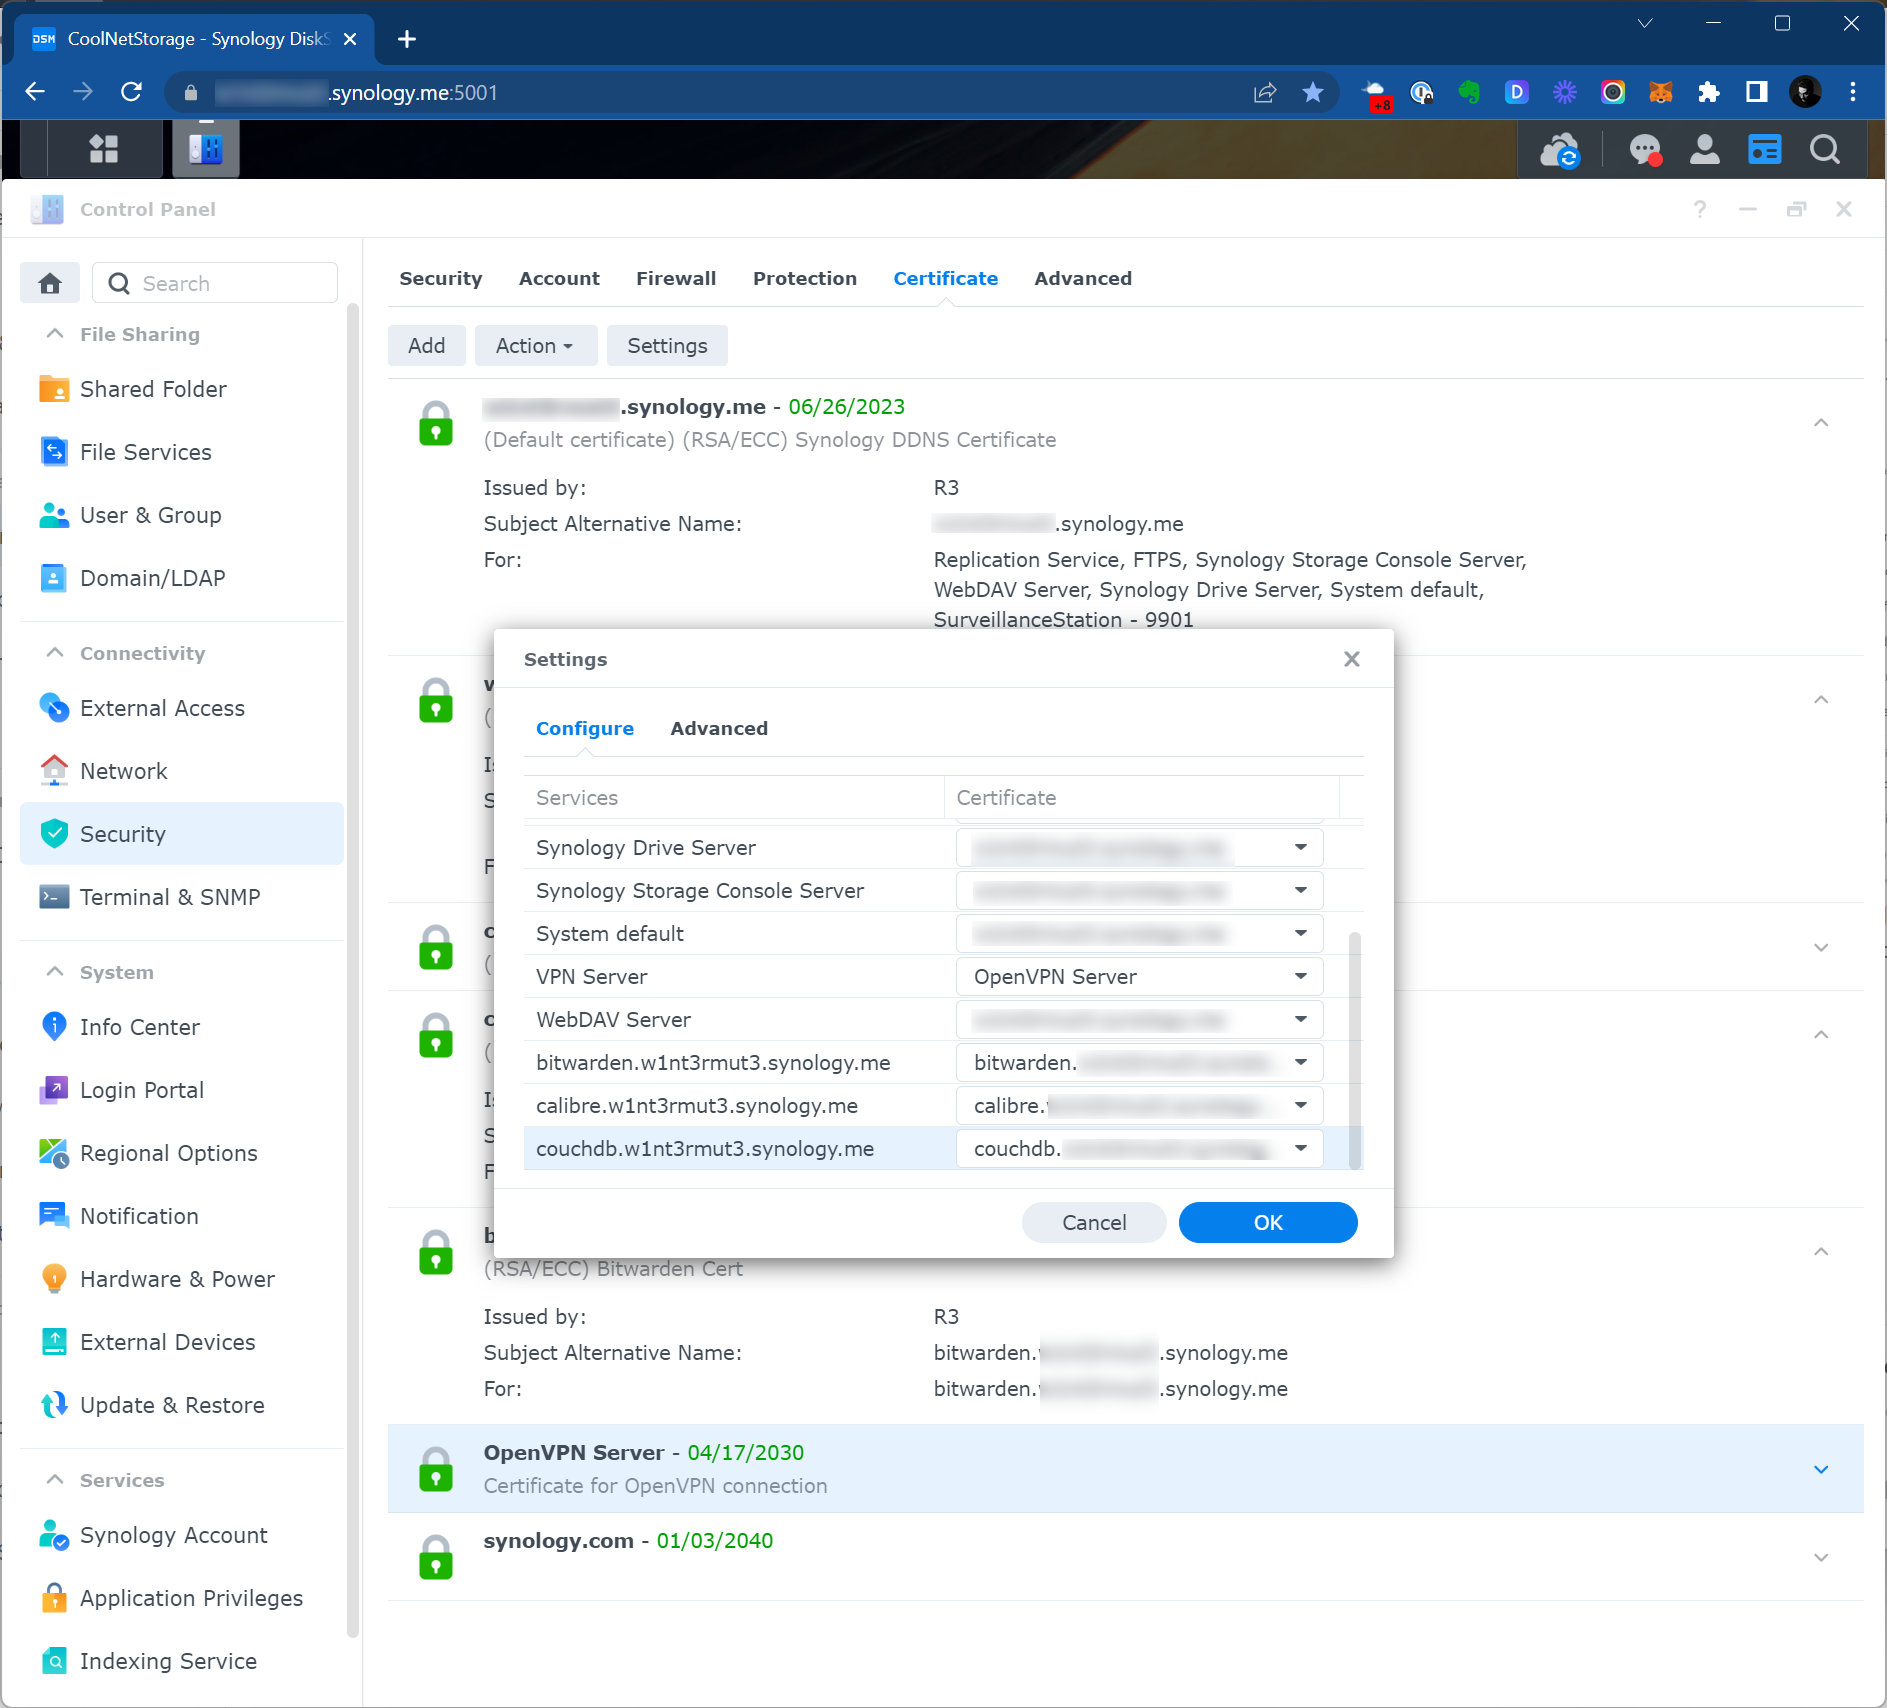
Assign the certificate for reversed proxy domain
The most easy part – just hit Settings button and find the right service and right certificate.
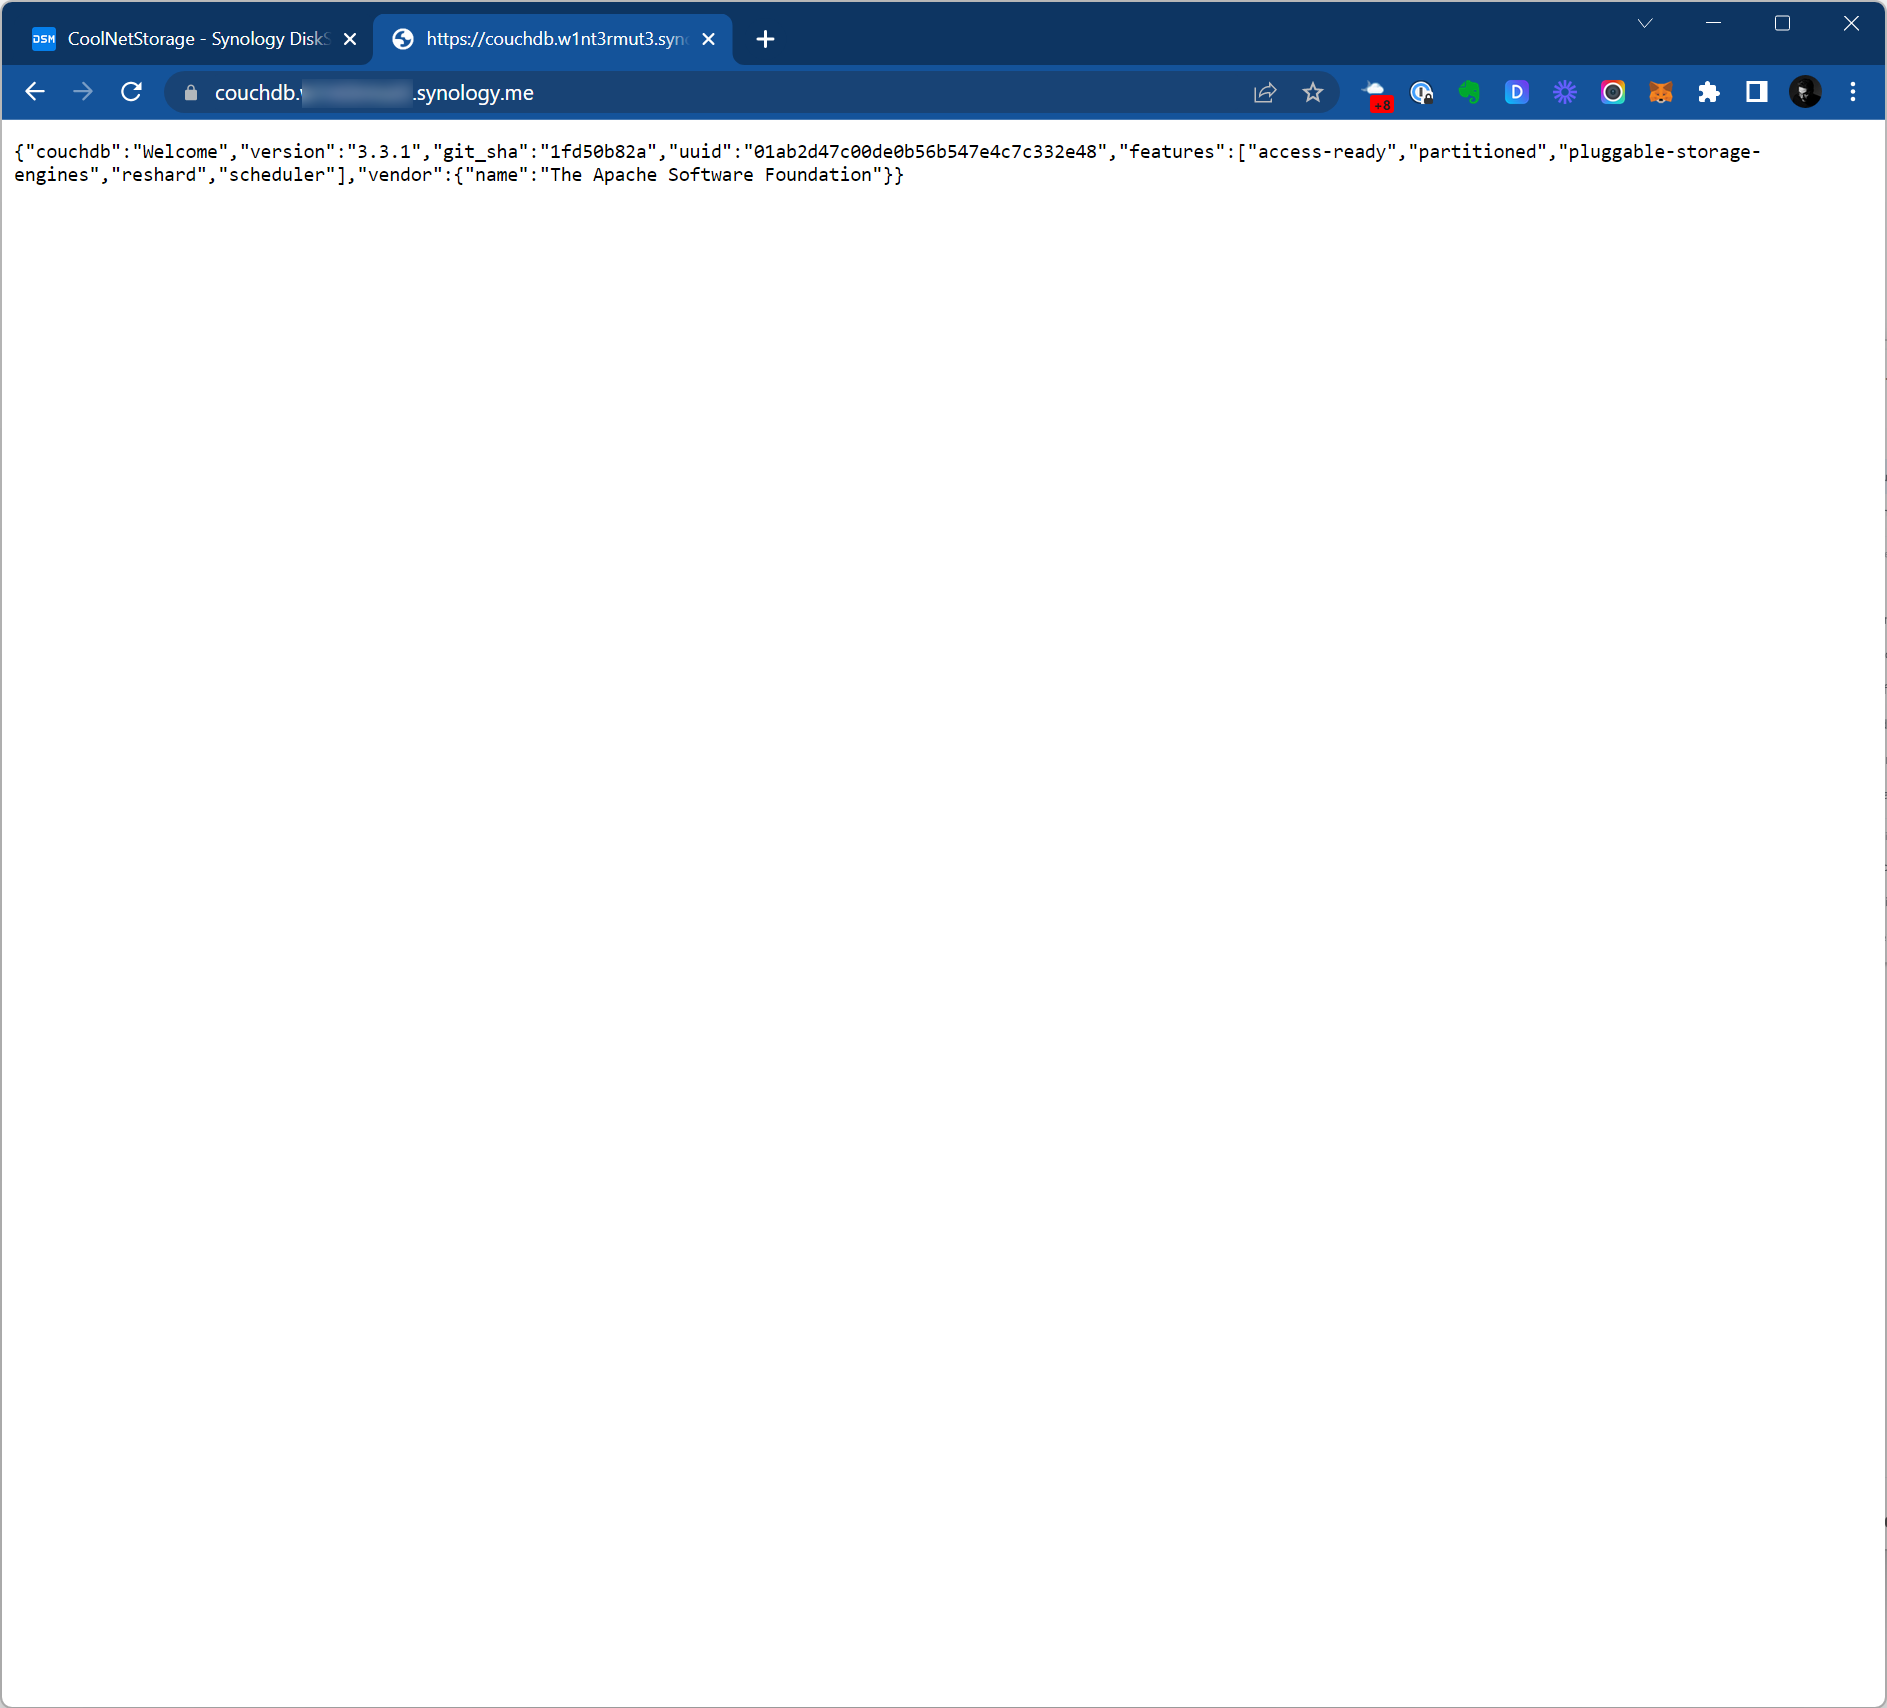
Final check
Jus try to open your domain via https (https://couchdb.Nas.synology.me in the example above) and it should look like this.
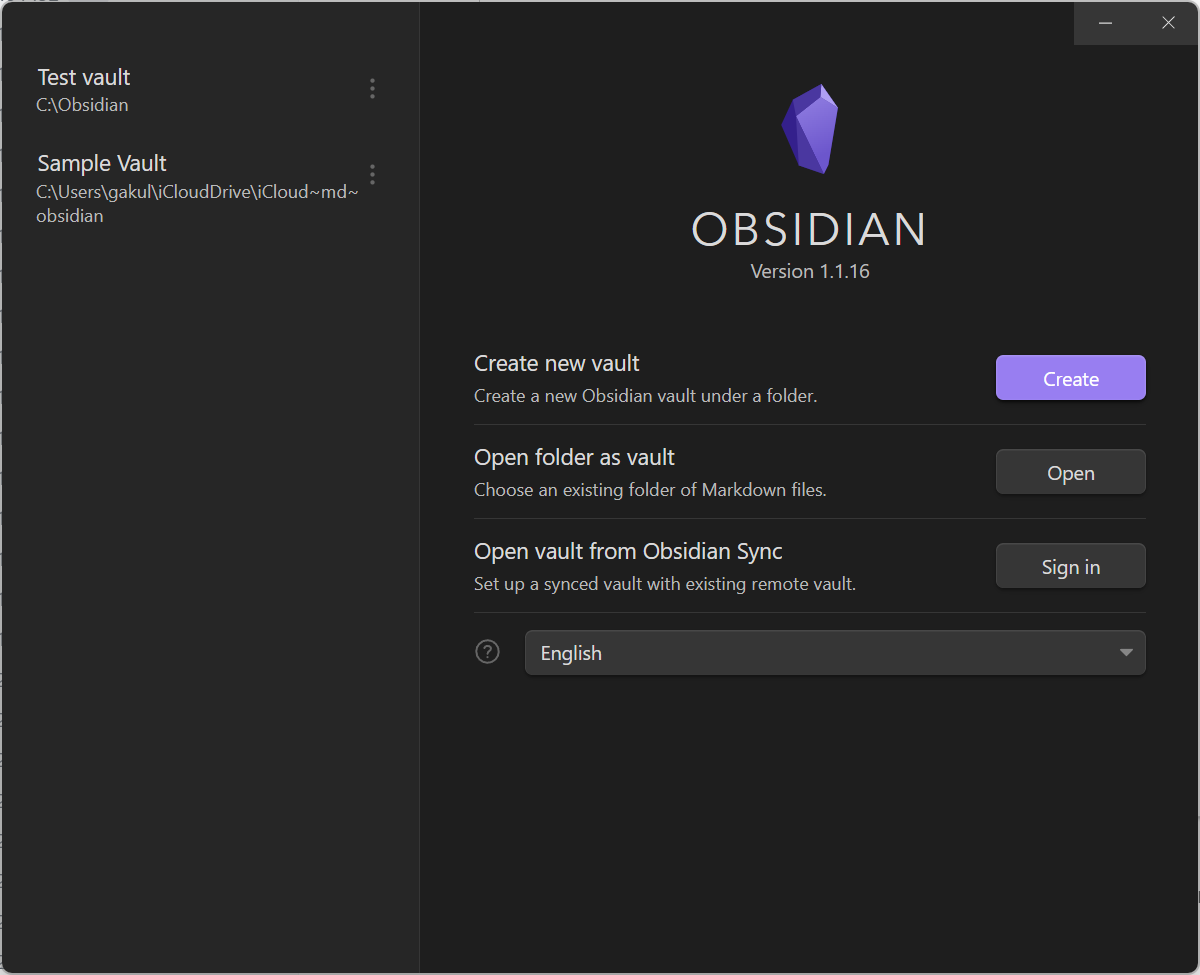
Vault set up on PC
First of all we need to create a brand new vault – I’ve created a folder in the root of C: drive.
Once it is open, go to settings (gear icon in bottom left corner) and go to Community plugins tab and turn them on.
Once it is done, you would be able to browse the community plugins – go there.
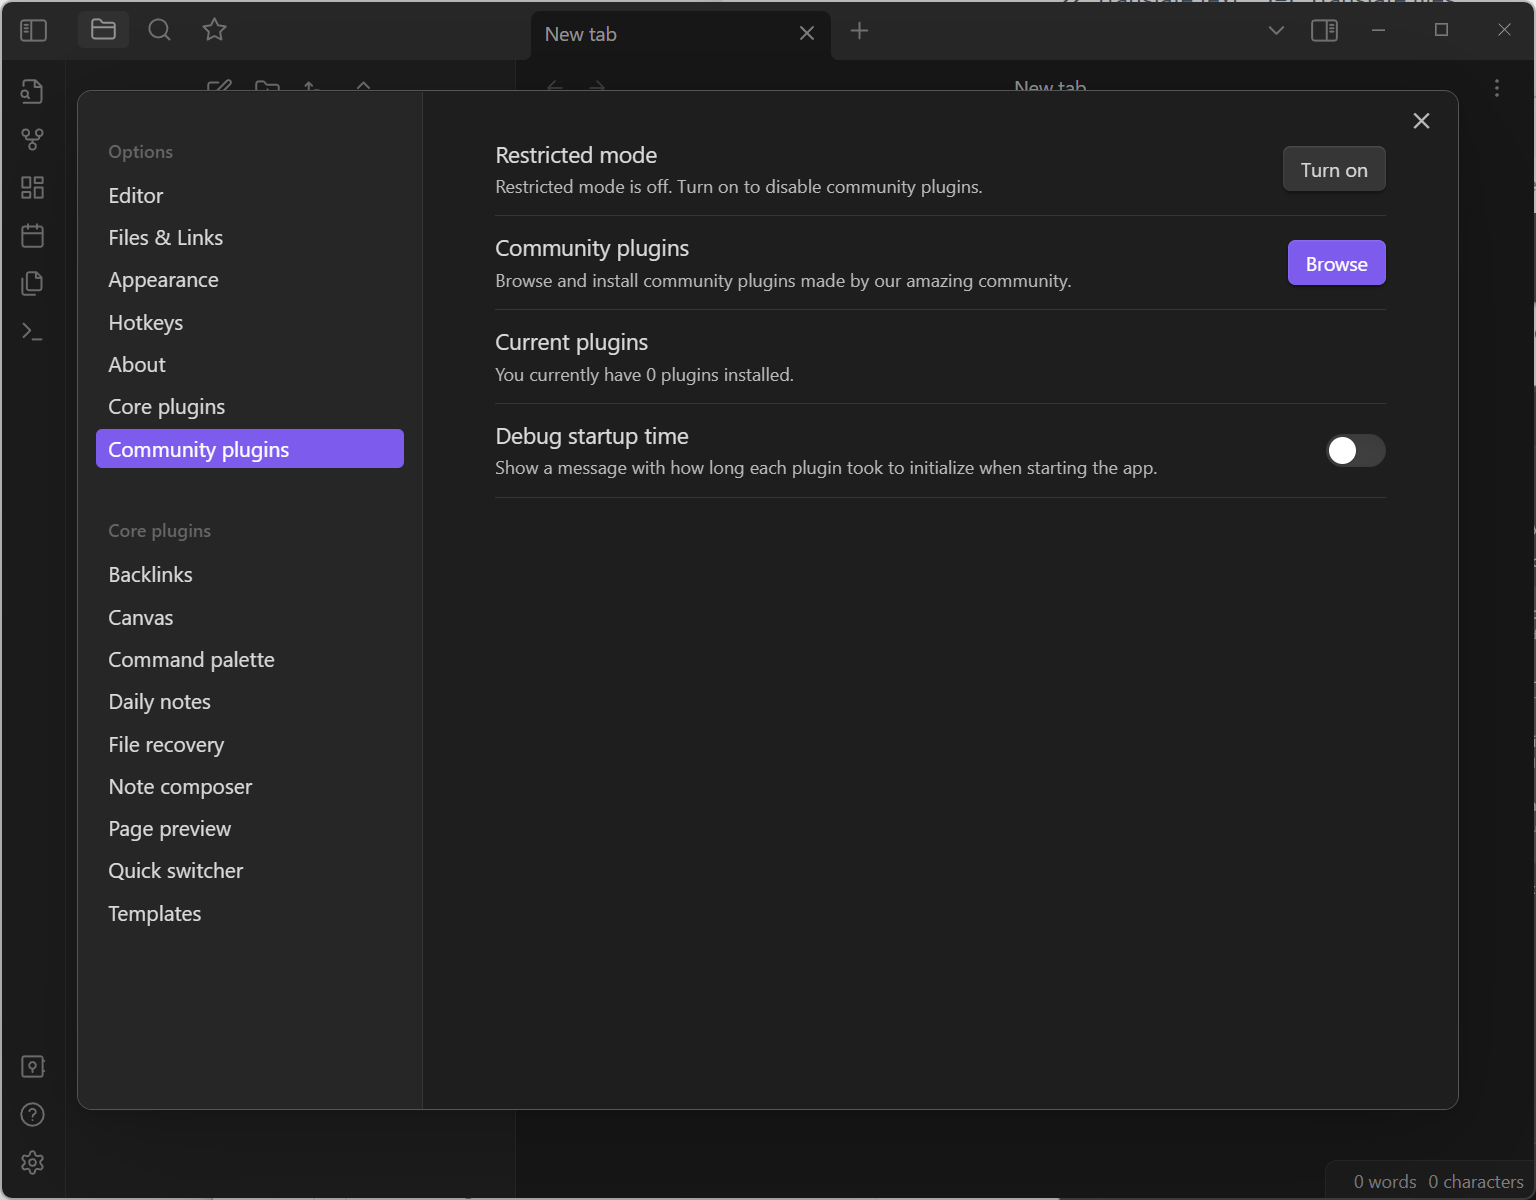
It is like the Appstore for plugins.
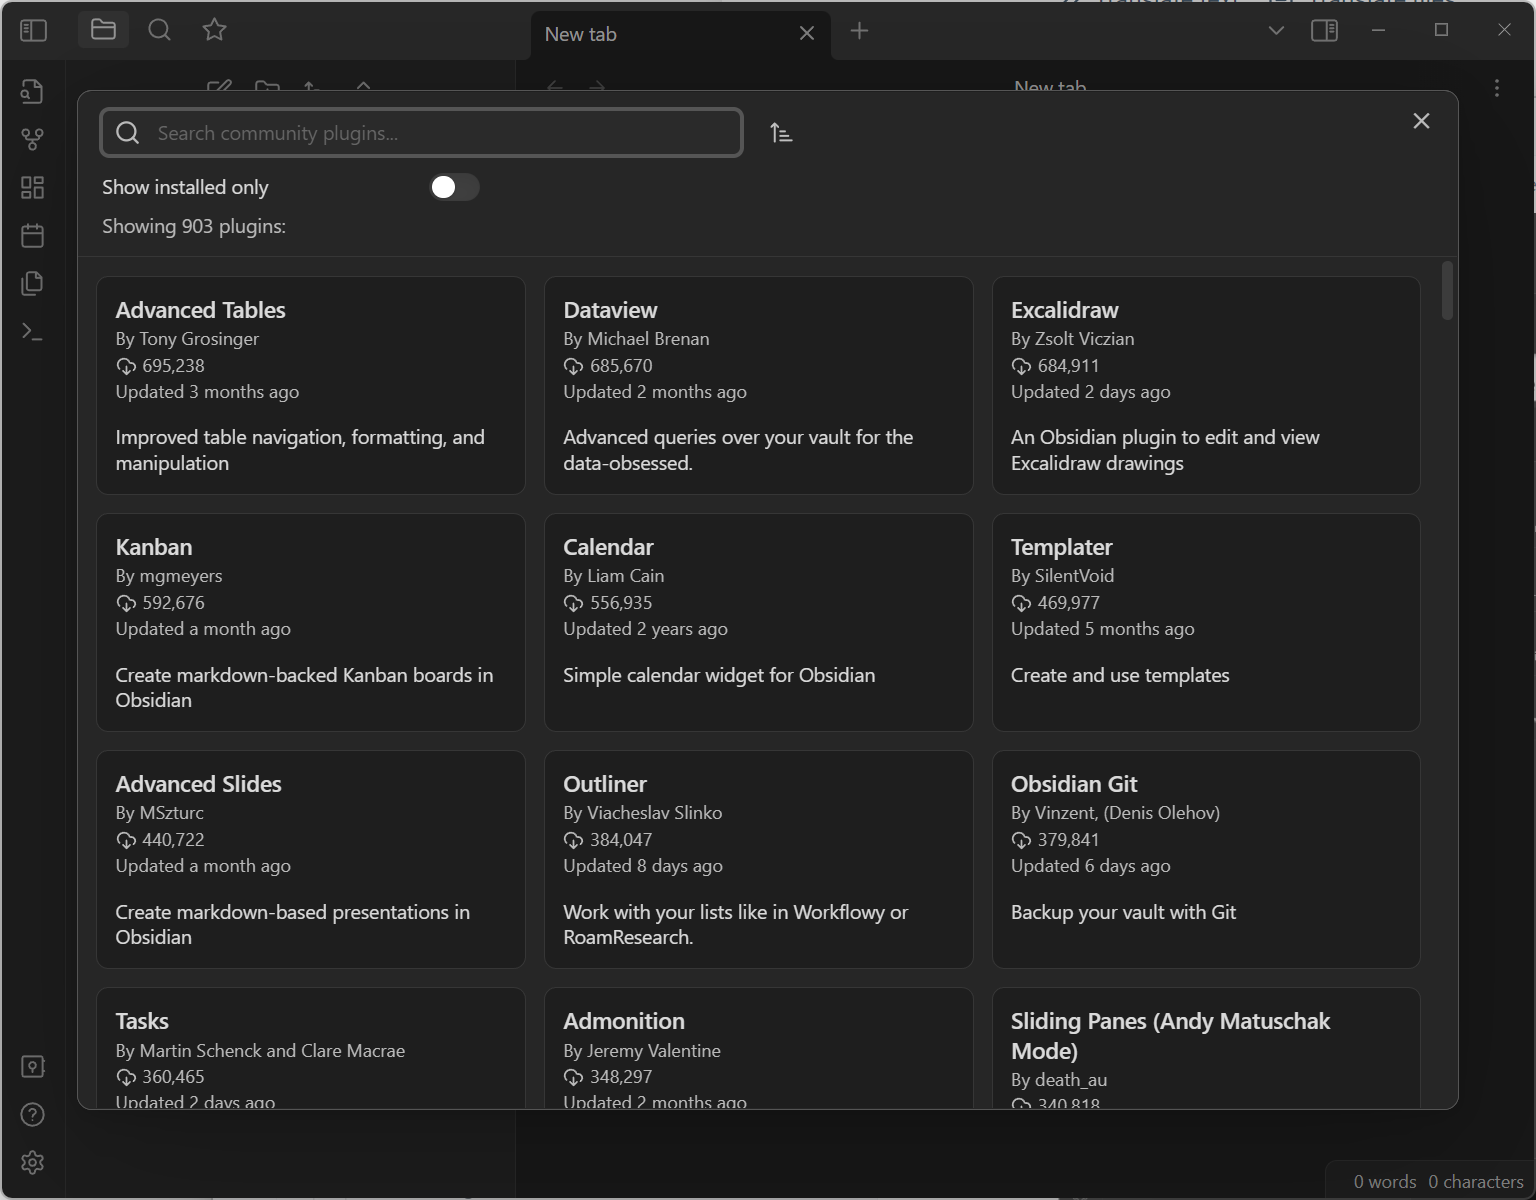
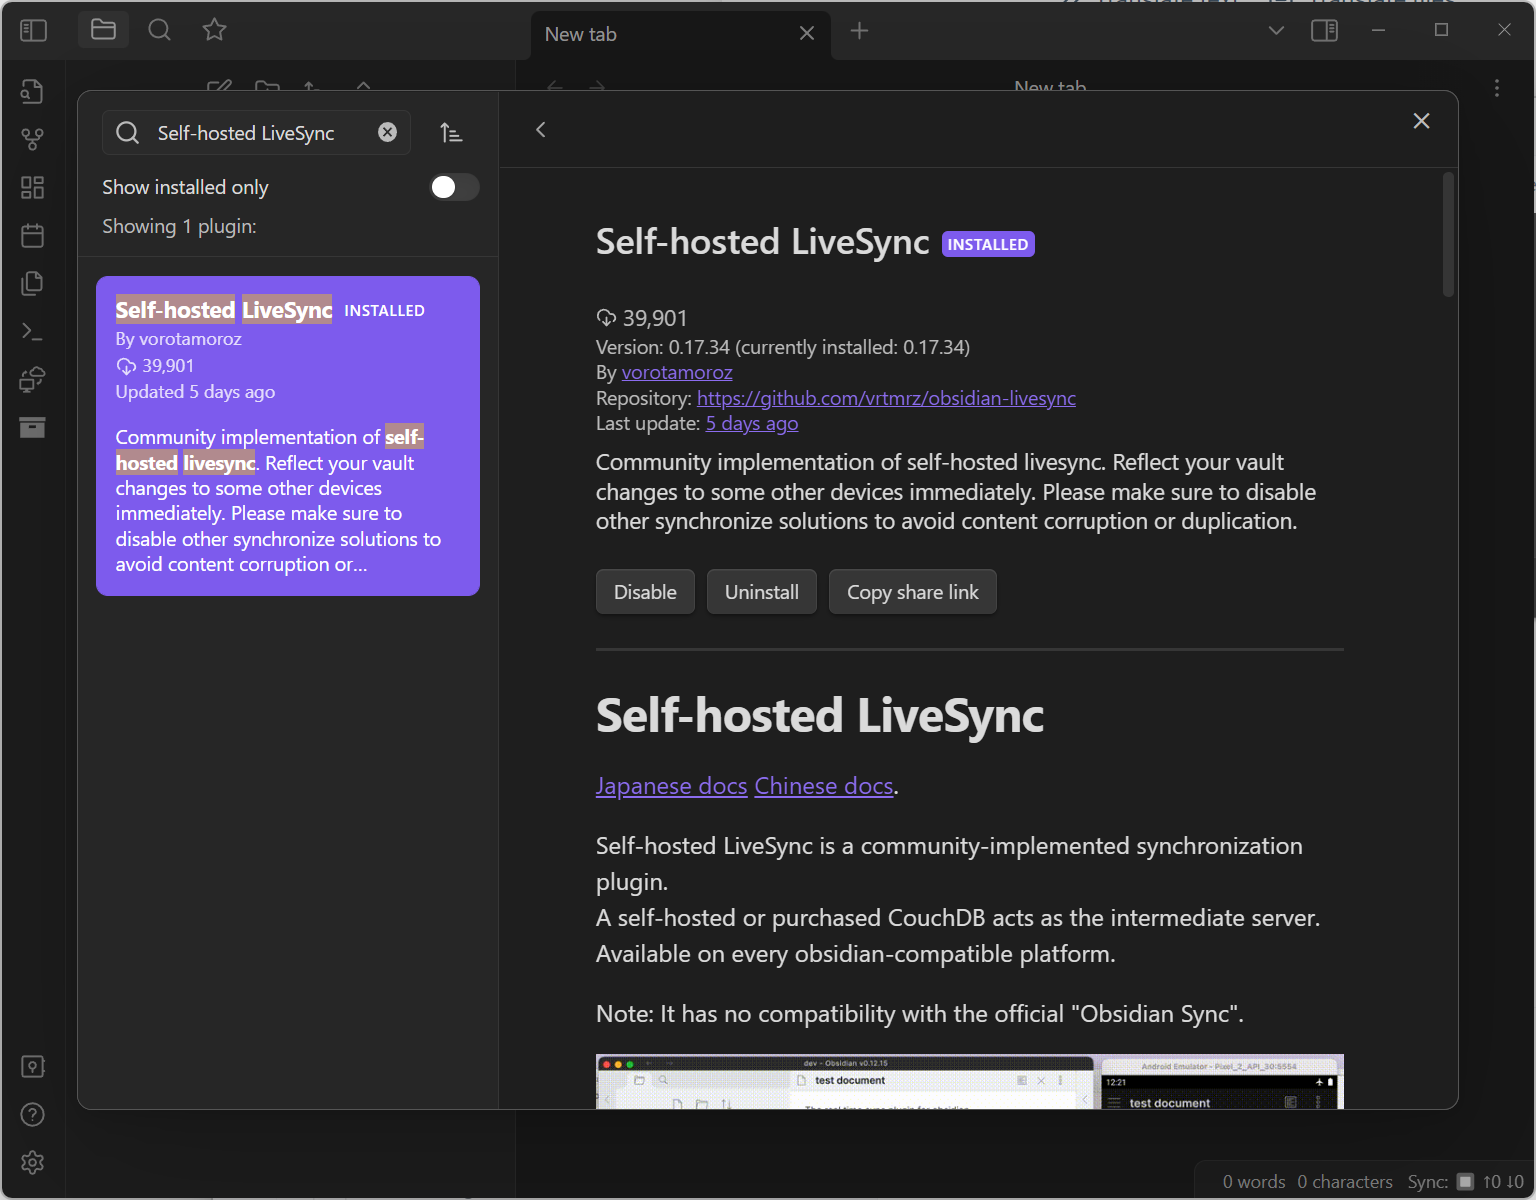
Search for Self-hosted LiveSync and install it.
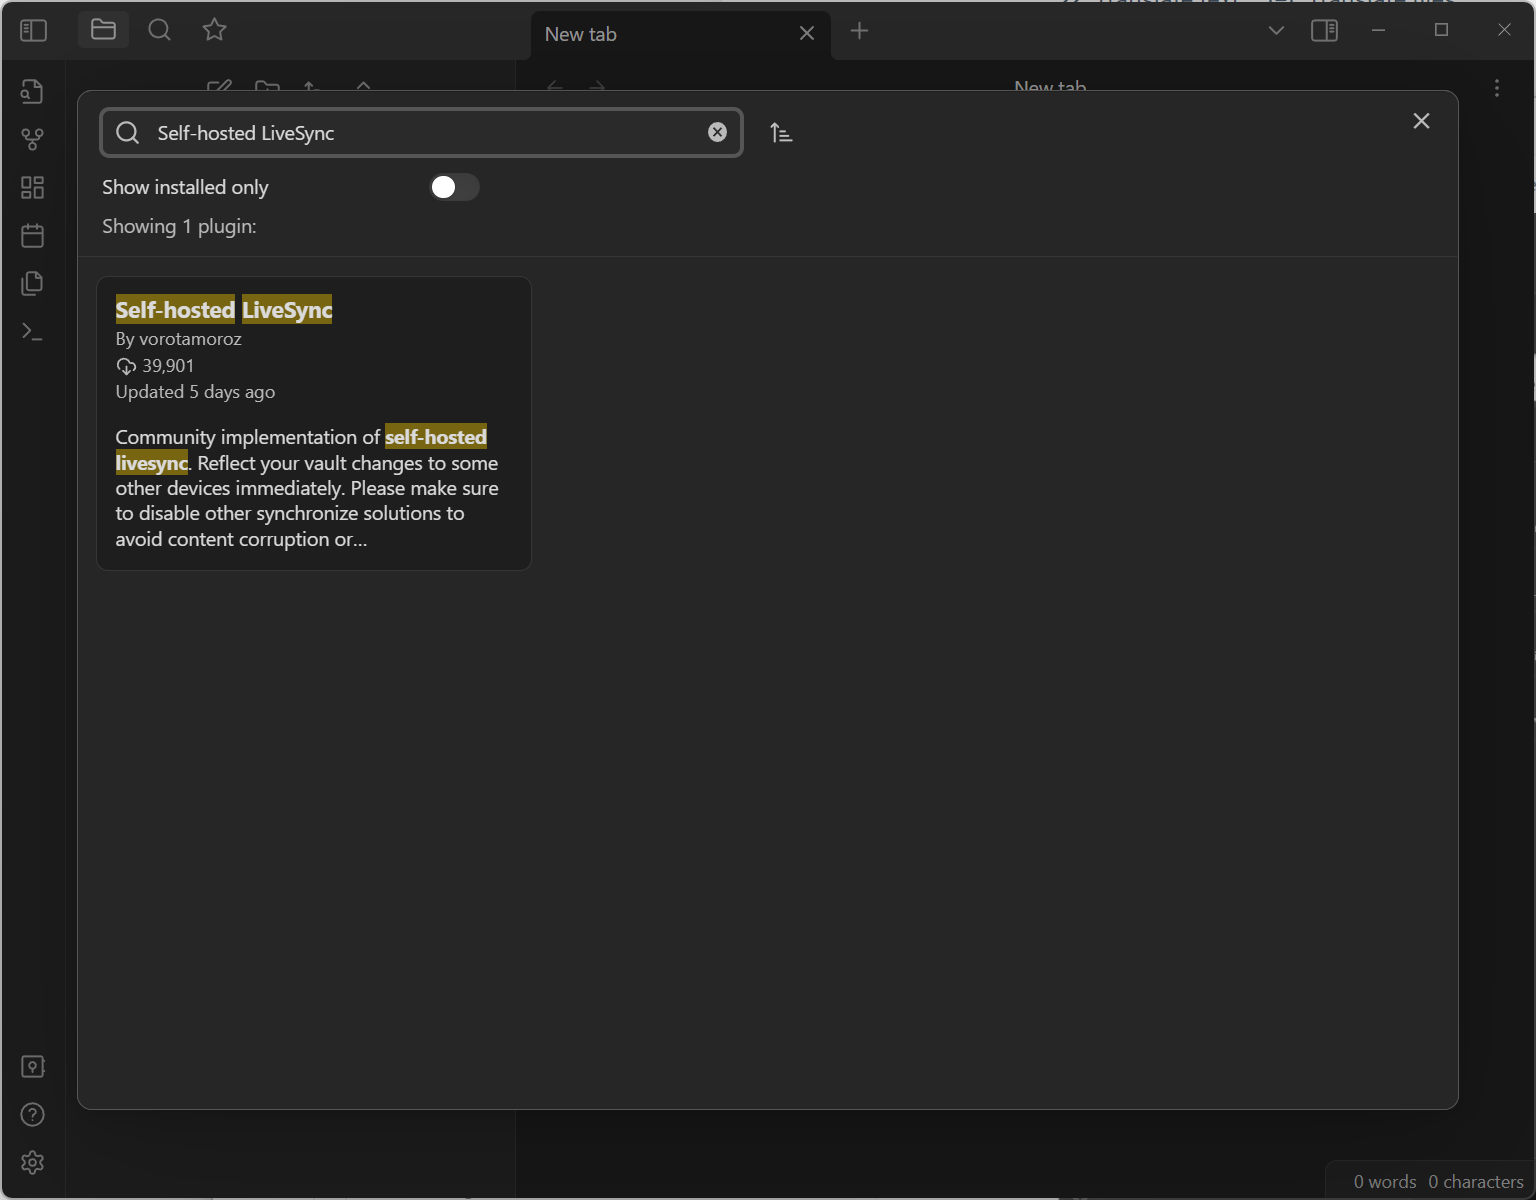
Don’t forget to enable it after the installation.
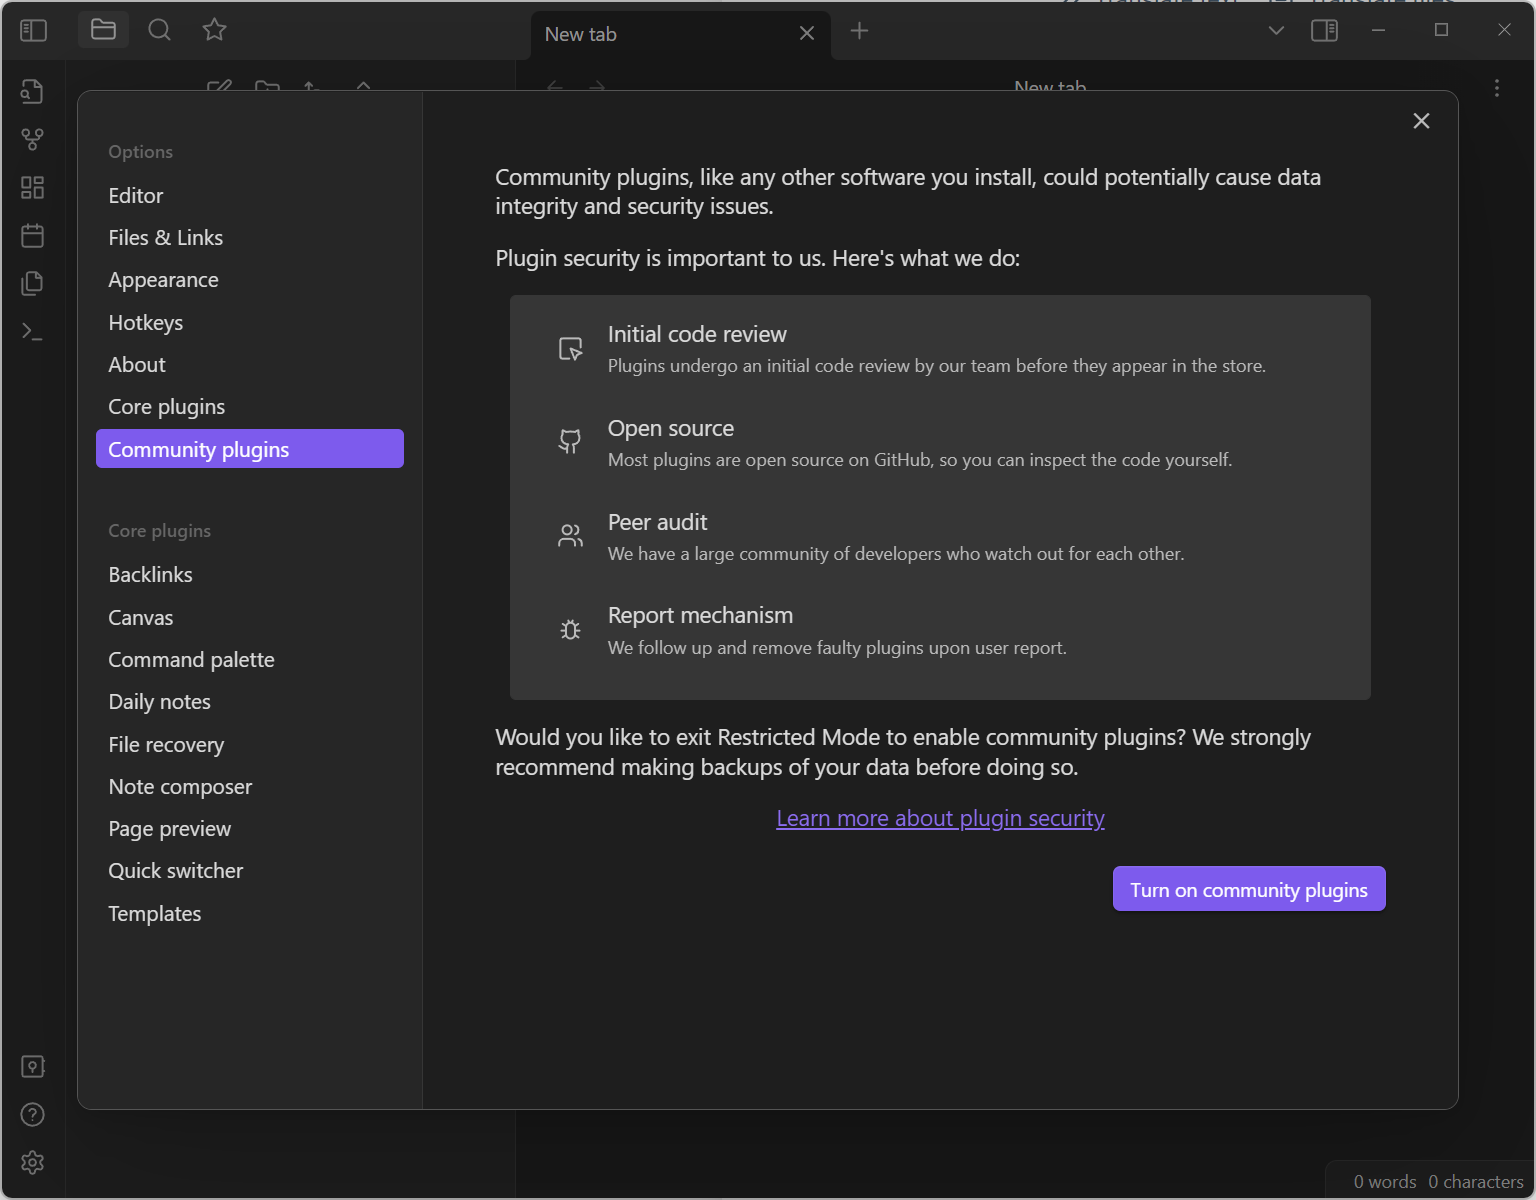
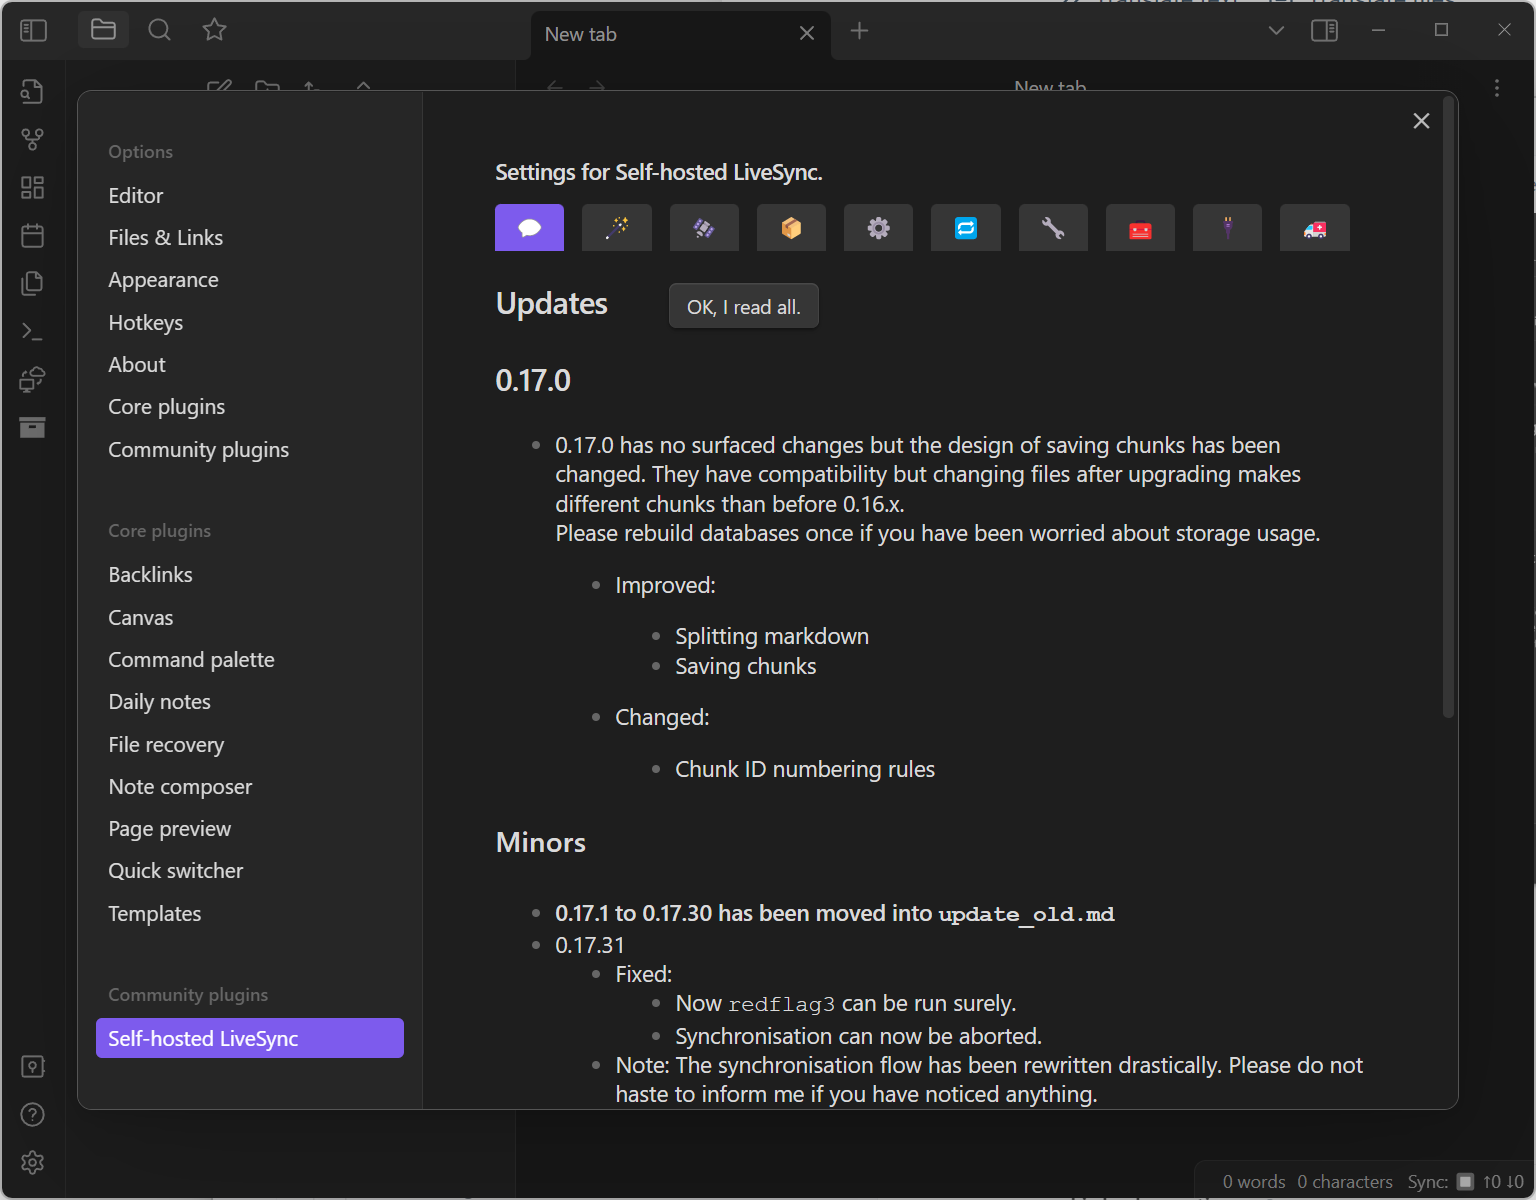
Close the community plugin store window and get back to settings – and go to plugin options.
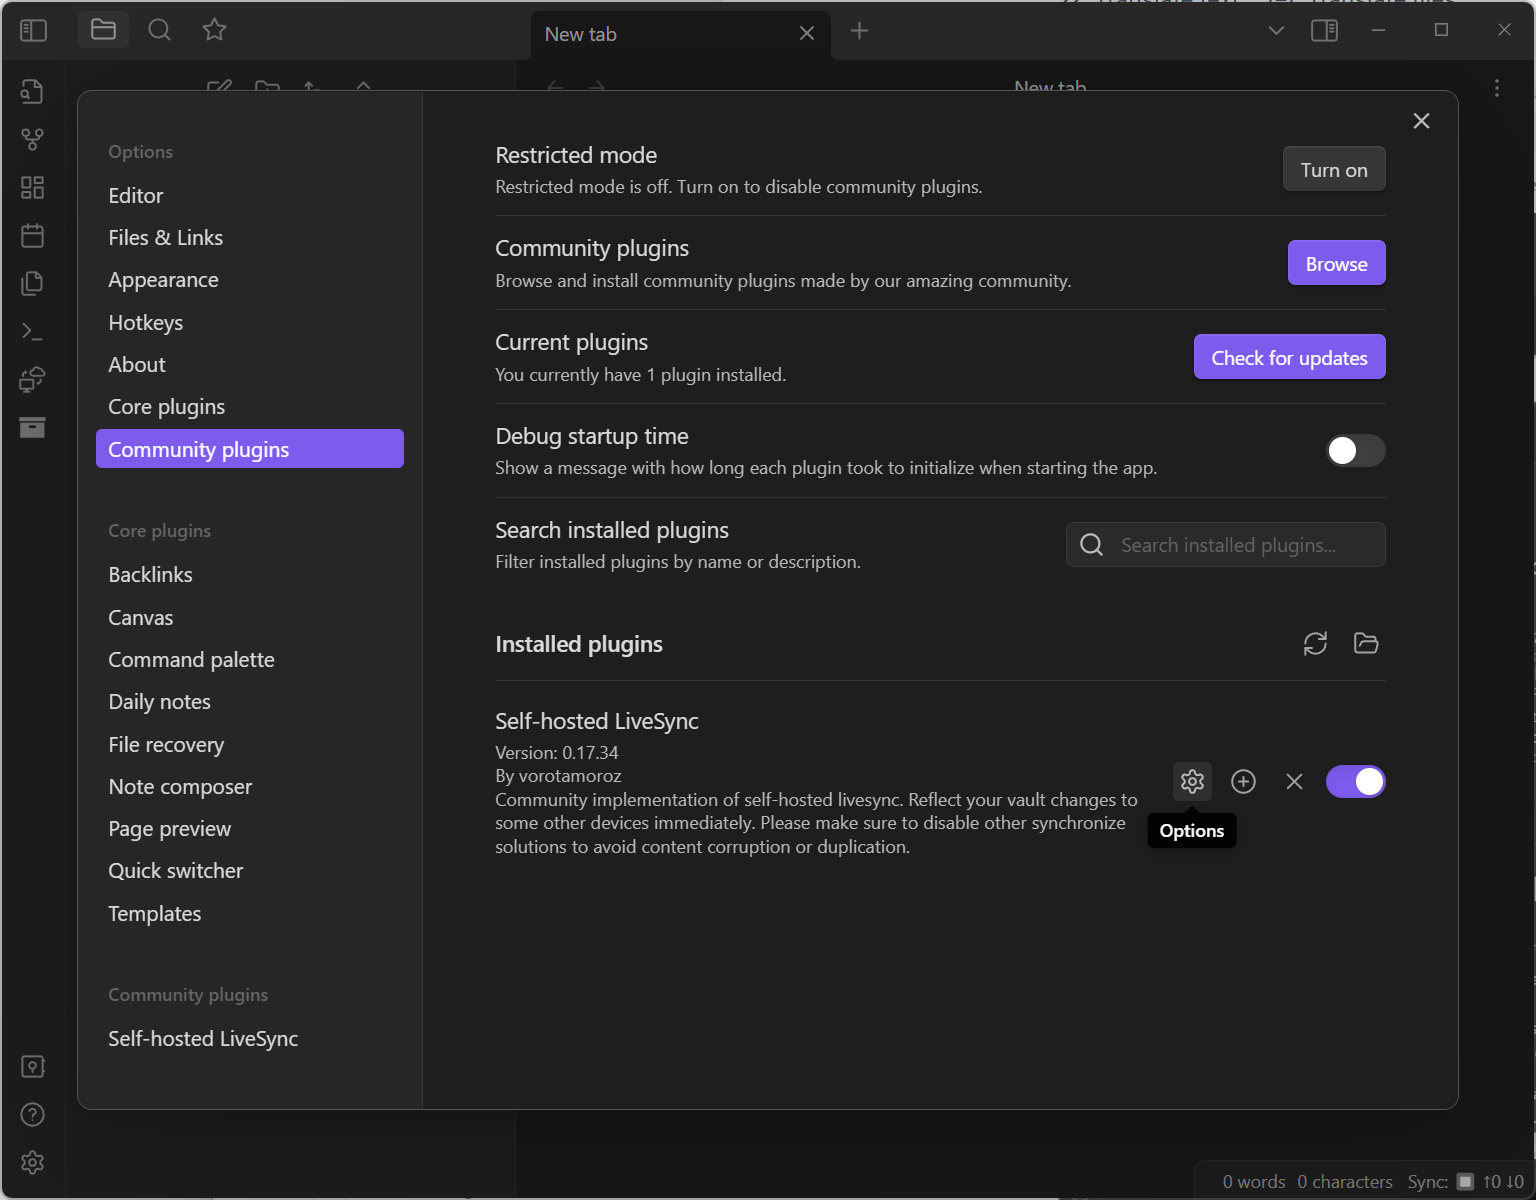
Yep, it looks a bit cumbersome but don’t worry, we would sort it our soon.
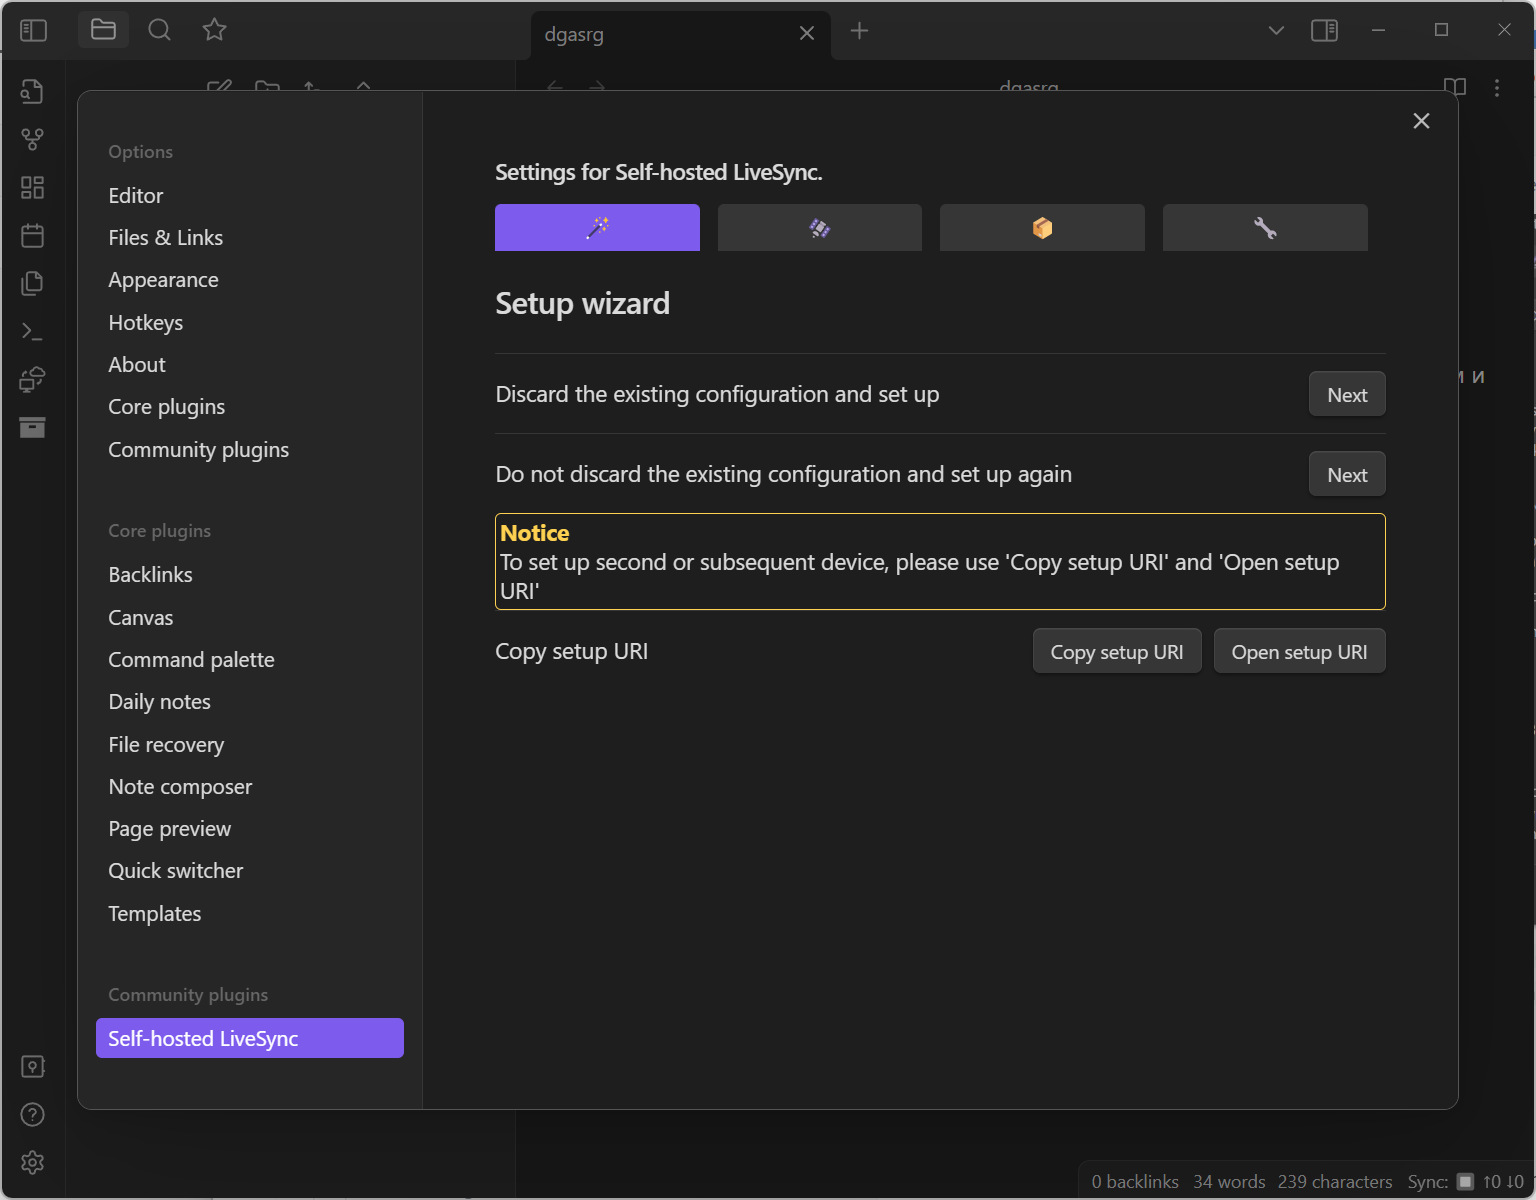
Got to Wizard button and choose Do not discard the existing configuration and set up again. Choose Discard the existing configuration and set up if you mess the things up, this approach would let you to restart from the scratch.
You would automatically switch to satellite button and need to fill-in the following fields.
URI- It is just the external url of our DB. Something like https://couchdb.NAS.synology.me
Username- The username of the DB user we created above
Password- The password for the DB user
Database name- You can pick any, I’ve used Obsidian initially and obsidian 2 to illustrate this article.
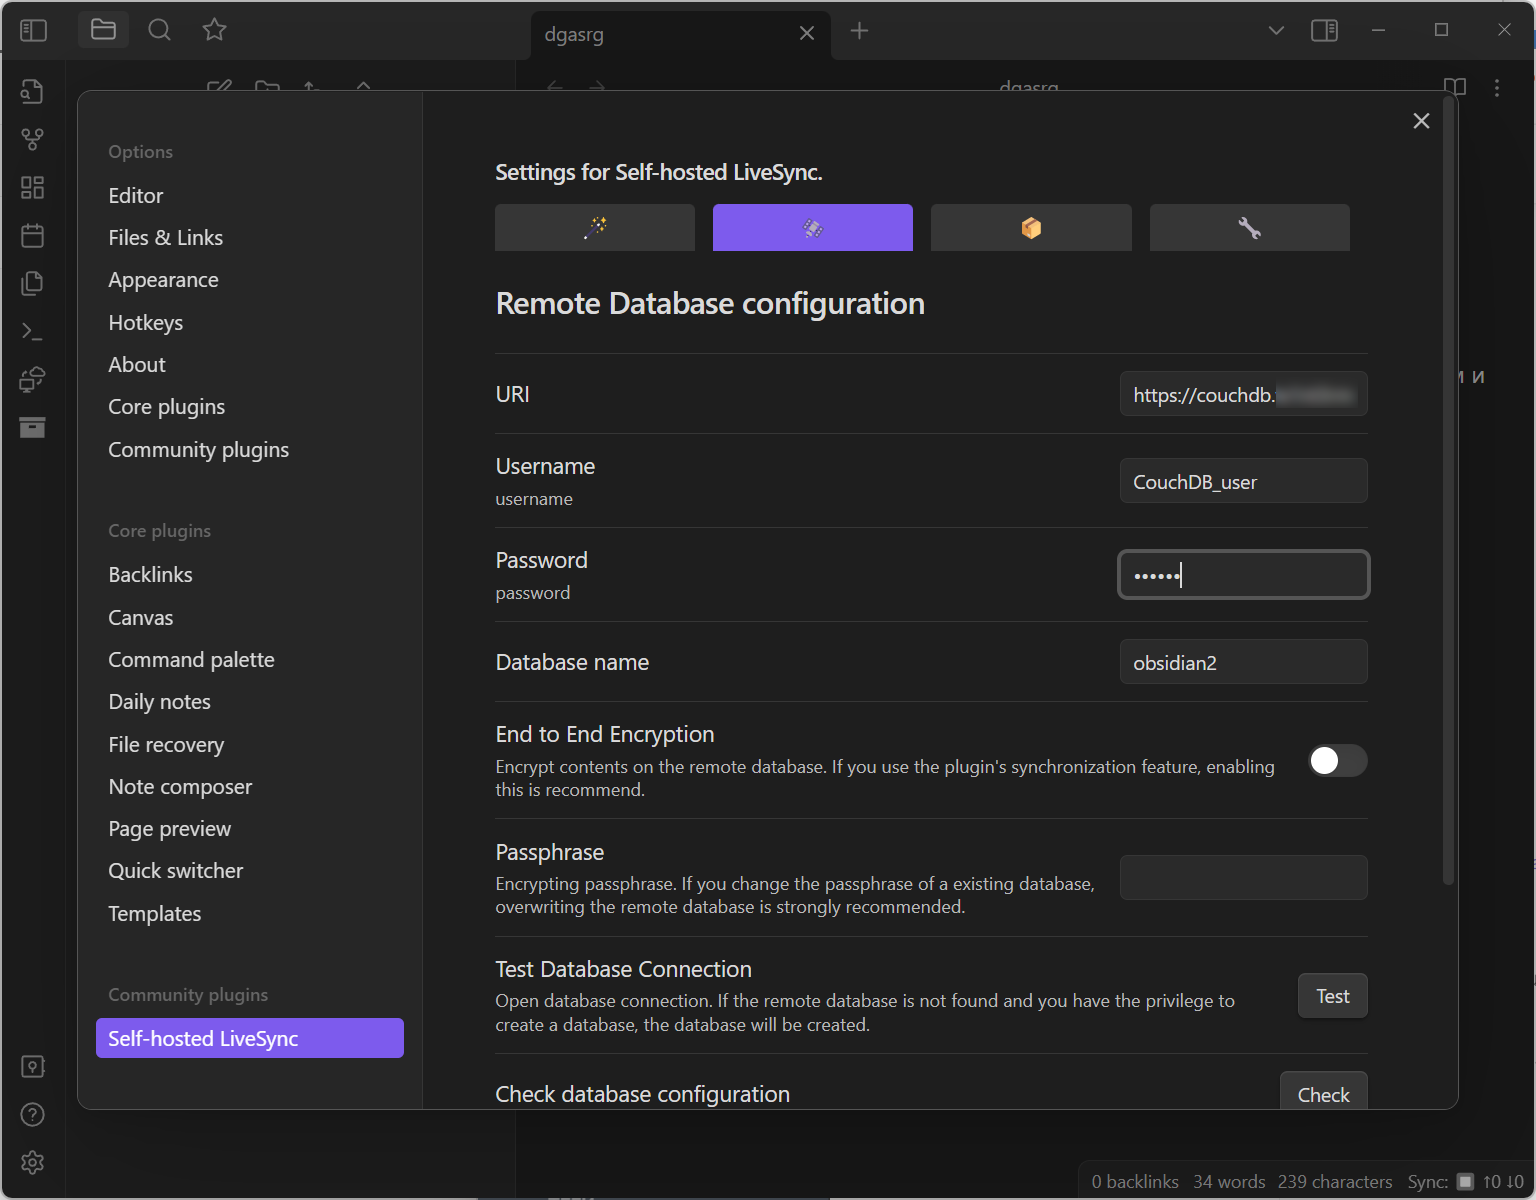
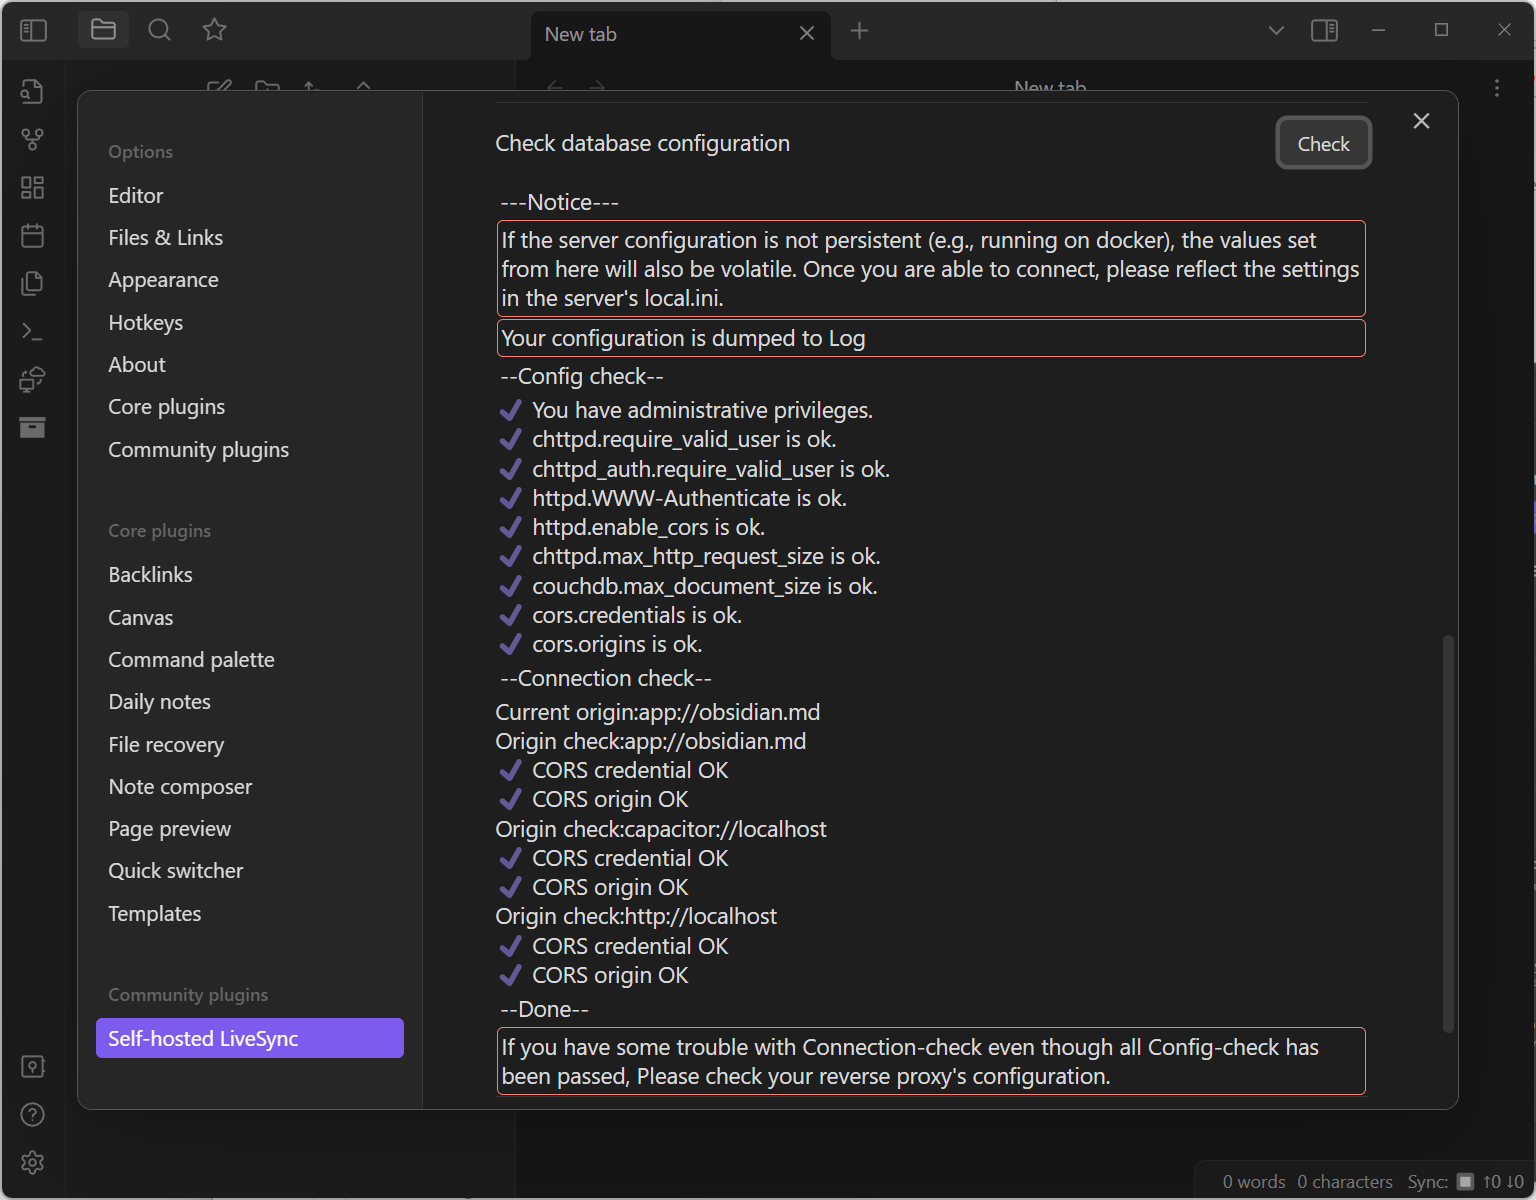
Let’s validate that it works – you can scroll and consequently press test and check buttons. If everything is ok, it would look this way.
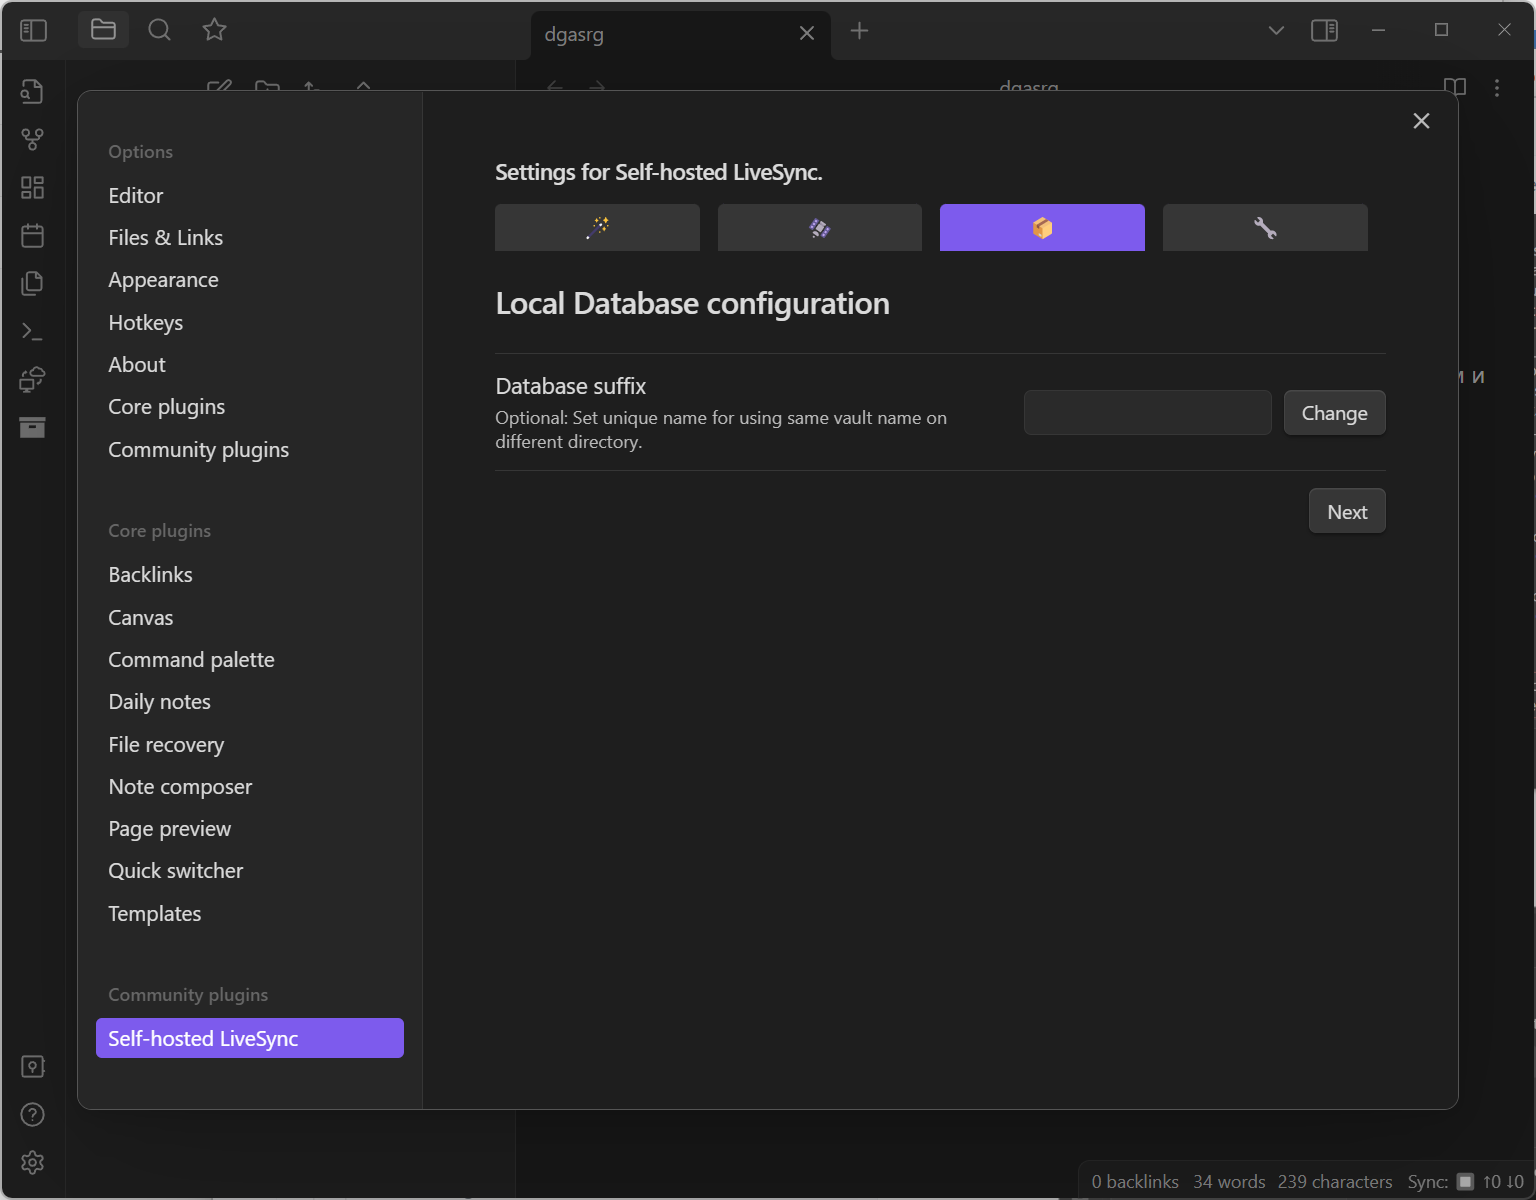
Local Database config looks good by default, you can go Next.
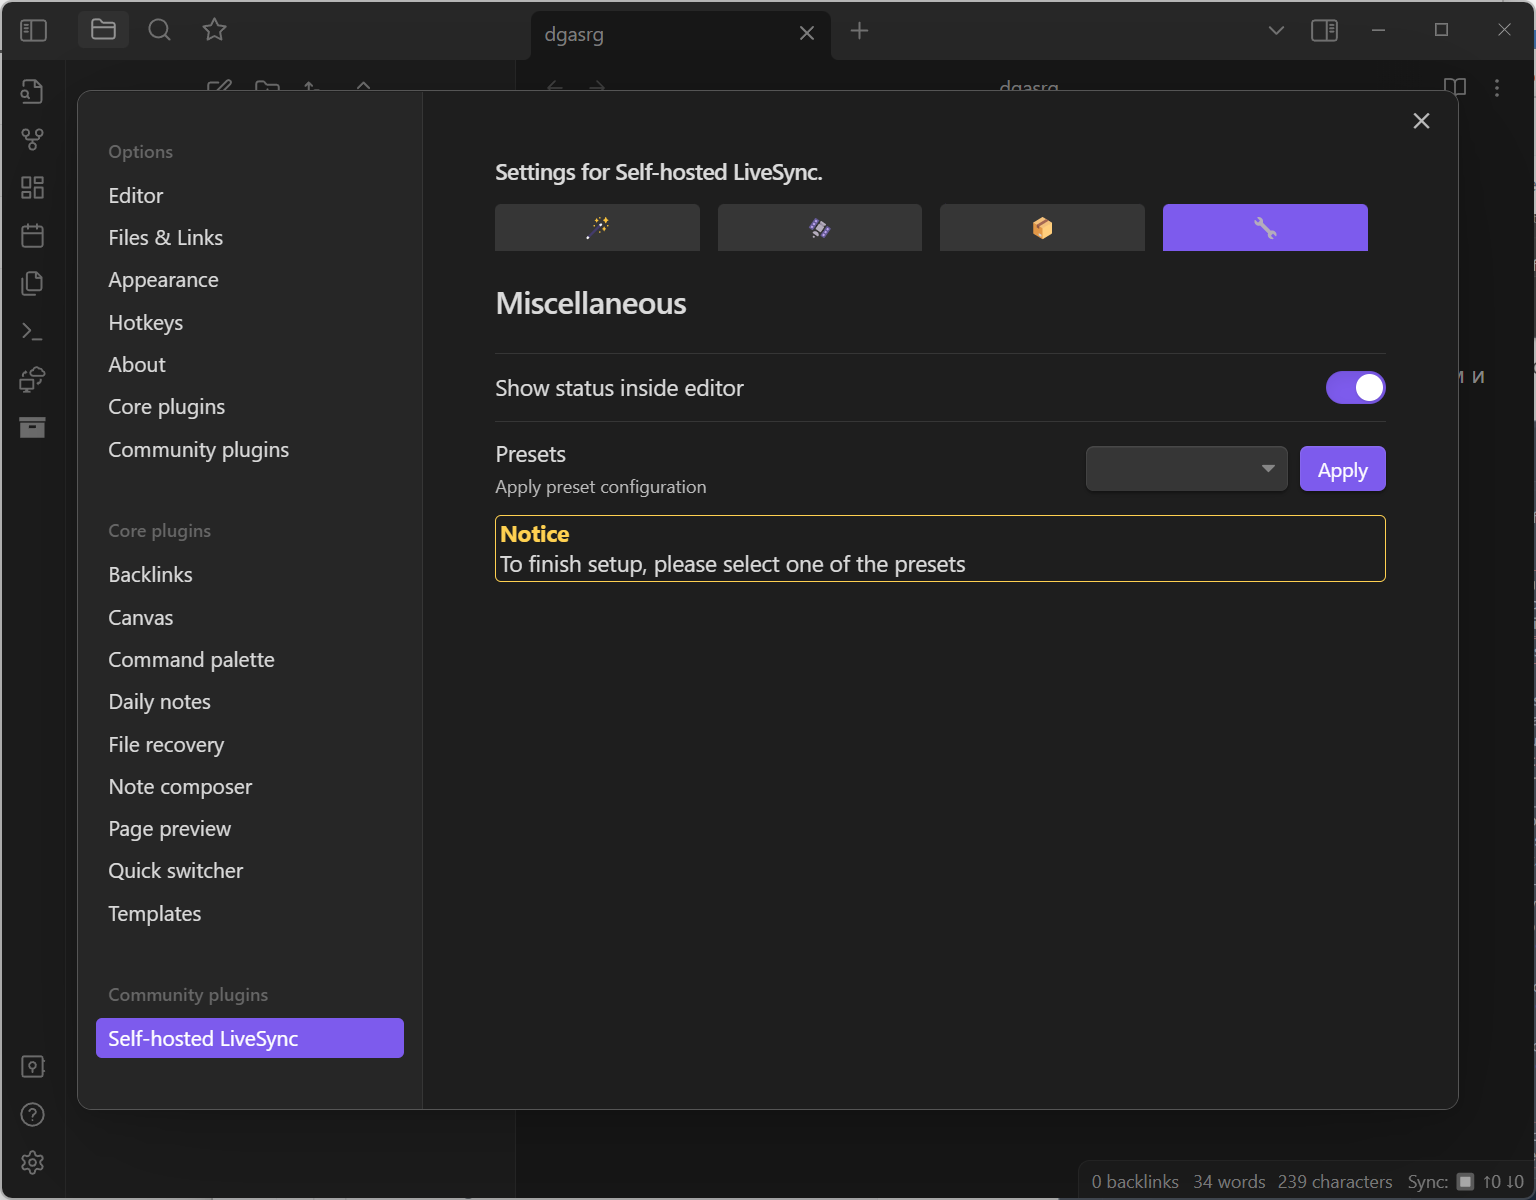
The final step of the set up wizard let’s you turn on status inside editor and pick up the sync Preset – I suggest to try LiveSync.
What to do if you already had a Obsidian vault before
Just copy the files from the initial vault to the new one with LiveSync set up. NB – the plugins and styles and setting would not be replicated automatically. Plugin and settings sync is in beta version and available under the plug button in the plugin settings.
Vault set up on mobile
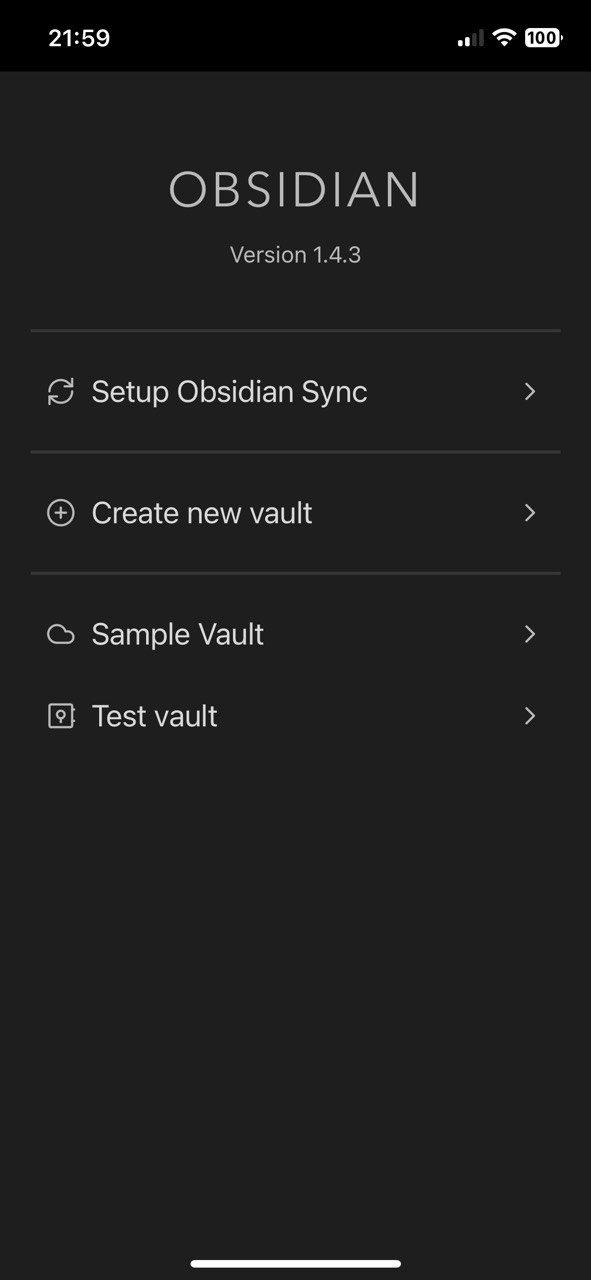
Ok, good news is that on mobile you don’t need to do the same steps as you did in laptop. First of all, set up a client on your mobile and create a new non-iCloud vault.
Go back to desktop and get in the plugin settings once again.
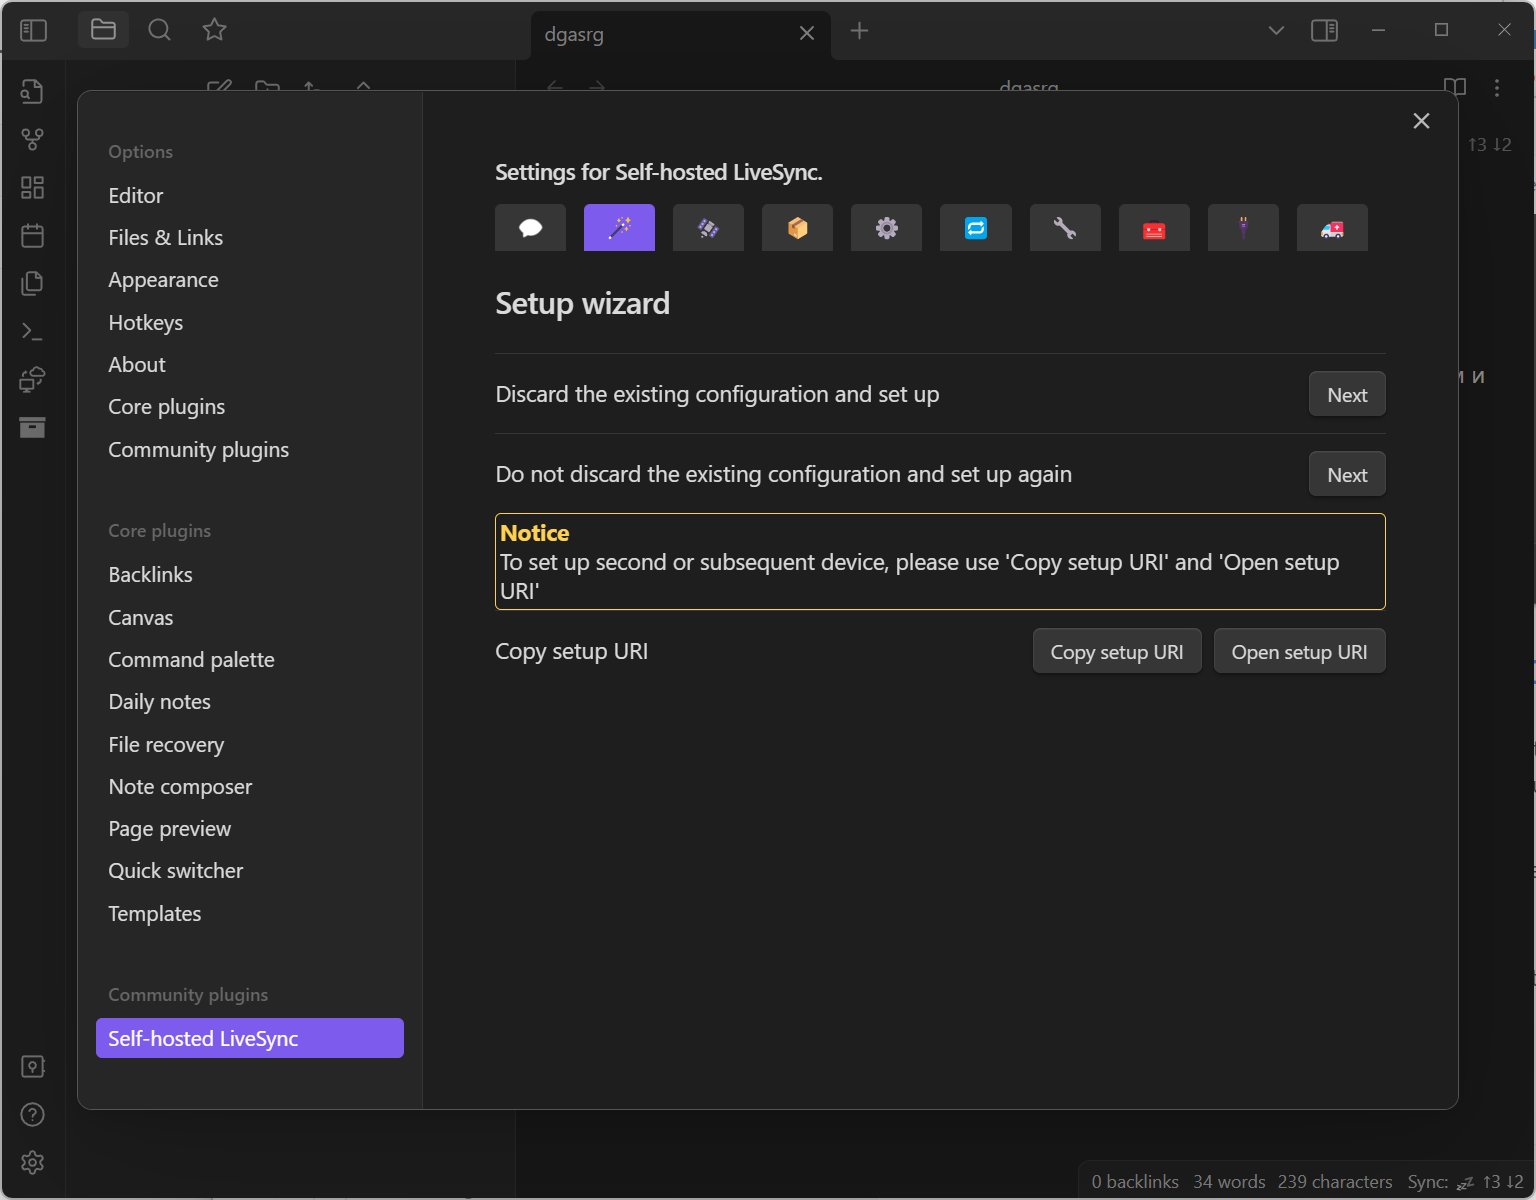
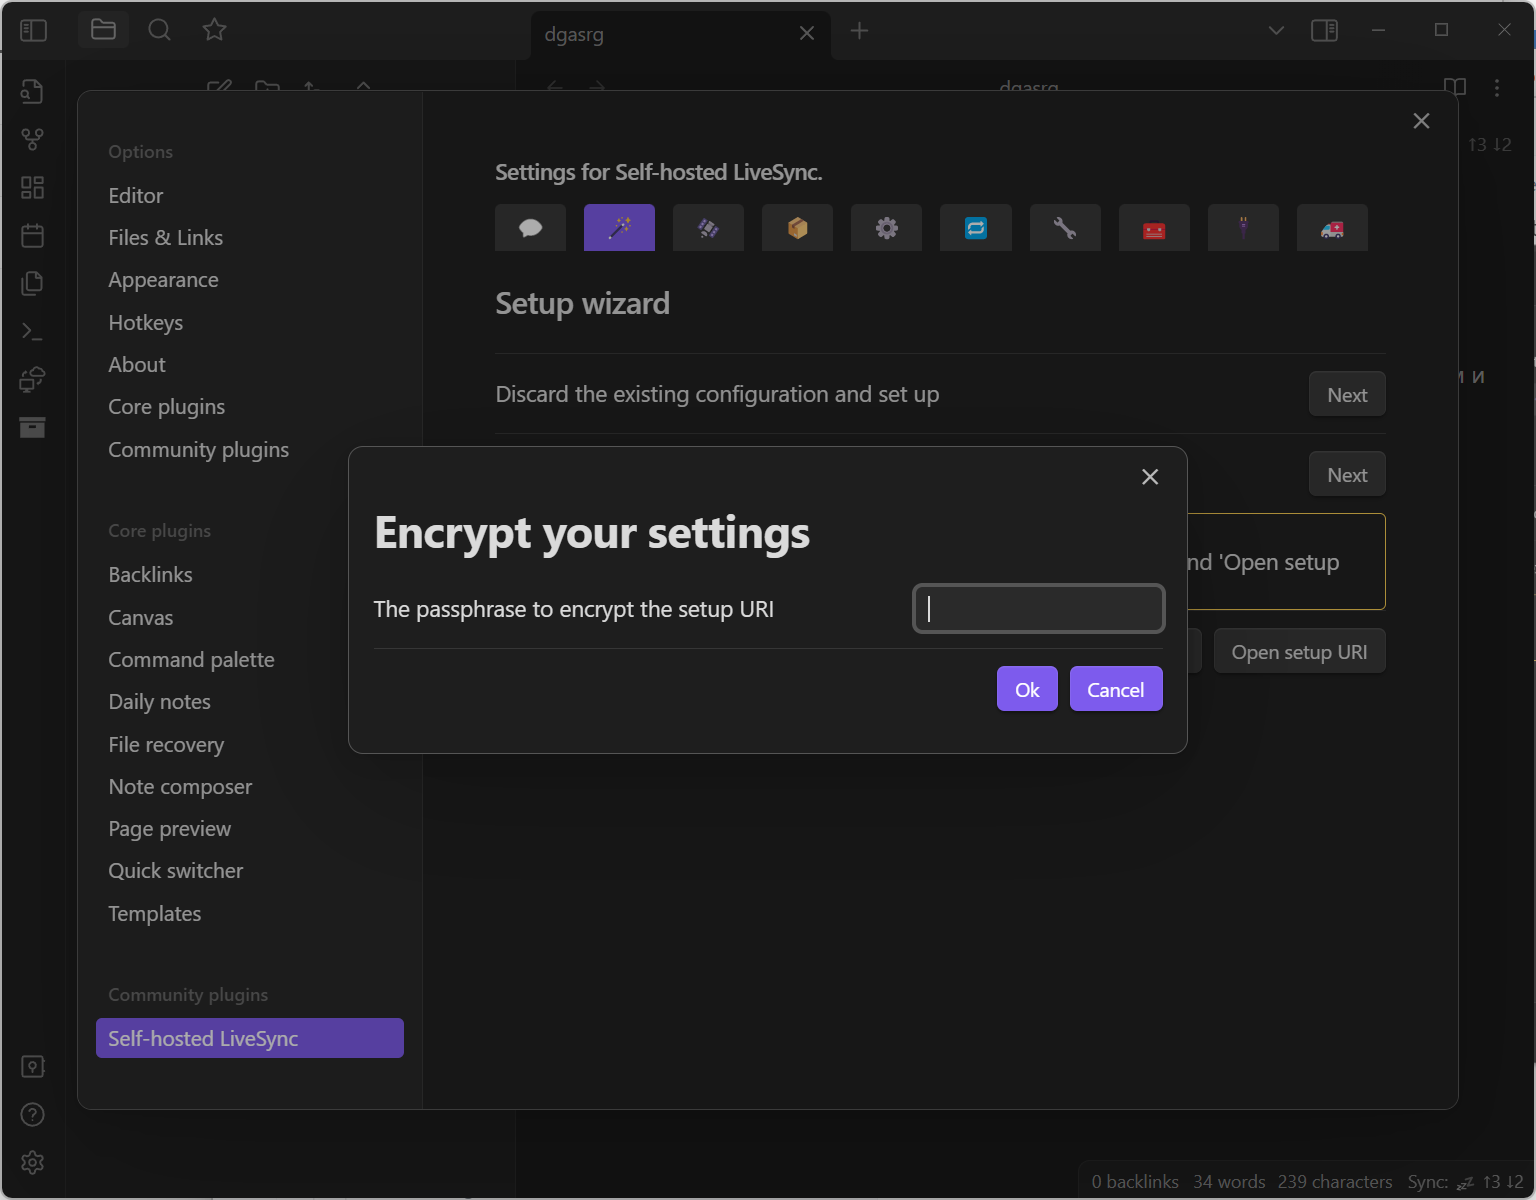
Find the Copy setup URI button and press it. Add the passphrase for the encryption.
Now you can paste the link to your mobile – e.g. via the messanger. I’ve used telegram and it failed to parse the link as clickable link, so I had to copy and paste it into Safari.
Once you open the link in Safari, it would open the Obsidian and propose to import the LiveSync configuration – choose yes.

Then choose the Set up as secondary and subsequent device and the sync would start.
